
Setting up ShareX with your web hosting can feel like unlocking a new level of productivity and efficiency. If you’ve ever wished for a seamless way to capture, upload, and share your screen captures directly to your own web server, you’re in the right place.
Imagine having the power to instantly share screenshots, GIFs, and files with just a few clicks, all while maintaining full control over your content. Sounds appealing, doesn’t it? In this guide, we’ll walk you through the simple steps to integrate ShareX with your web hosting, so you can start experiencing this streamlined workflow today.
Stick with us, and you’ll soon discover how easy it is to enhance your digital sharing capabilities and impress your audience with lightning-fast uploads. Get ready to transform the way you share your visual content!
Sharex Overview
ShareX is a popular tool for screen capture. It is also used for sharing files. The software is free and open-source. Users find it easy to use. It supports many file types. You can capture the whole screen or just a part. Then, upload directly to the cloud. This saves time and effort. The tool has editing options too. You can edit images before sharing. Another benefit is the customizable workflow. Users can set tasks to automate.
ShareX is used in many ways. Students use it for capturing notes. Teachers use it for creating tutorials. Businesses use it for sharing reports. It helps in making presentations. Bloggers use it for capturing screenshots. Gamers use it for sharing game moments. It is a helpful tool for anyone who needs quick screen captures.

Credit: m.youtube.com
Choosing Web Hosting
Web hosting is essential for your website. There are different types to consider. Shared hosting is common. It is cheap and easy to use. VPS hosting offers more control. It is good for growing sites. Dedicated hosting is for large websites. It is more expensive but powerful. Cloud hosting is flexible. It scales with your needs. Choose the best type for your website’s goals.
Choose hosting based on your needs. Check the cost first. It must fit your budget. Look at the speed too. Fast sites keep users happy. Check the support offered. Good support helps solve problems quickly. Security is key. Ensure your host offers strong protection. Consider the scalability. Your site may grow. Make sure your host can handle it.
Preparing Your Server
Begin by opening the server panel from your computer. Use your username and password to log in. Once inside, look for the control panel option. This panel helps you manage your server easily. Always keep your login details safe and secure.
Go to the FTP section in your server panel. Click on create new FTP account. Choose a username and a strong password. Note these details as you will need them later. With FTP, you can upload and download files easily. It’s like having a special tunnel for your files.
Installing Sharex
Visit the ShareX website to download. Choose the latest version. Make sure to select the correct version for your system. Once downloaded, locate the file. It’s usually in the Downloads folder. Double-click the file to start the process.
Follow the on-screen instructions. Choose the installation location. The default location is fine for most users. Click Next to continue. Agree to the terms and conditions. Click Install to begin. Wait for the installation to finish. Once done, click Finish. ShareX is now ready to use.
Configuring Sharex For Web Hosting
First, open ShareX. Find the destination settings tab. Click it. You will see many options. Choose the web hosting option. Enter your web hosting details. You need your URL and API key. Save these settings.
Go to the upload settings. Select the image format you want. Choose between PNG or JPEG. Adjust the quality settings. Higher quality means bigger files. Pick the best size for your needs.
Next, set the upload limit. You can choose how many files to upload at once. More files will upload slower. Check your internet speed. Use a smaller number if your internet is slow.

Credit: share-architects.com
Testing Upload Functionality
Start by choosing small files. Images or text documents work well. Open ShareX and select the files you want to upload. Click on the upload button. Watch the progress bar to see if it uploads.
If the upload fails, check your internet connection. Make sure the server settings are correct. Try re-uploading the file again. Ensure the file size is within allowed limits. Sometimes, large files may cause issues. If problems persist, consider checking the firewall settings. Adjust them if needed to allow ShareX access.
Optimizing Sharex Usage
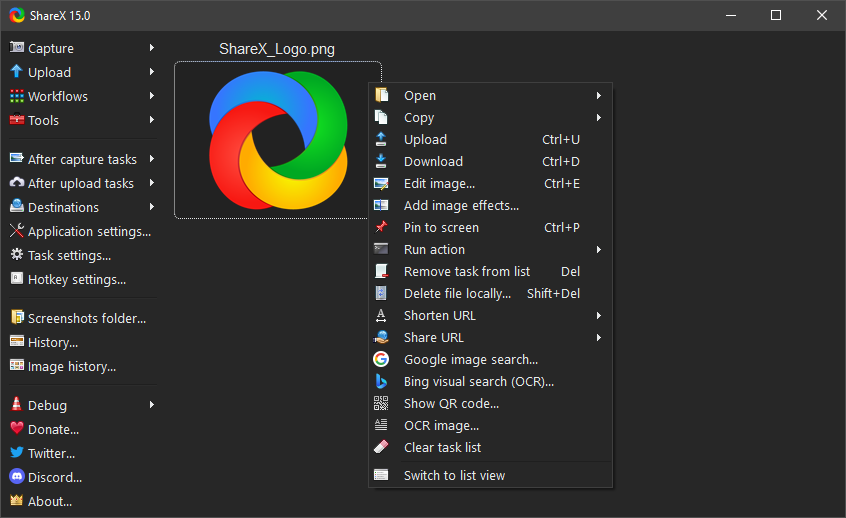
ShareX has many settings to explore. Start by opening the settings menu. Here, you can change how it looks. Choose colors and themes you like. You can also set shortcut keys. This makes taking screenshots easier. Adjust the quality of your captures. High quality means bigger files. But lower quality saves space. Make sure to save your settings. This way, you won’t lose any changes.
Keeping your data safe is important. Enable encryption for your files. This makes them hard to read without a key. Use a strong password for your uploads. It should have numbers and symbols. Avoid sharing your password with others. Update ShareX regularly. Updates fix security problems. They also add new features. Stay safe online!
Credit: getsharex.com
Frequently Asked Questions
How Do I Add Custom Uploaders To Sharex?
Open ShareX, go to “Destinations” and select “Custom uploaders. ” Click “Add” to create a new uploader. Fill in the required details such as URL and parameters. Save your settings and test the uploader to ensure it works correctly.
What Is Sharex Uploading?
ShareX uploading lets you easily share screenshots, files, and videos. It supports multiple upload destinations. Choose your preferred platform and upload directly. ShareX offers quick sharing options for social media or cloud storage. It’s efficient for productivity and collaboration.
How To Make Sharex Upload To Gyazo?
To upload to Gyazo using ShareX, install the Gyazo plugin in ShareX’s destination settings. Configure Gyazo API key by signing in to your Gyazo account. Set Gyazo as the default destination for image uploads in ShareX. Test the setup by capturing a screenshot and uploading it to Gyazo.
How Do I Delete An Upload On Sharex?
Open ShareX. Go to “History. ” Locate the upload you want to delete. Right-click it. Select “Delete” to remove it from history.
Conclusion
Setting up ShareX with web hosting can simplify your workflow. It offers easy file sharing. You can upload screenshots and videos directly. This setup saves time and boosts productivity. Follow the steps carefully. Customize settings to suit your needs. Regular updates keep your tools efficient.
Troubleshooting tips ensure smooth operation. Now, you can focus on creating great content. ShareX and web hosting make collaboration easier. Share your work seamlessly. Perfect for teams and individuals. Enjoy an organized and efficient system. Keep exploring more features. Enhance your online experience.
Happy sharing!


