
Have you ever thought about experimenting with your WordPress theme without the risk of affecting your live website? Running WordPress on localhost using Xampp is a perfect solution.
It offers you a safe playground to tweak your designs, test plugins, and enhance your skills without worrying about any real-world repercussions. Imagine having the freedom to explore every creative possibility with your theme, right from the comfort of your own computer.
This guide will walk you through each step, ensuring you get your localhost up and running smoothly. You’re about to unlock a whole new level of control and creativity. Dive in, and discover how simple and satisfying it can be to have your own private WordPress lab.

Credit: wpastra.com
Setting Up Xampp
First, visit the XAMPP website. There, find the download section. Choose the version that fits your computer. This could be for Windows, Mac, or Linux. Click the download button. Wait for the download to finish. It might take a few minutes.
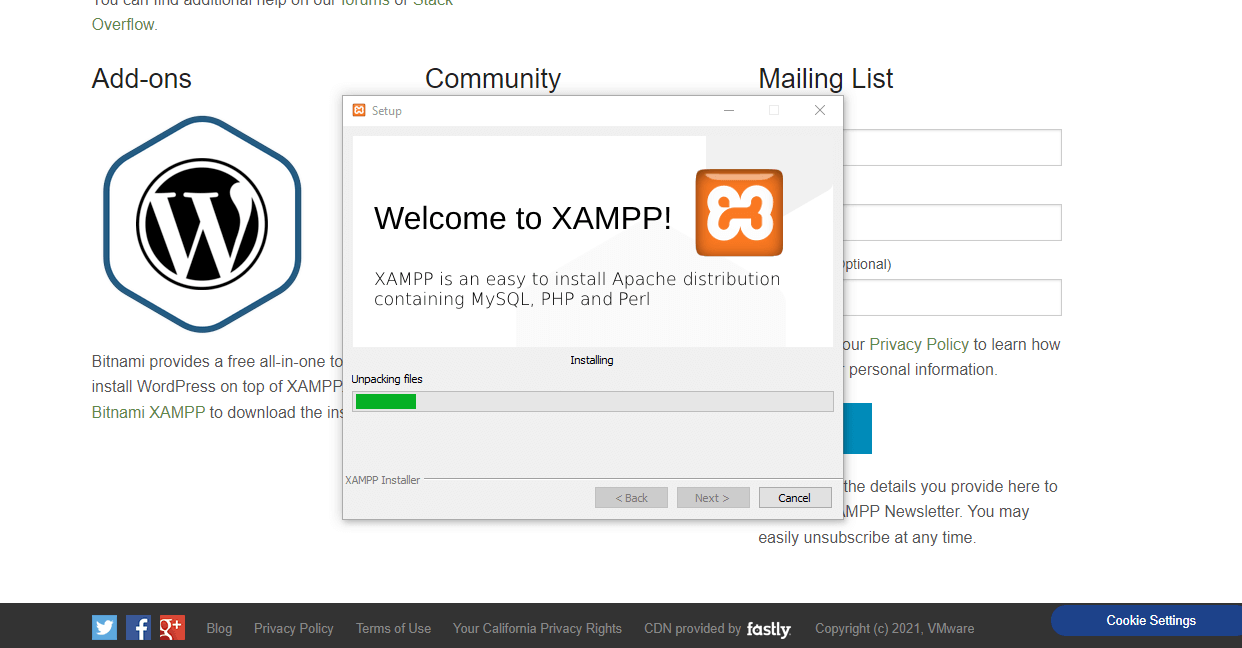
Open the file you just downloaded. This starts the installation process. Follow the on-screen instructions. Click “Next” to continue. Choose a folder to install XAMPP. Most people use the default folder. Click “Install” to begin. Wait for the installation to finish.
Open the XAMPP Control Panel. Find the Apache and MySQL modules. Click “Start” next to each one. This will run them. Check the status. Both should say “Running”. If they do, you’re ready to go.
Downloading WordPress
Easily run a WordPress theme on localhost using XAMPP by downloading WordPress. Set up your local server first, then install WordPress. Upload your theme, and start customizing without any online hassles.
Getting The Latest WordPress Version
Visit the official WordPress website to download the latest version. Click on the download button to save the file on your computer. The file is usually a zip format. It’s easy to download and free. Make sure to get the latest version for the best features.
Preparing WordPress Files
Once the file is downloaded, extract the zip file. Use any tool like WinRAR or 7-Zip. Extracting will create a folder named WordPress. This folder contains all the necessary files. These files are important for installation. Ensure all files are extracted properly.
Creating A Local Database
Open phpMyAdmin from Xampp control panel. Click on the Admin button next to MySQL. This will open the phpMyAdmin page. You will see a list of databases on the left side. These are default databases. Do not modify them. They are important for Xampp to work.
Click on the Databases tab at the top. You will see a field to create a new database. Enter a name for your new database. Make sure the name is simple and easy to remember. Click the Create button. Your new database is ready. You can now use it for your WordPress site.
Configuring WordPress
Running a WordPress theme on localhost Xampp involves installing Xampp and setting up a local server environment. Import the WordPress files into the htdocs folder and create a MySQL database via phpMyAdmin. Finally, configure the wp-config. php file with your database details to launch your site locally.
Editing Wp-config.php
Open the wp-config.php file in your WordPress folder. This file holds important settings. You must enter your database details here. Look for the following lines:
| Setting | Description |
|---|---|
| DB_NAME | The name of your database. |
| DB_USER | Your database username. |
| DB_PASSWORD | Your database password. |
| DB_HOST | Usually ‘localhost’. |
Change these to match your database info. Save the file. This connects WordPress to your database. Ensure every detail is correct, or it won’t work.
Installing WordPress Locally
To begin, visit localhost/wordpress in your browser. The WordPress setup page appears. Choose your language. Click Continue. Next, enter your database details. Name your database. Use root as the username. Leave the password blank. Host is localhost. Click Submit. WordPress connects to your database. Click Run the installation. Fill in site details. Enter a title for your site. Choose a username and password. Provide your email. Click Install WordPress. Wait a few seconds. WordPress is now installed.
Log in using your details. Dashboard opens. Customize your site. Install themes. Add plugins. Create pages. Write posts. Explore settings. Make changes as needed. Save your work. Visit your site on localhost/wordpress. Check changes. Your WordPress site is ready locally. Enjoy building!
Credit: theme4press.com
Uploading And Activating Theme
First, open the Xampp control panel. Start Apache and MySQL. Next, go to the htdocs folder. Find it in the Xampp installation directory. Create a new folder for your WordPress site. Name it anything you like. Download your theme file. It should be in a .zip format. Extract the theme files. Copy the extracted files to the wp-content/themes directory. Ensure all files are copied correctly.
Open your browser. Type localhost/your-folder-name in the address bar. Access the WordPress dashboard. Navigate to Appearance on the left menu. Click on Themes. You will see your uploaded theme. Click Activate to use the theme. Now, your theme is active. Check your site to see the changes.
Troubleshooting Common Issues
Port conflicts happen when two programs use the same port. First, check if Xampp is running. Open Xampp Control Panel and see the port numbers. Change the port number if needed. Find the config file in the Xampp folder. Look for httpd.conf. Open it with a text editor. Change the port from 80 to another number. Save and restart Xampp. This helps avoid conflicts.
Database connection problems can stop your site. Check the wp-config.php file first. Make sure the database name is correct. Double-check the username and password. They must match your MySQL settings. Look for MySQL errors in the Xampp log. If there’s a problem, restart MySQL service. This often fixes the issue. If it doesn’t, check localhost settings. Ensure it points to your database correctly.
Tips For Local Development
Debugging tools help find and fix errors. These tools show what is wrong in the code. Xdebug is a popular choice for PHP debugging. It is easy to use with Xampp. Install it and connect to your text editor. Errors become clear and easy to fix. This makes local development smooth and fast.
Plugins add features to your site. Testing them locally is smart. It helps find problems early. Use the WordPress dashboard to manage them. Try new plugins without risk. If a plugin breaks, your live site stays safe. Always keep plugins updated. This ensures best performance. Save time and avoid headaches.
Credit: wpmet.com
Frequently Asked Questions
How To Install WordPress Theme On Xampp Localhost?
To install a WordPress theme on XAMPP localhost, navigate to “wp-content/themes” in your XAMPP directory. Upload the theme folder there. Then, access your WordPress dashboard, go to “Appearance,” and click “Themes. ” Activate your new theme from the list.
How Do I Run A WordPress Theme Locally?
Install a local server environment like XAMPP. Download WordPress and the desired theme. Place WordPress in the local server’s htdocs folder. Create a database using phpMyAdmin. Run WordPress installation, connect to the database, and activate the theme via the WordPress dashboard.
How Do I Run WordPress On Localhost?
To run WordPress on localhost, install a local server like XAMPP. Download WordPress, extract files into the server’s “htdocs” folder. Create a database in phpMyAdmin. Open your browser, go to “localhost/your-folder-name”, and follow the setup instructions.
How Do I Upload A WordPress Theme To Localhost?
To upload a WordPress theme on localhost, first access your local WordPress dashboard. Navigate to “Appearance” > “Themes”. Click “Add New” and then “Upload Theme”. Choose your theme file (. zip format) and click “Install Now”. Activate the theme after installation to use it on your site.
Conclusion
Running a WordPress theme on XAMPP is straightforward. You now have the steps. Practice makes it easier over time. Local setups are great for testing. They help you avoid costly mistakes online. Always back up your work. This ensures no data loss.
Experiment with different themes. It enhances your skills and creativity. Soon, you’ll feel more confident. Enjoy the learning journey. Keep exploring WordPress options. Discover new ways to improve your site. Your local server is a safe space. Use it to innovate and grow.


