
Are you ready to take full control of your online presence? Registering and hosting your own domain on a Windows Server might sound complicated, but it’s easier than you think.
Imagine having your own space on the internet, where you decide what goes up and how it looks. This guide will walk you through every step, breaking down the process into simple actions you can follow. By the end, you’ll have the confidence to set up your domain and server without relying on expensive services.
Keep reading to unlock the power of hosting your own website and making your mark online.

Credit: www.whtop.com
Choosing Your Domain Name
Choosing the right domain name is an important first step in hosting your own Windows Server. The domain name represents your website’s identity. It should be easy to remember and type. A good domain name helps visitors find your site quickly and builds trust. Take time to pick a name that fits your purpose and audience.
Tips For Selecting A Domain
Keep the domain short and simple. Avoid long or complex words. Use common words that people know. Choose a name that reflects your content or business. Stay away from numbers and hyphens, as they can confuse users. Aim for a name that is easy to spell and pronounce. Consider using keywords related to your topic. This can improve your site’s search ranking.
Checking Domain Availability
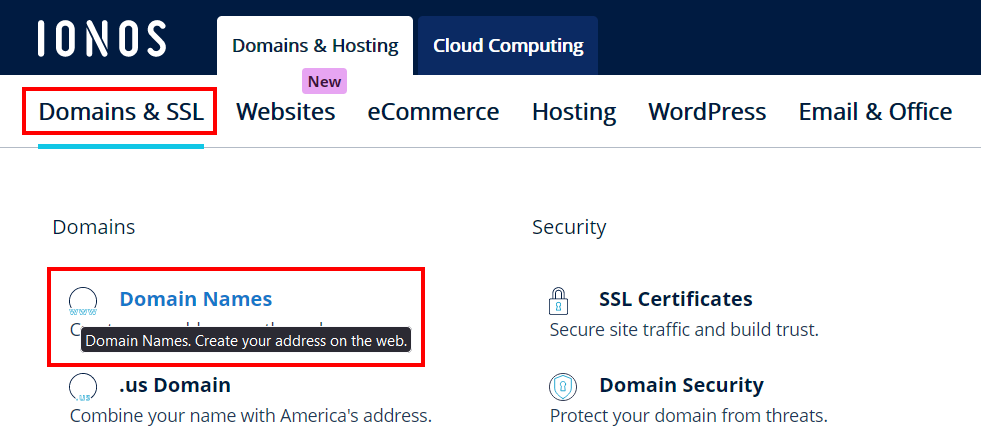
Check if your chosen name is free before registering. Use domain search tools provided by registrars. These tools show if the domain is taken or available. Try different extensions like .com, .net, or .org. Look for similar names to avoid confusion. If your first choice is taken, try slight variations. Confirm that the domain does not infringe trademarks. This avoids legal issues and keeps your brand safe.
Credit: learn.microsoft.com
Registering Your Domain
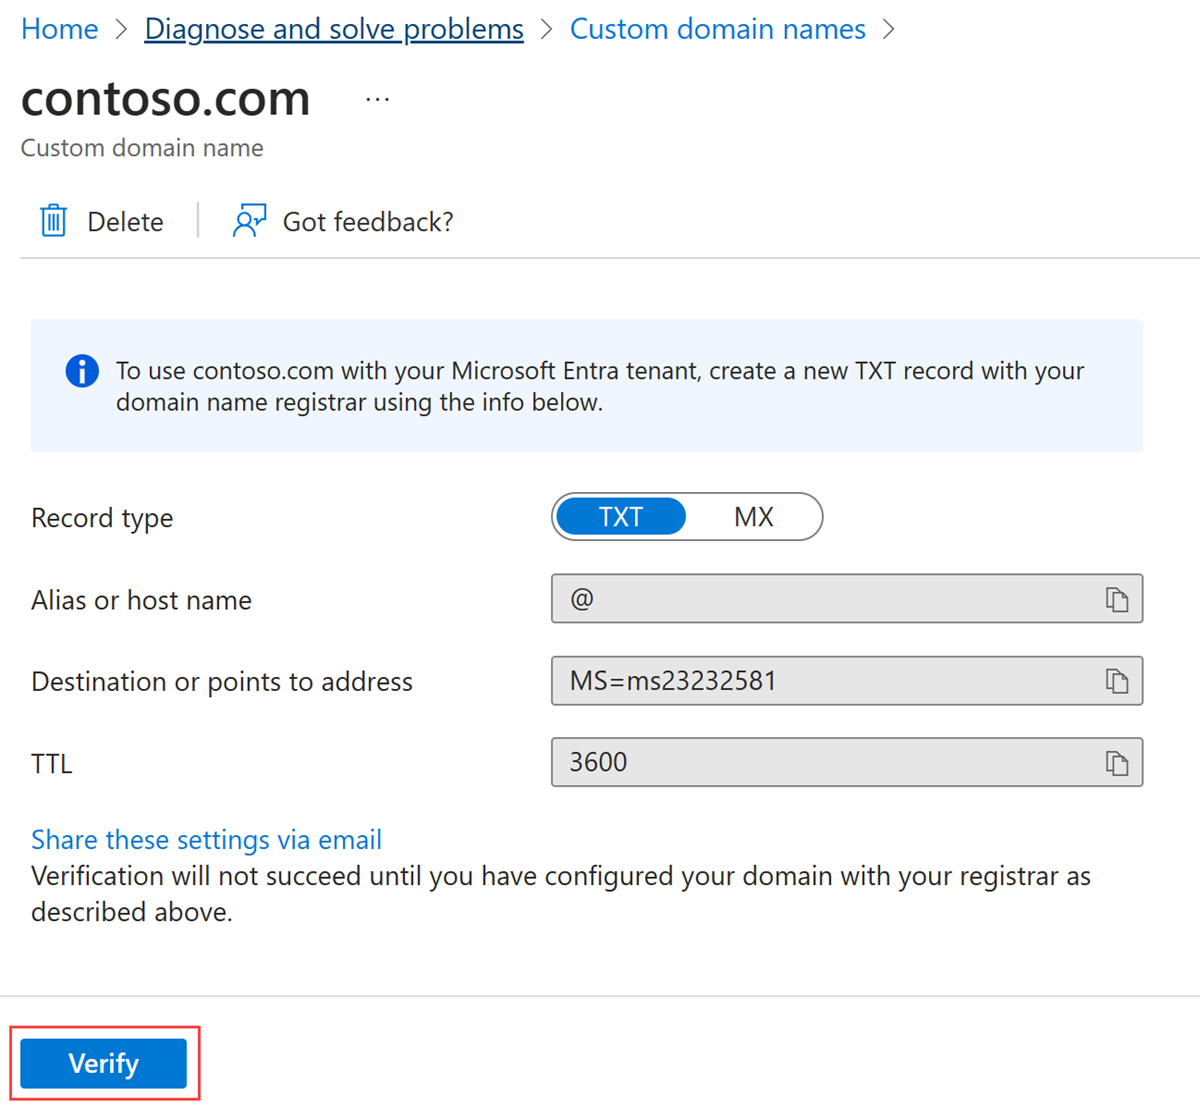
Registering your domain is the first step to hosting your own Windows Server. A domain name is your website’s address on the internet. It helps people find your site easily. Choosing the right domain and registering it properly is important for your online presence.
During registration, you claim a unique name for your website. This process is quick and simple. It also protects your brand and identity online.
Popular Domain Registrars
Many companies offer domain registration services. Some popular registrars include GoDaddy, Namecheap, and Google Domains. These companies provide easy tools to search and buy domains. They also offer support if you need help during the process.
Choosing a reliable registrar is important. Look for good reviews and affordable prices. Some registrars also offer free domain privacy and email forwarding.
Domain Registration Process
Start by searching for your desired domain name. The registrar will check if it is available. If taken, try a different name or extension like .net or .org.
Once you find an available name, add it to your cart. Fill out your contact details for registration. Pay the registration fee using your preferred payment method.
After payment, you will receive a confirmation email. Your domain will be registered and ready to use. You can then link it to your Windows Server.
Setting Up Domain Privacy
Domain privacy hides your personal information from public view. Without privacy, your name, address, and phone number are visible online. This can lead to spam and unwanted calls.
Many registrars offer privacy protection as an add-on service. It replaces your details with the registrar’s information. Activating privacy is a simple step during or after registration.
Keep your data safe and your inbox free from spam by enabling privacy. It also adds a layer of security to your domain ownership.
Preparing Your Windows Server
Preparing your Windows Server is the first step to hosting your own domain. It sets the base for a stable and secure environment. Proper preparation helps avoid future issues and ensures smooth operation. This section guides you through essential tasks before registering your domain.
Installing Windows Server
Start by installing the latest Windows Server version. Use a clean installation to avoid conflicts. Follow the setup wizard carefully and choose necessary options only. Select the correct edition based on your needs. After installation, restart the server for changes to apply.
Configuring Server Roles
Assign roles that fit your hosting goals. Common roles include DNS, DHCP, and Web Server (IIS). Use Server Manager to add roles easily. Configure each role with basic settings for your domain. Proper role setup ensures your server serves requests correctly.
Ensuring Security Updates
Security updates protect your server from threats. Enable automatic updates in Windows Update settings. Check for and install all critical patches regularly. Regular updates keep your server stable and safe. Avoid running your server without the latest security fixes.
Setting Up Dns On Windows Server
Setting up DNS on your Windows Server is a key step in hosting your own domain. DNS helps translate your website name into an IP address. This makes it easier for people to find your site online. Proper DNS setup ensures your domain works smoothly and stays reliable.
Follow these steps to install and configure DNS on Windows Server. The process includes installing the DNS server role, creating zones, and adding DNS records. Each step builds on the last to create a strong DNS foundation.
Installing Dns Server Role
Start by opening the Server Manager on your Windows Server. Click on “Add roles and features” to begin the setup. Select the “DNS Server” role from the list. Follow the prompts to install it. Restart the server if needed. This role allows your server to handle DNS queries.
Creating Forward Lookup Zones
Open the DNS Manager from the Server Manager tools. Right-click on “Forward Lookup Zones” and select “New Zone.” Choose the primary zone type. Enter your domain name carefully. This zone will store records that link domain names to IP addresses. Finish the wizard to create the zone.
Configuring Dns Records
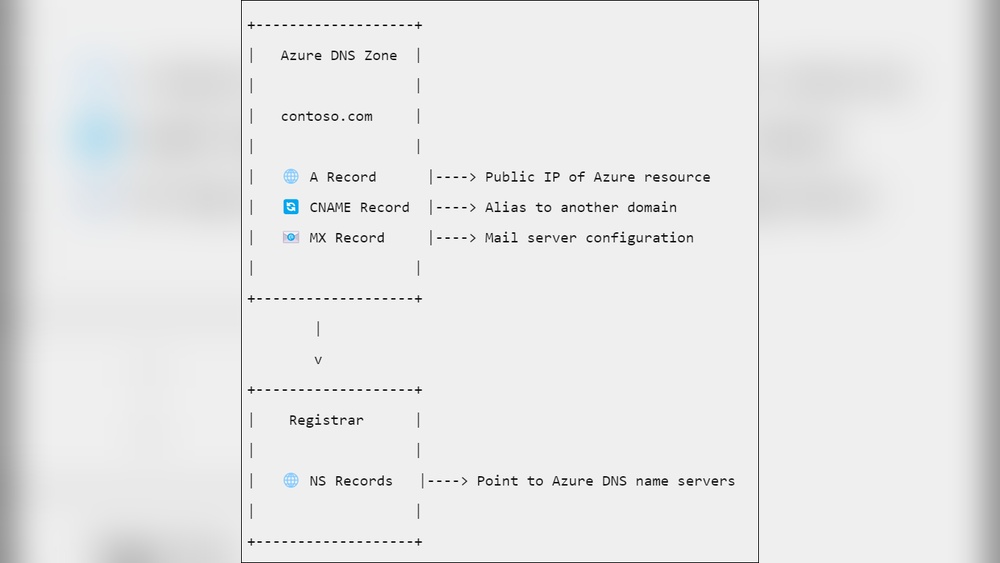
Within your new zone, add DNS records to point your domain to the correct server. Create an “A” record to connect your domain to your server’s IP address. Add other records like “CNAME” for aliases if needed. Save each record to update your DNS settings. Proper records make sure your domain directs visitors correctly.
Hosting Your Website
Hosting your website on a Windows Server lets you control your online presence fully. It gives you a dedicated space to share content and services. Setting it up is simple with the right steps. Below are key steps to help you host your site effectively.
Installing Iis Web Server
IIS (Internet Information Services) is the web server software from Microsoft. It handles web requests and delivers your site to visitors. To install IIS, open Server Manager on your Windows Server. Click “Add Roles and Features,” then select “Web Server (IIS).” Follow the prompts and complete the installation. After this, IIS will be ready to host your website files.
Deploying Website Files
Your website files include HTML, CSS, images, and scripts. Place these files in the IIS default folder, usually “C:\inetpub\wwwroot.” You can use FTP, file explorer, or command line to copy files. Make sure the main page is named “index.html” or “default.html.” IIS will serve these files when visitors access your domain.
Configuring Website Bindings
Website bindings tell IIS how to handle traffic. Open IIS Manager and select your site. Click “Bindings” on the right side. Add a new binding with your domain name and the desired port, usually port 80 for HTTP. Save the settings. This step links your domain to your website, making it accessible online.
Credit: www.ionos.com
Configuring Firewall And Network
Configuring the firewall and network settings is crucial for hosting your own domain on a Windows Server. These steps ensure your server stays secure while allowing visitors to access your website smoothly. Proper setup prevents unauthorized access and network issues.
Start by opening the necessary ports to let traffic reach your server. Then, assign a static IP to keep your server address consistent. Finally, configure your router to forward the right ports to your server, making it accessible from the internet.
Opening Required Ports
Open ports in your Windows Firewall to allow web traffic. Typically, port 80 is for HTTP and port 443 for HTTPS. Use the Windows Defender Firewall settings to add these ports as inbound rules. This step lets users connect to your website without being blocked.
Setting Up Static Ip
Assign a static IP address to your Windows Server. This keeps your server’s IP from changing after a restart. Go to Network Settings, find your network adapter, and set a manual IP address. A static IP helps in stable domain pointing and easier network management.
Router Port Forwarding
Configure your router to forward ports 80 and 443 to your server’s static IP. This action directs external requests to your server inside your local network. Access your router’s admin panel, find port forwarding settings, and add rules for these ports. This step makes your website available online.
Enabling Remote Access
Enabling remote access on your Windows Server lets you manage your server from any place. This feature saves time and increases flexibility. You can work on your server without being physically present.
Remote access requires proper setup and security. Without this, your server is open to risks. Follow the steps below to configure it correctly and keep your data safe.
Configuring Remote Desktop
Start by turning on Remote Desktop in Windows Server settings. Open the System Properties and find the Remote tab. Check the box that allows remote connections to this computer.
Select users who can connect remotely. By default, administrators have access. You can add other users if needed.
Next, configure your firewall to allow Remote Desktop traffic. Open port 3389 for TCP. This step ensures your server accepts remote connections.
Securing Remote Connections
Secure remote access to protect your server from hackers. Use strong passwords for all accounts with remote access rights. Weak passwords make it easy for attackers to break in.
Enable Network Level Authentication (NLA). This adds an extra layer of security before a full connection is established.
Consider setting up a Virtual Private Network (VPN). VPNs encrypt your internet traffic and hide your IP address.
Regularly update your Windows Server. Updates fix security flaws and improve system stability.
Managing Ssl Certificates
Managing SSL certificates is a key step in securing your Windows Server domain. SSL certificates protect data by encrypting the connection between the server and visitors. This helps build trust and improves your site’s search ranking. Proper management of these certificates ensures your website stays safe and accessible.
Obtaining Ssl Certificates
Start by choosing a reliable certificate authority (CA). Many offer free or paid certificates. You need to create a Certificate Signing Request (CSR) on your server. This request contains your server’s details. Submit the CSR to the CA to get your SSL certificate. The CA will verify your information and send the certificate files. Save these files carefully for the next step.
Installing Certificates On Iis
Open Internet Information Services (IIS) Manager on your Windows Server. Click on your server name in the left panel. Find and open the “Server Certificates” option. Use the “Import” feature to add your SSL certificate files. After importing, go to your website under “Sites.” Select “Bindings” and edit the HTTPS binding. Choose your installed certificate from the dropdown list. Save the settings and restart IIS if needed. Your site now uses SSL and shows the secure padlock icon.
Maintaining Your Server
Maintaining your Windows Server keeps it safe and running well. A well-maintained server helps avoid crashes and data loss. It also improves speed and security. Small tasks done regularly can save a lot of trouble later.
Regular Backups
Backups protect your data from accidents or attacks. Schedule backups daily or weekly, based on your needs. Store backup files in a separate location. Test backups often to ensure they work correctly. This keeps your data safe and easy to restore.
Monitoring Server Performance
Watch your server’s performance to spot issues early. Use tools to check CPU, memory, and disk usage. High usage can slow down your server or cause errors. Set alerts to get notified about unusual activity. Keeping an eye on performance helps keep your server stable.
Applying Updates And Patches
Updates fix bugs and improve security. Install Windows updates regularly to protect your server. Apply patches to fix known vulnerabilities quickly. Schedule updates during off-peak hours to avoid disruption. Staying updated reduces the risk of attacks and errors.
Troubleshooting Common Issues
Troubleshooting common issues helps keep your Windows Server running smoothly. Problems can stop your website or server from working. Knowing how to fix these issues saves time and stress. Below are some frequent problems and easy fixes.
Dns Resolution Problems
DNS helps turn your domain name into an IP address. If DNS fails, your site won’t load. Check if your DNS records are correct in the domain registrar. Use tools like nslookup or ping to test DNS resolution.
Clear your DNS cache on the server to remove old data. Make sure your DNS server is running without errors. Update DNS settings if you recently changed your hosting provider.
Website Access Errors
Website access errors can show as “404 not found” or “500 internal server error.” Check your website files and folders for missing or wrong files. Review your web server settings and permissions.
Restart your web server to fix temporary glitches. Look at your server logs for specific error messages. Ensure your firewall or security settings do not block access.
Server Connectivity Issues
Connectivity issues stop users from reaching your server. Verify your server’s IP address and port are open and accessible. Use tools like telnet or tracert to test connections.
Check your network cables and router settings. Restart your server and network devices. Make sure your firewall allows incoming traffic on necessary ports.
Frequently Asked Questions
What Is The First Step To Register A Domain On Windows Server?
The first step is to choose and register your domain name through a reputable registrar. Then, configure DNS settings on your Windows Server to link the domain properly.
How Do I Configure Dns For My Domain On Windows Server?
Open the DNS Manager on your Windows Server. Create a new forward lookup zone matching your domain name. Add necessary records like A, CNAME, and MX for proper domain function.
Can I Host Multiple Domains On One Windows Server?
Yes, Windows Server supports hosting multiple domains. You need to create separate DNS zones and configure IIS sites for each domain accordingly.
What Security Measures Are Needed For Hosting A Domain On Windows Server?
Implement firewall rules, keep the server updated, and use SSL certificates. Regularly monitor server logs to prevent unauthorized access and protect your domain data.
Conclusion
Registering and hosting your own domain on Windows Server is simple. Follow the steps carefully to avoid common mistakes. A good setup ensures your website runs smoothly and stays secure. Regular updates keep your server safe from threats. Take time to learn each part well.
Your own domain gives you control and freedom online. Start today and build your presence with confidence.


