
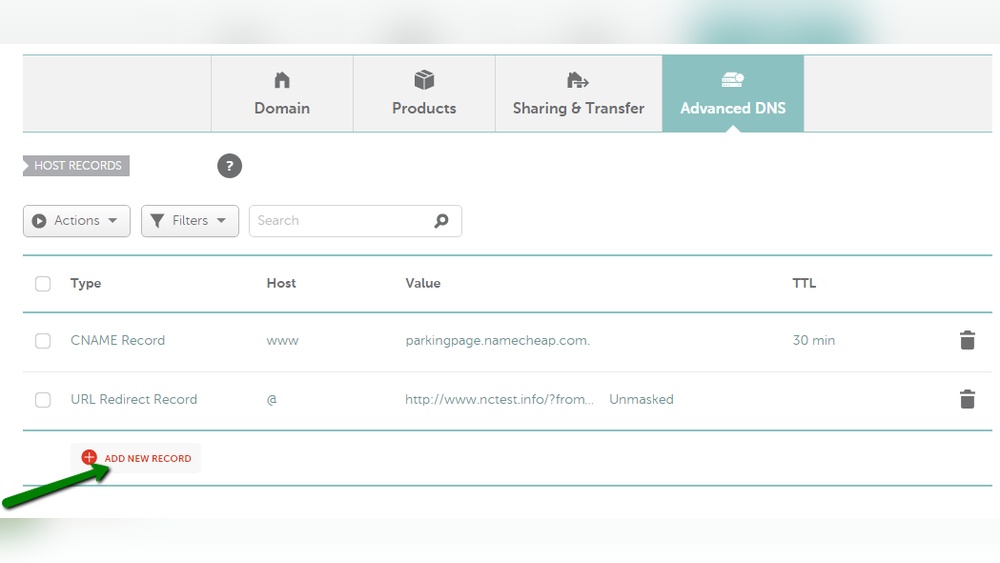
You’ve just grabbed a new domain, and now it’s time to make it work for you. But how do you connect your shiny new web address to your hosting provider?
It might sound tricky, but pointing your domain to your host is easier than you think. Getting this right is crucial because it ensures your website shows up when people type your domain name. In this guide, you’ll discover simple, clear steps to link your new domain to your host quickly and confidently.
Keep reading—you’re just moments away from bringing your website to life.
Choose A Domain Registrar
Choosing a domain registrar is the first step in pointing your new domain to a host. The domain registrar manages your domain’s registration and DNS settings. A good registrar makes the process easier and safer. Pick one that fits your needs and budget. Understanding what to look for helps you avoid problems later.
What Is A Domain Registrar?
A domain registrar is a company that sells domain names. It keeps your domain name active on the internet. The registrar also lets you change DNS records. These records tell where your website and emails go. Without a registrar, you cannot use your domain online.
Factors To Consider When Choosing A Registrar
Look for affordable pricing and clear renewal fees. Check if the registrar offers easy DNS management tools. Customer support is important for quick help. Security features like domain lock and two-factor authentication protect your domain. Also, see if the registrar provides email or website hosting services.
Popular Domain Registrars To Explore
Some well-known registrars include GoDaddy, Namecheap, and Google Domains. These companies offer reliable service and user-friendly interfaces. They provide helpful guides for pointing domains to hosts. Compare their features and prices before deciding.
Credit: www.seekahost.com
Select A Hosting Provider
Selecting the right hosting provider is a key step in pointing your new domain to a host. The hosting provider stores your website files and makes your site visible online. Picking a reliable host ensures your website loads quickly and stays online without interruptions.
Many hosting providers offer different plans. Some focus on shared hosting, while others provide dedicated servers or cloud hosting. Understanding your website’s needs helps choose the best plan and provider.
Select A Hosting Plan That Fits Your Needs
Choose a hosting plan based on your website size and traffic. Small websites may do well with shared hosting. Bigger sites or those expecting high traffic need stronger plans like VPS or dedicated hosting.
Check Hosting Provider’s Uptime And Speed
Look for hosts that guarantee high uptime, at least 99.9%. Fast servers improve user experience and help search engine rankings. Ask about server locations and speed tests before deciding.
Consider Customer Support Quality
Good customer support helps solve problems quickly. Find providers with 24/7 support via chat, phone, or email. Read reviews to learn about their response times and helpfulness.
Review Security Features
Strong security protects your website from hacks and attacks. Check if the host offers SSL certificates, firewalls, and daily backups. These keep your data safe and secure.
Evaluate Pricing And Renewal Policies
Compare initial prices and renewal fees. Some hosts offer low starting costs but raise prices later. Understand the billing terms to avoid surprises.
Access Domain Dns Settings
Accessing your domain’s DNS settings is the first step to point your new domain to your hosting provider. These settings control where your domain directs visitors. Without changing DNS records, your domain cannot connect to your host’s servers.
Finding the DNS settings area depends on your domain registrar. Common places include your domain dashboard or control panel. Knowing how to reach this section saves time and prevents errors.
Log In To Your Domain Registrar Account
Start by logging into the website where you bought your domain. Use your username and password. This access lets you manage your domain’s details.
Navigate To Domain Management
After login, find the section called “Domain Management” or “My Domains.” This area lists all your registered domains. Select the domain you want to point to your host.
Locate The Dns Or Name Server Settings
Inside the domain settings, look for “DNS Settings,” “DNS Management,” or “Name Servers.” This is where you can change your domain’s destination address.
Prepare For Dns Changes
Before changing records, note current settings for backup. Incorrect changes can cause your website or email to stop working. Save a copy or screenshot of existing DNS records.
Update Name Servers
Updating name servers is a key step to connect your new domain to your web host. This process tells the internet where to find your website files. Without this update, visitors cannot see your website. The name servers act like an address for your domain. Changing them points your domain to the right hosting service.
Find Hosting Name Servers
Start by logging into your hosting account. Look for the section called “DNS” or “Name Servers.” You will see two or more name servers listed. They usually look like “ns1.hostingprovider.com” and “ns2.hostingprovider.com.” Copy these name server addresses carefully. You will need them in the next step.
Replace Default Name Servers
Go to your domain registrar’s website and sign in. Find the option to manage your domain’s name servers. This is often under “Domain Settings” or “DNS Management.” Delete the default name servers shown there. Paste the hosting name servers you copied earlier. Save the changes to update your domain’s settings.
After updating, the change may take some hours to apply. This delay is normal. Your domain will start pointing to your hosting once the update completes.
Modify Dns Records
Modifying DNS records is a key step to point your new domain to your hosting provider. DNS records tell the internet where to find your website and email services. Correctly updating these records ensures your site loads correctly and your emails reach their destination.
Every domain has several types of DNS records. Each type has a specific role in connecting your domain to the host. You will mainly work with A, CNAME, and MX records when pointing a domain.
Edit A Record
The A record links your domain to the hosting server’s IP address. Change the A record to the IP address your host gives. This directs all traffic from your domain to your website’s server. Make sure to delete old A records to avoid conflicts.
Set Cname Records
CNAME records create an alias for your domain or subdomains. Use CNAME to point subdomains like www to the main domain. This helps users reach your site with or without “www.” Check that the CNAME points to the correct domain or host name.
Configure Mx Records
MX records manage your email delivery. Set MX records to your email provider’s servers. This lets you send and receive emails from your domain. Remove old MX records that do not match your current email service.
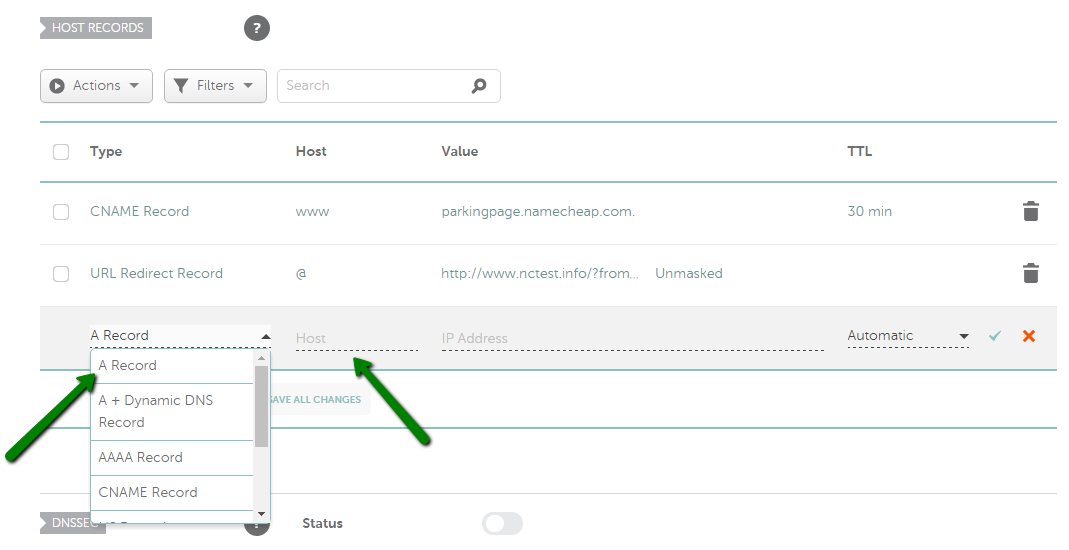
Credit: www.namecheap.com
Verify Domain Propagation
Verifying domain propagation is a key step after pointing your new domain to a hosting service. It shows whether your domain changes have spread across the internet. This process ensures visitors reach your new website without issues.
Propagation can take time. Different servers update at different speeds. Checking propagation helps confirm your domain works properly worldwide. It also helps identify any possible delays or errors.
Use Online Tools
Several free websites let you check domain propagation easily. These tools query DNS servers worldwide. You get a quick view of your domain status in many locations.
Popular tools include DNSChecker, WhatsMyDNS, and MXToolbox. Enter your domain name, and these sites display results from multiple servers. This gives you a clear picture of how far propagation has reached.
Check Propagation Time
Propagation usually takes a few hours to 48 hours. Sometimes it may take longer due to DNS caching. Patience is important during this time.
Keep checking your domain with online tools every few hours. Note any changes in the results. Once most servers show your new hosting IP, propagation is complete.
Troubleshoot Common Issues
Pointing a new domain to your host can sometimes cause issues. These problems often slow down your website setup. Knowing how to fix common errors saves time and stress. This section helps you troubleshoot simple problems fast.
Dns Cache Clearing
Old DNS records may block new changes. Your computer or browser stores these records temporarily. Clearing this cache forces your system to get fresh data. This step ensures you see the latest website version.
To clear DNS cache, use command prompt or terminal. On Windows, type ipconfig /flushdns. On Mac, use sudo killall -HUP mDNSResponder. Restart your browser after this process. Try loading your website again to check updates.
Verify Record Accuracy
Incorrect DNS records cause most domain pointing issues. Double-check all entries like A, CNAME, and MX records. Make sure they match the host’s instructions exactly. A small typo can stop your site from working.
Use online DNS lookup tools to confirm your records. They show if your domain points to the right IP address. Fix any wrong details in your domain registrar’s control panel. Accurate records ensure smooth domain hosting connection.
Secure Your Domain
Securing your domain is an essential step after pointing it to your host. It protects your website and visitor data. It also builds trust with your audience. Taking simple security measures keeps your domain safe from threats and misuse.
Enable Ssl Certificate
An SSL certificate encrypts data between your site and visitors. It helps prevent hackers from stealing information. Most hosts offer free SSL certificates. Activate SSL through your hosting control panel. Once enabled, your website URL shows “https,” signaling safety to users. Search engines also favor sites with SSL, improving your ranking.
Activate Domain Privacy
Domain privacy hides your personal contact details in the WHOIS database. Without it, anyone can see your name, address, and phone number. This exposure may lead to spam and identity theft. Domain privacy replaces your info with generic data. You can turn it on in your domain registrar account. Protect your identity and reduce unwanted contacts with this feature.

Credit: www.hostafrica.ke
Frequently Asked Questions
How Do I Point My Domain To A New Hosting Provider?
To point your domain to a new host, update its DNS nameservers. Log in to your domain registrar, find DNS settings, and replace old nameservers with new ones from your hosting provider. Changes may take 24-48 hours to propagate worldwide.
What Dns Records Are Needed To Connect A Domain To Hosting?
Typically, you need to update A records pointing to your server’s IP address. Some hosts require CNAME or MX records for email services. Check your hosting provider’s instructions for exact DNS record details to ensure proper domain connection.
How Long Does Dns Propagation Take After Pointing A Domain?
DNS propagation usually takes 24 to 48 hours. However, some changes may appear within a few hours. Propagation time depends on your ISP and global DNS caching. Be patient while your domain fully connects to the new host.
Can I Keep My Email Service When Pointing A New Domain?
Yes, you can keep your existing email service. Just avoid changing MX records during the domain pointing process. Confirm MX settings remain unchanged in your DNS to ensure uninterrupted email delivery.
Conclusion
Pointing a new domain to your host is simple with clear steps. Follow each instruction carefully to avoid errors. Check your settings to ensure the domain works correctly. Changes may take some time to show online. Stay patient and verify your site often.
This process helps your website become accessible to visitors. Keep your domain and hosting details organized for easy management. Now you are ready to share your website with the world.


