
Are you ready to take control of your website’s identity? Pointing your domain from your current host to Namecheap might sound tricky, but it’s simpler than you think.
Whether you want better management, improved services, or just a fresh start, moving your domain is a smart move. In this guide, you’ll learn exactly how to make the switch step-by-step, without confusion or hassle. Keep reading, and by the end, you’ll have full confidence in managing your domain like a pro.
Credit: www.namecheap.com
Prepare Domain And Account Details
Gather your domain name and hosting account details before starting. These include login info and domain registrar access. Having them ready speeds up the process.
Gather Host Account Information
Start by collecting all details from your current hosting provider. You need the domain name, login credentials, and DNS settings. Locate the nameservers or DNS records used by your host. This information is crucial for pointing your domain correctly. Keep your account username and password handy to access your host’s control panel. Having this ready saves time during the transfer process.
Access Namecheap Dashboard
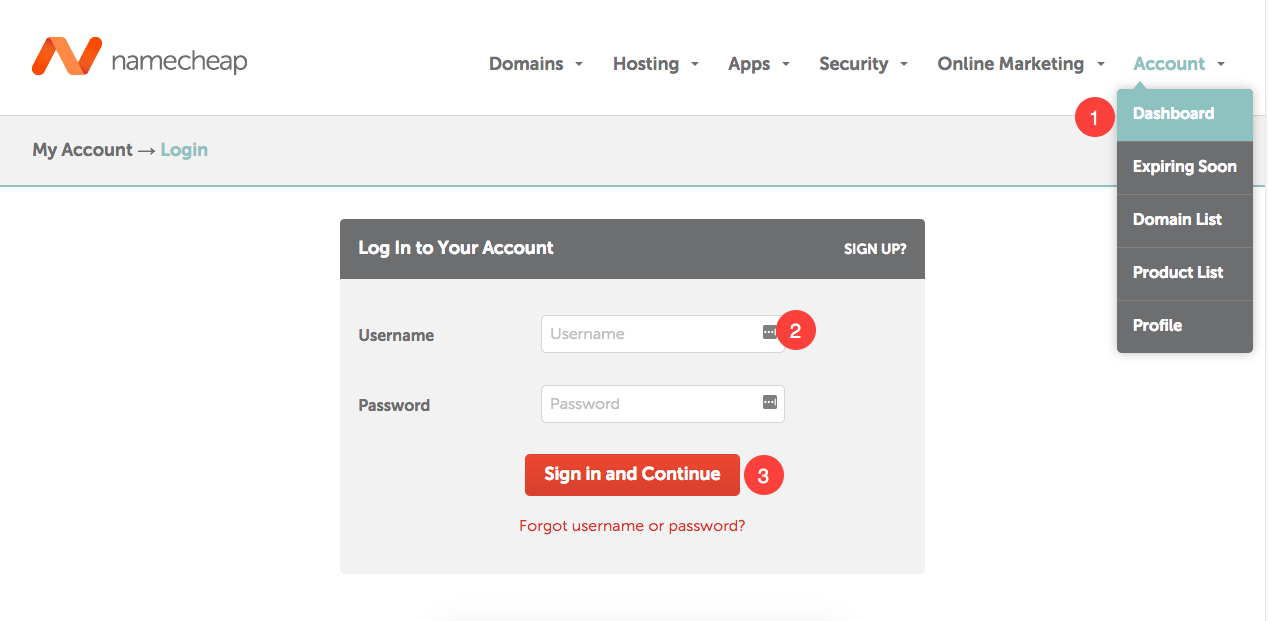
Next, log into your Namecheap account dashboard. Use your username and password to sign in securely. The dashboard is where you manage domains and DNS settings. Navigate to the “Domain List” to find the domain you want to point. Familiarize yourself with the controls and settings available in this area. This helps you make changes quickly and with confidence.
Update Nameservers At Host
Updating nameservers at your current host is an essential step to point your domain to Namecheap. This change tells the internet where to find your website and email services. The process is simple and takes only a few minutes.
Start by accessing your domain settings at your hosting provider. You will replace the existing nameservers with those from Namecheap. This update allows Namecheap to manage your domain’s DNS records.
Locate Dns Settings
Log in to your hosting account dashboard. Find the section labeled “Domains” or “Domain Management.” Look for “DNS Settings,” “Nameservers,” or “Manage DNS.” This area shows your current nameservers and DNS records.
If you have trouble finding the DNS settings, check your host’s support pages. Some hosts call it “Domain Settings” or “Name Server Management.”
Replace With Namecheap Nameservers
Copy the nameservers provided by Namecheap. Typically, they look like dns1.namecheaphosting.com and dns2.namecheaphosting.com. Paste these into the nameserver fields at your host.
Remove any old nameservers listed. Save your changes. The update may take a few hours to propagate across the internet.
After updating, your domain points to Namecheap’s servers. You can now manage DNS records from your Namecheap account.
Configure Domain In Namecheap
Configuring your domain in Namecheap is an important step to make your website live. This process connects your domain name to Namecheap’s services. It allows you to manage your domain settings and DNS records easily. Follow these simple steps to set up your domain correctly.
Add Domain To Namecheap
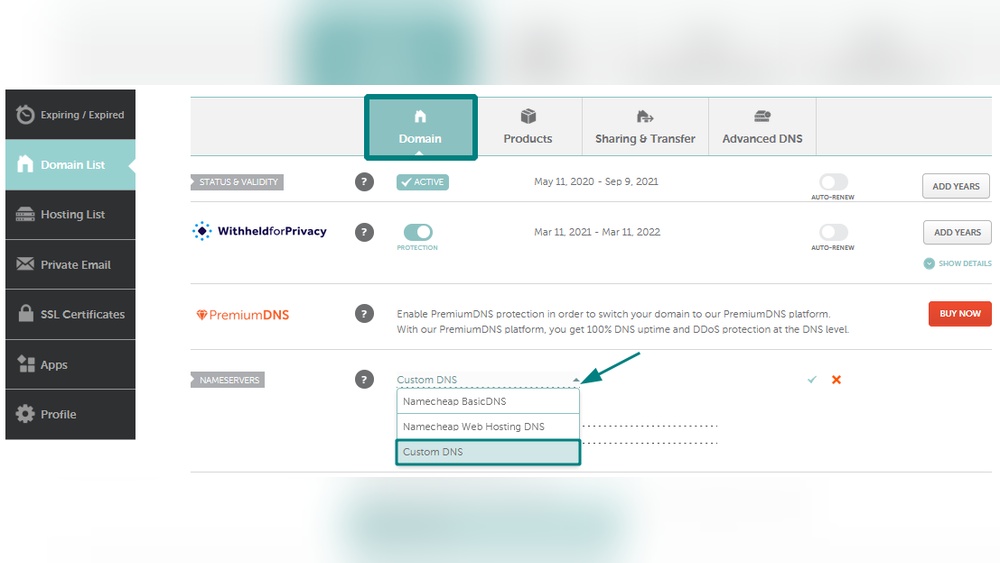
First, log in to your Namecheap account. Go to the “Domain List” section on the dashboard. Click the “Add Domain” button to start the process.
Enter your domain name exactly as registered. Confirm the details and add it to your account. Namecheap will verify the domain ownership. This may take a few minutes.
Set Up Dns Records
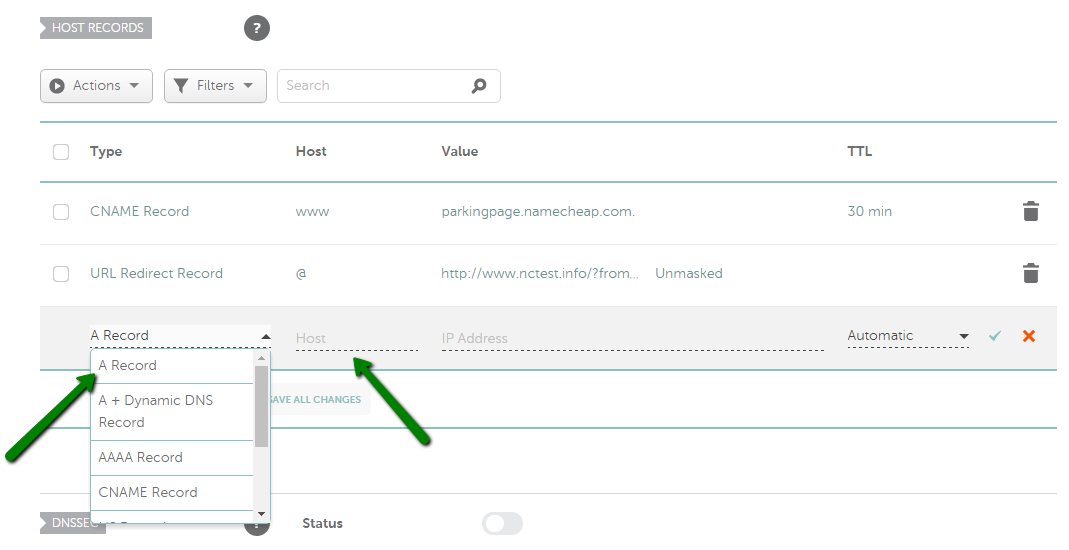
After adding the domain, go to the “Advanced DNS” tab. Here, you will manage your DNS records. DNS records tell the internet where to find your website and email.
Add an A record pointing to your hosting server’s IP address. Set the host as “@” for the root domain. Add a CNAME record if you use subdomains. Also, add MX records for email services if needed.
Save all changes. DNS updates may take some time to spread worldwide. Check your domain status after a few hours to confirm it works.

Credit: help.shopify.com
Verify Domain Propagation
After pointing your domain from your host to Namecheap, you need to check if the changes have taken effect. This process is called domain propagation. It can take some time for DNS servers worldwide to update and show your new settings. Verifying domain propagation helps you know if your website is ready for visitors.
Check Dns Status
Use online tools like DNS Checker or WhatsMyDNS to see your domain’s status. Enter your domain name and select the record type, usually A or CNAME. These tools show the IP addresses seen by servers in different countries. If most servers show the new IP, your domain has propagated well.
Check multiple times during the day. Propagation can take up to 48 hours. Patience is key. Avoid making more changes until propagation completes. This prevents confusion and delays.
Troubleshoot Common Issues
If the domain does not show the new IP after 48 hours, try these steps. First, clear your browser cache and flush your local DNS cache. Old data can block updates from showing.
Second, verify your DNS records in Namecheap’s control panel. Make sure they match the host’s instructions exactly. Typos or missing records cause problems.
Contact Namecheap support if issues persist. They can help find and fix errors in your DNS setup.
Tips For Smooth Domain Transfer
Transferring your domain to Namecheap requires careful steps to avoid downtime. Smooth domain transfer keeps your website and email working without interruption. Follow these simple tips to make the process easy and safe.
Backup Existing Dns Records
Save all current DNS settings before starting the transfer. DNS records control your website and email functions. Losing them causes broken links and lost emails. Check A records, MX records, CNAME, and TXT records. Write them down or take screenshots for reference.
Allow Time For Dns Changes
DNS updates do not happen instantly. They can take from a few minutes to 48 hours to spread worldwide. During this time, some visitors may reach the old server. Be patient and avoid changing settings repeatedly. This waiting period ensures your site stays online.
Credit: help.pixpa.com
Frequently Asked Questions
How Do I Change Domain Nameservers To Namecheap?
Log into your current host’s control panel. Find the domain management section. Replace existing nameservers with Namecheap’s nameservers. Save changes and allow up to 48 hours for DNS propagation.
What Are Namecheap’s Default Nameservers?
Namecheap’s default nameservers are: dns1. namecheaphosting. com and dns2. namecheaphosting. com. Use these when pointing your domain to Namecheap hosting for proper DNS resolution.
How Long Does Dns Propagation Take After Pointing Domain?
DNS propagation usually completes within 24 to 48 hours. During this time, some users may see the old site while others see the new one.
Can I Keep My Email When Pointing Domain To Namecheap?
Yes, you can keep your email if your MX records remain unchanged. Update only the nameservers or DNS records carefully to avoid email disruption.
Conclusion
Pointing your domain from Host to Namecheap is simple and fast. Just follow the steps carefully and double-check your entries. Changes may take some time to show online. Stay patient and avoid making quick changes again. This process helps you manage your domain better on Namecheap.
Now, your website can run smoothly with your new settings. Keep this guide for future reference if needed. You are ready to control your domain like a pro. Easy, clear, and done right.


