
Creating a subdomain on Namecheap might sound like a technical task, but it’s actually straightforward and rewarding. Imagine having a dedicated space online, where you can organize your content or showcase a specific project.
Whether you’re expanding your website or want to create a unique platform for your business, learning how to set up a subdomain can open up new avenues for you. In this guide, you’ll discover simple steps to create a subdomain effortlessly, ensuring you can enhance your online presence and keep your main domain tidy and professional.
Let’s dive in and explore how you can make this happen with Namecheap.
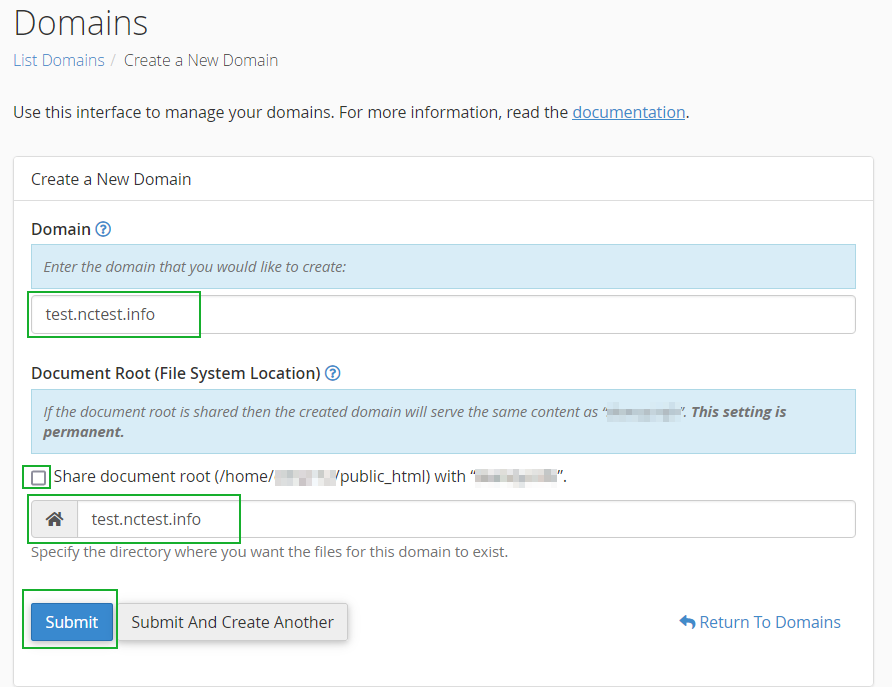
Credit: www.namecheap.com
Understanding Subdomains
Creating a subdomain in Namecheap is straightforward. Log into your account and navigate to the “Domain List. ” Select your domain and click on “Manage. ” In the “Advanced DNS” tab, add a new record for your subdomain. Save changes and your subdomain is ready.
Understanding Subdomains Creating subdomains can be a game changer for managing your website’s content and structure. If you’ve ever wondered how websites create separate sections like blog.yoursite.com or store.yoursite.com, you’re in the right place. Subdomains allow you to segment different areas of your website under the same domain, offering flexibility and organization. Let’s dive into what subdomains are and why they might be beneficial for you.What Is A Subdomain?
A subdomain is essentially an extension of your main domain. Think of it as creating a new room within your website’s home. It lets you categorize and manage content separately while still being part of the main domain family. For instance, imagine you run a business called “Super Shoes”. Your main domain might be supershoes.com. If you want a dedicated section for your blog, you could create a subdomain like blog.supershoes.com. This keeps things organized and user-friendly. Subdomains are easy to set up with hosting providers like Namecheap. They offer a straightforward way to diversify your website’s offerings without needing a completely new domain.Benefits Of Using Subdomains
Subdomains offer several advantages that can enhance your website’s functionality and user experience. First, they help in organizing content. If you have different services or products, you can dedicate a subdomain to each, making it easier for visitors to navigate. Secondly, subdomains can improve your site’s SEO. By having distinct sections, search engines can better understand and index your content, potentially boosting visibility. Finally, they allow for targeted marketing efforts. You can create a unique look or feel for each subdomain, tailoring your approach to different audiences and needs. Imagine walking into a library with separate sections for each genre. It’s easier to find what you want, right? Subdomains provide that kind of clarity and structure online. So, what are you waiting for? Consider how subdomains could streamline your web presence and make navigation a breeze for your visitors. Have you thought about how a subdomain could enhance your website today?Preparation Before Creating A Subdomain
Creating a subdomain on Namecheap requires planning. Start by choosing a unique name that reflects your content. Ensure your primary domain is active and DNS settings are correctly configured.
Creating a subdomain on Namecheap can seem like a daunting task, especially if you’re new to website management. However, with a bit of preparation, you can simplify the process significantly. Before diving into the technical steps, ensure you’re fully equipped to set up your subdomain seamlessly. This preparation phase is crucial—it ensures a smooth transition and minimizes potential hiccups down the line. ###Accessing Your Namecheap Account
First, make sure you can log into your Namecheap account without any issues. Accessing your account is the gateway to managing your domain settings, including creating subdomains. Have your login credentials handy. If you’re like me and often forget passwords, consider using a password manager for easy access. This saves time and reduces frustration, allowing you to focus on setting up your subdomain. Once logged in, familiarize yourself with the dashboard. Knowing where to find the right settings can save you from endless clicking around. If you’re unsure, Namecheap offers helpful guides and a support team ready to assist. ###Verifying Domain Ownership
Before creating a subdomain, verify that you actually own the domain. This step is essential, as it ensures you have the necessary permissions to make changes. Check your domain list within the Namecheap dashboard. Is your domain listed? If not, you might need to transfer it or ensure it’s registered under your account. This verification process can prevent unauthorized access and potential security issues. If you’re managing multiple domains, double-check to ensure you’re working on the correct one. It’s easy to click on the wrong domain when you’re in a hurry. This simple oversight can lead to unwanted changes on another site. A quick double-check can save you from a major headache later. Isn’t it reassuring to know you’re fully prepared before taking the plunge into creating a subdomain? This preparation not only simplifies the process but also empowers you with confidence and control.Creating A Subdomain In Namecheap
Creating a subdomain in Namecheap is simple. Log into your account and go to the Domain List. Select “Manage” for the domain you want. Find the “Advanced DNS” tab. Click “Add New Record” and choose “A Record” or “CNAME Record.
” Enter your subdomain name and IP address. Save changes. Done!
Creating a subdomain in Namecheap is a straightforward process. Subdomains help organize and structure your website’s content. They can serve various purposes, like hosting a blog or a support site. This guide will walk you through the steps. Each step is easy to follow. You don’t need to be a tech expert. ###Navigating To The Domain List
First, log into your Namecheap account. Once logged in, go to your dashboard. Find the “Domain List” option in the left sidebar. Click on it to see all your domains. This is where you start creating a subdomain. Make sure you are on the right page. ###Selecting The Domain For Subdomain
Now, look through your list of domains. Find the domain you want to add a subdomain to. Click the “Manage” button next to it. This takes you to the domain settings page. Ensure you select the correct domain. Double-check to avoid mistakes. ###Adding A New Subdomain
In the domain settings, look for the “Advanced DNS” tab. Click on it to proceed. Scroll down to the “Host Records” section. Here, you can add a new record. Click on “Add New Record.” Choose “CNAME Record” or “A Record,” depending on your needs. Enter your desired subdomain name in the “Host” field. Fill in the necessary details in the other fields. Save your changes to finalize the setup. Your subdomain is now ready to use.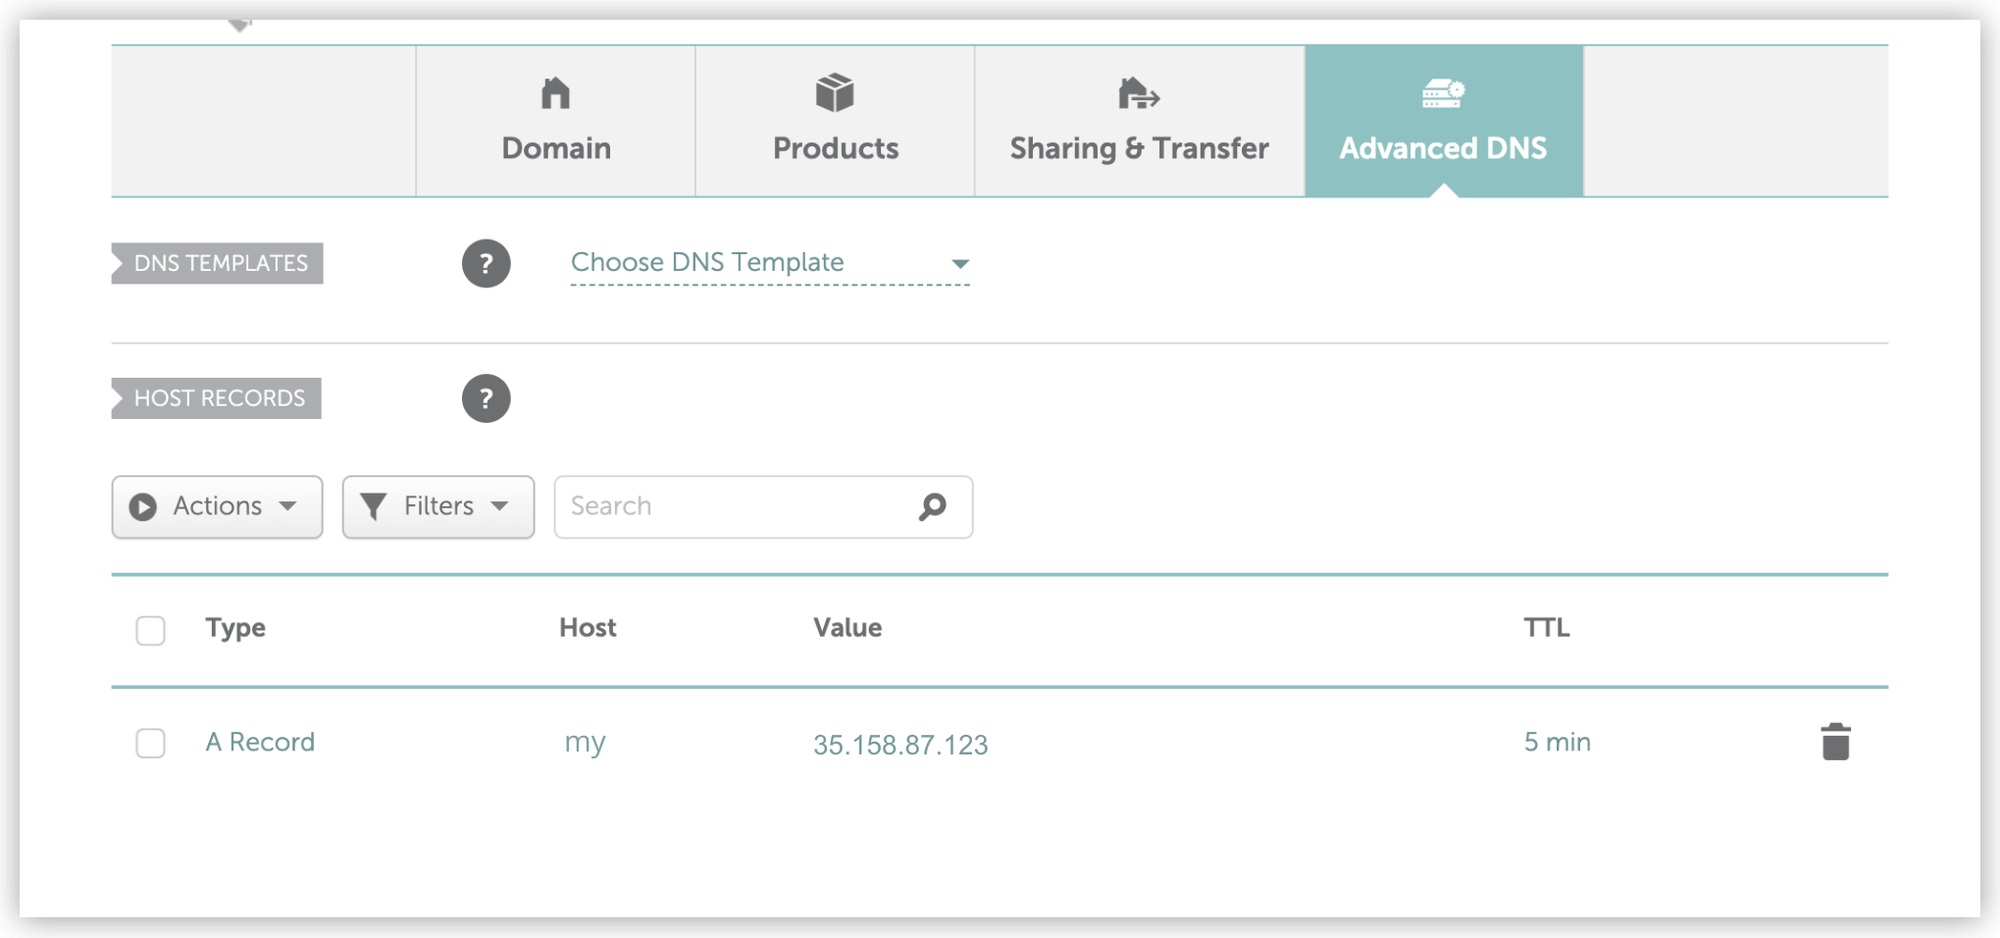
Credit: docs.softr.io
Configuring Subdomain Settings
Easily create a subdomain in Namecheap by navigating to the “Domain List” section. Access “Manage” next to your domain, then select “Advanced DNS. ” Click “Add New Record” and choose “CNAME Record” to enter your subdomain details. Save changes to complete the setup efficiently.
Configuring your subdomain settings in Namecheap can seem daunting, but it’s a straightforward process with a bit of guidance. Whether you’re setting up a blog, an online store, or a portfolio, ensuring your subdomain is configured correctly is crucial. Let’s dive into the essential steps, focusing on DNS settings adjustments and setting up redirects to make your subdomain functional and efficient.Dns Settings Adjustments
To start, log in to your Namecheap account and navigate to the Domain List. Select your domain and click on “Manage.” This is where you’ll adjust the DNS settings for your subdomain. Ensure you’re on the DNS settings tab. Here, you can add new records. Click “Add New Record” and choose the record type, usually “A Record” or “CNAME,” depending on your needs. Enter the subdomain name in the host field. If you’re unsure about the value, check with your hosting provider or use the IP address of your server. Save the changes, and you’re done!Setting Up Redirects
Redirects are essential if you want your subdomain to lead somewhere specific, like another webpage or site. You can set these up easily in Namecheap. In the same DNS settings area, look for the “Redirect Domain” section. Click on “Add Redirect,” and enter the subdomain you wish to redirect. Specify the destination URL. This could be a different page on your site or an entirely different website. Save the redirect settings and test it to ensure it works correctly. Consider how a well-placed redirect can enhance the user experience. Have you ever clicked a link only to find yourself lost on an unrelated page? Setting up your redirects properly prevents this and keeps your visitors engaged. Making changes to DNS settings or redirects might sound technical, but it’s manageable with a little patience. Have you ever thought about how these small tweaks can significantly impact your online presence?Testing Your Subdomain
Create a subdomain in Namecheap by accessing your domain list and selecting the domain. Navigate to the “Advanced DNS” section, add a new record, and specify your desired subdomain name. Save your changes to complete the setup.
Testing Your Subdomain After creating a subdomain with Namecheap, it’s crucial to test its functionality. Testing ensures everything is set up correctly and your site visitors can access it seamlessly. You don’t want to lose potential visitors due to technical hiccups, right?Checking Accessibility
First, verify that your subdomain is accessible. Open your browser and type the subdomain’s URL in the address bar. Does it load without any issues? If yes, you’re on the right track! But if you see a “Page Not Found” error, it might indicate a DNS propagation delay. This can take a few minutes to several hours. You can use online tools like What’s My DNS to check the propagation status.Troubleshooting Common Issues
Encountering issues is normal, but how you address them makes the difference. One common problem is incorrect DNS settings. Double-check your Namecheap DNS settings to ensure your subdomain points to the right server. Another issue could be a server misconfiguration. Check your hosting provider’s settings to ensure the subdomain is correctly configured. Have you ever felt frustrated trying to troubleshoot tech issues? It’s like searching for a needle in a haystack. But once you find the solution, the relief is unparalleled! Are you still facing issues? Consider reaching out to Namecheap support for expert assistance. They can provide detailed help tailored to your specific setup. Testing is not just about ensuring functionality. It’s about securing your digital space and offering a seamless experience to your audience. Ready to dive into testing your subdomain?
Credit: hostadvice.com
Maintaining Your Subdomain
Creating a subdomain in Namecheap enhances your website’s structure. Log into your Namecheap account and navigate to the domain list. Select your domain, choose ‘Advanced DNS,’ and add your subdomain under ‘Host Records. ‘
Maintaining your subdomain is crucial to ensure it runs smoothly and effectively serves its purpose. Think of your subdomain as an extension of your primary website that requires just as much attention and care. Keeping it updated and monitoring its performance will not only help in delivering a seamless user experience but also in improving your search engine rankings.Regular Updates
Regular updates are the backbone of a healthy subdomain. They ensure that your content remains relevant and appealing to your audience. Outdated information can deter visitors and affect your credibility. Consider setting a schedule to review your subdomain content. This could be once a month or quarterly, depending on your resources and the nature of your content. Updating plugins and software is equally important to maintain security and functionality.Monitoring Performance
Monitoring performance is like having a health check-up for your subdomain. It helps you understand what’s working and what needs improvement. Use tools like Google Analytics to track visitor behavior and identify popular content. Pay attention to metrics such as page load speed, bounce rate, and user engagement. These insights can guide you in making informed decisions about content and structural changes. Have you ever noticed a drop in traffic and wondered what went wrong? Regular performance checks can help you catch issues early and keep your subdomain thriving.Frequently Asked Questions
How To Make A Subdomain On Namecheap?
Log into your Namecheap account. Go to “Domain List” and select “Manage” next to your domain. Click “Advanced DNS,” then “Add New Record. ” Choose “CNAME Record” for the subdomain, enter the details, and save changes. Your subdomain is now set up.
How Do I Create My Own Subdomain?
To create a subdomain, access your web hosting control panel. Locate the subdomain section, enter your desired name, and link it to a directory. Save changes, and your subdomain is ready. Check your host’s documentation for specific steps.
Is A Subdomain Bad For Seo?
Subdomains are not inherently bad for SEO. They can rank well if optimized properly. Search engines treat subdomains separately, so content relevance and quality are crucial. Ensure proper internal linking and site structure to boost SEO. Always monitor performance and adjust strategies for better results.
Is Creating Subdomains Free?
Creating subdomains is typically free with most web hosting providers. Check your hosting plan details. Some may include a limited number of free subdomains, while others offer unlimited options. Always verify with your hosting service to ensure no hidden costs are associated with subdomain creation.
Conclusion
Creating a subdomain in Namecheap is simple and straightforward. Follow each step carefully. Your website can benefit from better organization. Subdomains help in targeting specific audiences. They also improve user experience. A well-structured site enhances navigation. This can lead to higher visitor satisfaction.
Remember, practice makes perfect. Try it out on your own site. You’ll get the hang of it quickly. Don’t hesitate to explore more features. Namecheap offers various tools for your needs. Keep learning and experimenting. Your website’s potential is endless.
Enjoy your enhanced online presence.


