
Are you struggling to access your Namecheap cPanel? You’ve landed in the right place.
Whether you’re managing a personal blog, a business website, or an online store, logging into your cPanel is a crucial step in keeping your site running smoothly. Imagine having the power to tweak your website settings, manage files, and optimize performance, all at your fingertips.
That’s exactly what cPanel offers. But first, you need to know how to get in. This guide will walk you through each step, ensuring you can confidently log in and take control of your website. Stick around; mastering this process will empower you to unlock your site’s full potential.
Accessing The Namecheap Website
Logging into Namecheap’s cPanel is straightforward. Visit Namecheap’s website and locate the cPanel login section. Enter your credentials to access hosting features effortlessly.
Accessing the Namecheap website is your first step toward logging into cPanel and managing your web hosting account. Whether you’re setting up a new website or tweaking existing settings, accessing Namecheap efficiently is key. But what’s the best way to do this? Let’s break it down. ###Locate The Namecheap Website
Begin by opening your preferred web browser. Type “Namecheap.com” into the address bar. Hit enter, and you’ll see the familiar interface of the Namecheap homepage. This is your starting point. Are you familiar with using bookmarks? Bookmarking the Namecheap site can save you time in the future. ###Utilize The Search Bar
On the homepage, you’ll find a search bar. It’s not just for searching domain names. Use it to find specific services or support articles that may assist you during the login process. Have you ever used a search bar for more than just searching? This could be your chance to explore its potential. ###Navigate To The Login Page
Look for the “Sign In” button, usually located at the top right corner. Click it to be redirected to the login page. Enter your credentials: username and password. Ensure they are correct to avoid login issues. Have you considered using a password manager? It can streamline your login process significantly. ###Check For Website Updates
Websites often update their interfaces. Be prepared for slight changes in layout or button positions. Are you keeping up with these updates? Staying informed can help you navigate efficiently. If the website looks different from your last visit, don’t panic. It’s just a modern touch to enhance user experience. ###Encountering Issues?
Sometimes, unexpected problems arise. Perhaps the page doesn’t load, or your credentials aren’t recognized. Look for troubleshooting guides or contact support. Namecheap offers resources to assist you in resolving issues. Have you faced login problems before? Sharing experiences in forums could provide helpful tips. In accessing the Namecheap website, a few simple steps can make all the difference in how smoothly you can manage your web hosting tasks.
Credit: www.namecheap.com
Navigating To Account Login
Accessing your Namecheap cPanel is simple. First, locate the account login page. This step is crucial for managing your website effectively.
Finding The Namecheap Homepage
Open your browser. Type “namecheap.com” in the address bar. Hit enter. You will see the Namecheap homepage.
Locating The Login Button
On the homepage, look at the top right corner. Find the “Sign In” button. It is easy to spot.
Clicking The Sign In Button
Click the “Sign In” button. A new page will open. This is the login page.
Entering Your Account Details
On the login page, enter your username. Type your password next. Ensure both are correct.
Accessing Your Dashboard
After entering details, click the “Sign In” button. You will reach your dashboard. Here, you can manage your cPanel.
Logging Into Your Namecheap Account
Accessing your Namecheap account requires logging into cPanel. Start by visiting the Namecheap website and entering your credentials. Navigate to the cPanel section for easy management of your hosting services.
Logging into your Namecheap account is the first step towards managing your web hosting and domain services effectively. Whether you’re a seasoned webmaster or a beginner starting your first website, accessing your Namecheap account is crucial. It’s more than just a routine task; it’s your gateway to a world of online possibilities. But how do you ensure a smooth login experience every time? Let’s break it down. ###Entering Username And Password
Start by visiting the Namecheap homepage. Look for the ‘Sign In’ button, usually located at the top right corner. Click it, and you’ll be directed to the login page. Type in your username. This is typically the email you used when signing up. Ensure there are no typos, as even a small mistake can lead to login errors. Next, enter your password. This should be a combination of letters, numbers, and symbols to keep your account secure. Use a password manager if you struggle to remember complex passwords. Ever forgotten a password? The ‘Forgot Password’ link is your friend—click it to reset. ###Using Two-factor Authentication
Two-factor authentication (2FA) adds an extra layer of security to your Namecheap account. After entering your username and password, you’ll be prompted for a second piece of information. This is typically a code sent to your phone or generated by an app. Have you ever wondered why 2FA is essential? Imagine losing access to your domains because someone hacked your account. With 2FA, even if someone gets your password, they can’t access your account without the second factor. Enable 2FA in your account settings. It’s a small step that provides big security benefits. Consider it as locking your door and then adding a deadbolt. Have you set it up yet? Incorporating these steps into your routine not only makes your login process smoother but also protects your digital assets. Are you ready to log in with confidence?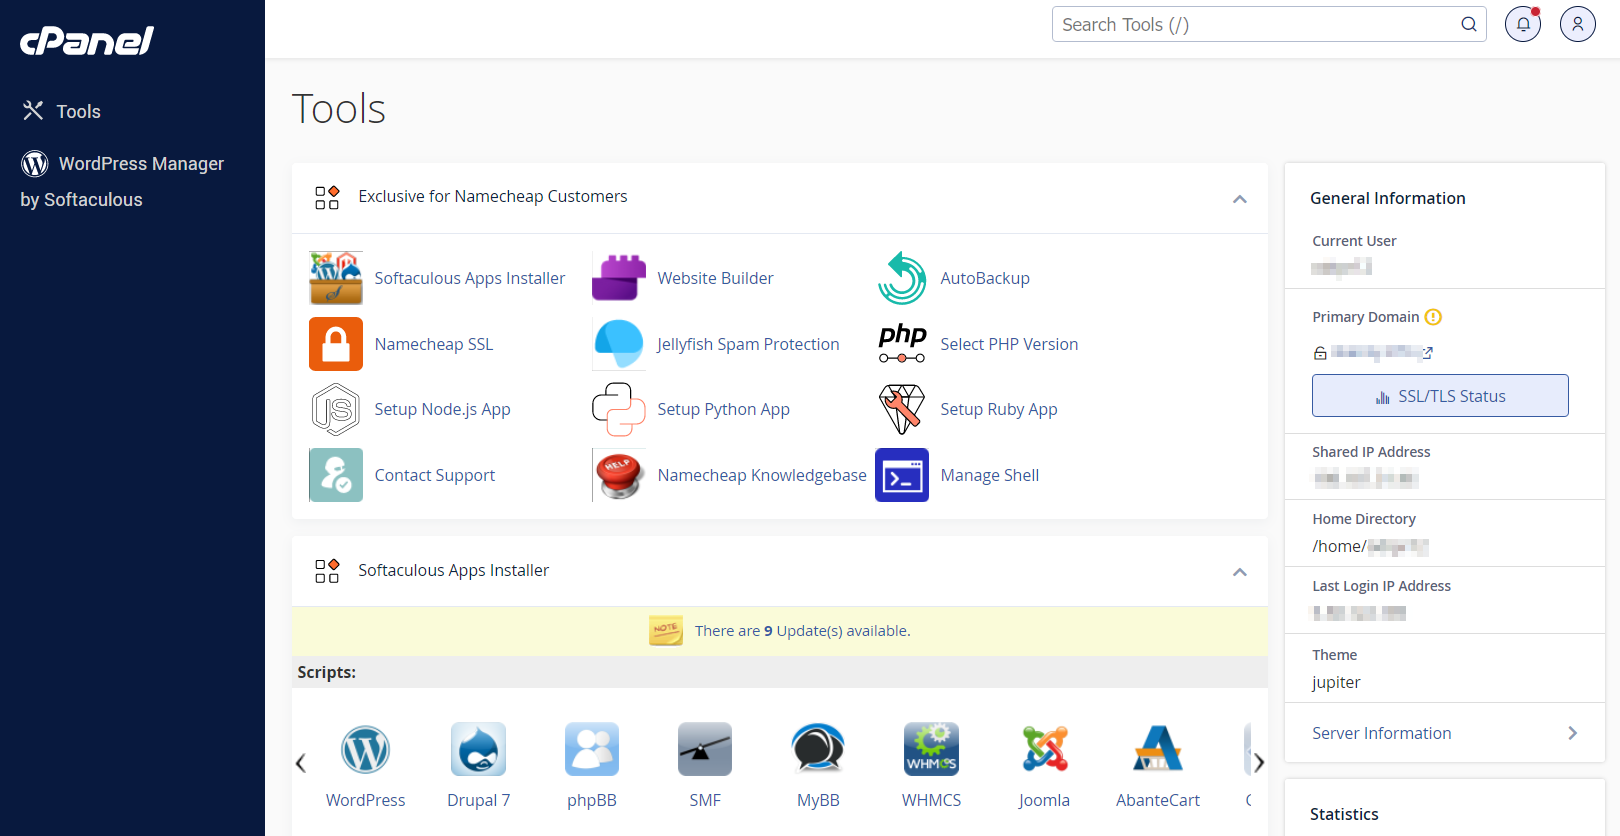
Credit: www.namecheap.com
Locating The Cpanel
Accessing your Namecheap cPanel is simple. First, visit your Namecheap account dashboard. Next, click on “Account” and find “cPanel. ” Enter your username and password. You will be directed to your cPanel interface.
Navigating the digital landscape of website management can feel overwhelming. Yet, accessing your cPanel via Namecheap is easier than you might think. Whether you’re a seasoned webmaster or new to the world of hosting, knowing exactly where to find your cPanel is crucial. Let’s explore the steps to locate your cPanel and smoothly manage your web hosting account. ###Finding The Hosting Section
First, log in to your Namecheap account. Once you’re in, you’ll find yourself at the dashboard. Look for the “Hosting List” on the left-hand side. This section is your gateway to all hosting-related features. Clicking on it will reveal a list of all the hosting plans you have with Namecheap. If you only have one, it’ll be straightforward. But if you manage multiple domains, this is where it gets interesting. ###Selecting Your Domain
In the “Hosting List”, each of your domains will be displayed. Next to each domain, you’ll see several options. Click on the “Manage” button next to the domain whose cPanel you want to access. This will lead you to the hosting management page. Here, amidst a wealth of options, you will find the “cPanel” button—your direct link to managing the technical aspects of your website. Have you ever wondered why some people struggle with accessing their cPanel? It’s often because they overlook this simple step. By focusing on the domain you want to manage, you streamline your tasks and avoid unnecessary confusion. Remember, understanding where to find your cPanel can save you time and headaches. Does this process sound simpler than you expected? Perhaps it’s time to log in and see for yourself.Accessing Cpanel
Accessing Cpanel is essential for managing your web hosting with ease. Namecheap provides a user-friendly interface to access Cpanel. Follow simple steps to reach your Cpanel dashboard effortlessly.
Using The Cpanel Login Button
Visit the Namecheap website. Navigate to the account login page. Enter your username and password. Once logged in, locate the Cpanel login button. Click the button to access your hosting panel.
The login button is usually prominent. It simplifies the process of accessing your web hosting tools. Quick and easy access ensures you manage your site effectively.
Understanding Cpanel Dashboard
The Cpanel dashboard is your control center. It displays various tools for site management. Familiarize yourself with its layout for efficient navigation.
On the dashboard, you find options like file management, database settings, and email configurations. Each section helps you control specific aspects of your website. Explore each feature to optimize your site’s performance.
Monitoring website analytics and security settings is straightforward. Utilize the dashboard to keep your site secure and functional. Regular use improves your understanding of its capabilities.
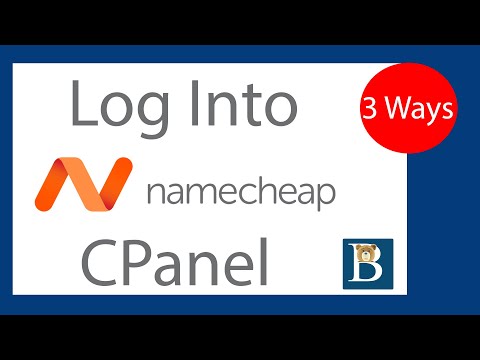
Credit: www.youtube.com
Troubleshooting Login Issues
Accessing your Namecheap cPanel can sometimes be tricky. You may face login issues due to several reasons. Whether it’s a forgotten password or technical glitches, resolving these problems promptly is crucial. This section will guide you through troubleshooting common login issues.
Recovering Forgotten Password
Forgetting your password is common. Namecheap provides a simple way to recover it. Visit the login page and click on “Forgot Password.” Enter your registered email address. You will receive a password reset link. Follow the instructions in the email. Create a new password that is strong yet easy to remember.
Contacting Support For Help
If you continue facing login issues, contacting support is your best option. Namecheap offers excellent customer service. You can reach out via live chat or email. Explain your issue clearly. Provide any error messages you encounter. The support team will guide you through the resolution process.
Tips For Secure Login
Accessing your Namecheap cPanel securely is crucial. Always use strong passwords and enable two-factor authentication. Keep your login details private to protect your website’s data from unauthorized access.
Securing your login process for cPanel on Namecheap is crucial to protect your website and personal data. It’s not just about entering your username and password; it’s about ensuring that your login credentials are safe from prying eyes. Let’s dive into some practical tips that will help you fortify your login.Creating Strong Passwords
A strong password is your first line of defense. Use a combination of uppercase, lowercase, numbers, and special characters. Avoid common words or easily guessable sequences. Think of a password manager. It can generate and store complex passwords for you. This not only simplifies your life but also enhances security. A friend once shared a tip that changed my approach: use a passphrase instead of a password. A sentence you can remember but others can’t guess, like “MyDogEats7Carrots!” adds length and complexity.Enabling Additional Security Features
Two-factor authentication (2FA) adds an extra layer of security. Even if someone knows your password, they can’t access your account without the second factor. Check Namecheap’s security settings for 2FA options. You might need to use an app on your phone to receive a code when logging in. Consider setting up IP address restrictions. This limits access to specific locations, reducing unauthorized login attempts. Think about where you usually access your cPanel and configure accordingly. How secure do you feel with your current login practices? Taking these small steps can make a big difference. Prioritizing security not only protects your data but also gives you peace of mind.Frequently Asked Questions
How Do I Access My Cpanel On Namecheap?
Log in to your Namecheap account. Go to “Account” > “Dashboard. ” Click “Hosting List,” then choose “Go to cPanel” for access.
How Do I Login Directly To Cpanel?
Access cPanel directly by typing “yourdomain. com/cpanel” in your browser. Enter your username and password. Use the hosting provider’s login details. Ensure you have the correct credentials for a smooth login process. Contact support if facing issues.
How To Access Terminal In Cpanel Namecheap?
Log in to your Namecheap cPanel account. Navigate to the “Advanced” section. Click “Terminal” to access it directly. Use this tool for command-line tasks securely. Ensure you have necessary permissions for terminal access.
How Do I Access Cpanel From Hosting?
Log into your hosting account dashboard. Find the cPanel icon or link. Click to access your cPanel. Alternatively, use your hosting provider’s direct cPanel URL and enter your login credentials. Ensure you have correct username and password for seamless access.
Conclusion
Accessing your cPanel through Namecheap is simple and straightforward. Follow the steps outlined to ensure a smooth login process. First, gather your login credentials. Then, navigate to the Namecheap website. Use the login button to reach your cPanel. Your dashboard will appear, ready for use.
Regular access helps manage your hosting effectively. This ensures your website runs smoothly. Remember to keep your login details secure. If you encounter issues, Namecheap support is always available to help. By following these steps, you ensure efficient management of your web hosting.
Enjoy seamless navigation and control over your website.


