
Have you ever tried to upload a large file to your WordPress theme editor only to be stopped by a pesky upload limit? It’s frustrating, isn’t it?
You have the perfect image or video that could transform your website, but it seems just out of reach. The good news is, you’re not alone, and better yet, there’s a solution. Learning how to increase the upload size in your WordPress editor can open doors to endless customization possibilities.
Imagine the freedom of uploading any file you need, without restrictions. This guide is designed to help you easily overcome those annoying upload limits, giving you the power to enhance your website just the way you envision. Ready to take control? Let’s dive in and unlock the full potential of your WordPress theme.
Checking Current Upload Limits
First, check the current upload limit in WordPress. Go to the media library. Upload a file. You might see a message about size limits. This shows the maximum file size you can upload. Knowing this helps when you want to increase it.
Sometimes, the limit is set by the hosting provider. You might need to contact them. They can change the server settings for you. Another way is to update the php.ini file. This file controls upload limits. Set new values for upload size in this file.
Some WordPress plugins can help too. They make it easy to change limits without coding. Always save changes and test uploading again. This ensures the new limit works well.

Credit: www.cloudways.com
Modifying Php Settings
First, locate your PHP configuration file. This file is usually named php.ini. It can be found in your server’s root directory. You might need FTP access to reach it. Use a text editor to open this file. Look for settings related to upload size.
Memory limit affects how much data your site can handle. Find the line that says memory_limit. It may look like memory_limit = 128M. Change this value to a higher number. For example, change it to 256M to allow more data handling.
Post max size is crucial for uploads. Look for the post_max_size setting. It controls the maximum size of your file uploads. If it says post_max_size = 8M, change it to 16M or higher. Save the file after making changes. Restart your server to apply these settings.
Editing .htaccess File
Adjusting the. htaccess file can enhance your WordPress theme upload size. Locate the file in your root directory. Add directives like `php_value upload_max_filesize 64M`. This increases the limit for theme uploads. Ensure the new size meets your needs for smoother updates.
Locating .htaccess
The .htaccess file is crucial for your WordPress site. It is usually in the root folder. This is where WordPress stores important settings. To find it, use an FTP client like FileZilla. Connect to your server. Look for the file in the main directory. Sometimes it’s hidden. You may need to enable hidden files.
Adding Size Parameters
Once you locate .htaccess, open it for editing. You can use a text editor like Notepad. Add the following code to increase upload size:
php_value upload_max_filesize 64M
php_value post_max_size 64M
php_value max_execution_time 300
php_value max_input_time 300
Save the changes. Close the editor. This code helps you upload larger files. Remember, use the exact format. Errors can cause problems. Now your WordPress can handle bigger uploads.
Using Functions.php
First, find the WordPress dashboard on your site. Click on Appearance, then choose Theme Editor. A list of files will appear. Locate the functions.php file. This file is essential. It controls many features of your theme. Always make a backup before editing. It prevents data loss.
Open the functions.php file. Scroll to the bottom. Add the new code snippet. This code will increase the upload size. Example code: @ini_set('upload_max_size' , '64M' ); . Make sure the code is correct. Small errors can cause problems. Save the changes. Now, your upload size is bigger.
Utilizing Plugins
Boost your WordPress theme upload size using plugins. Install a suitable plugin to adjust the upload limit effortlessly. Enhance your site’s functionality by following simple steps in the WordPress editor.
Recommended Plugins
Increasing upload size in WordPress can be challenging. Plugins make this task easier. WP Maximum Upload File Size is a popular choice. It boosts upload limits with ease. Increase Max Upload Filesize is another effective plugin. Both plugins are user-friendly.
Installation And Setup
First, go to your WordPress dashboard. Click on Plugins and select Add New. Search for your chosen plugin. Click Install Now. After installation, click Activate. Open the plugin settings. Adjust the upload size limit. Save your changes. Your upload size is now increased.
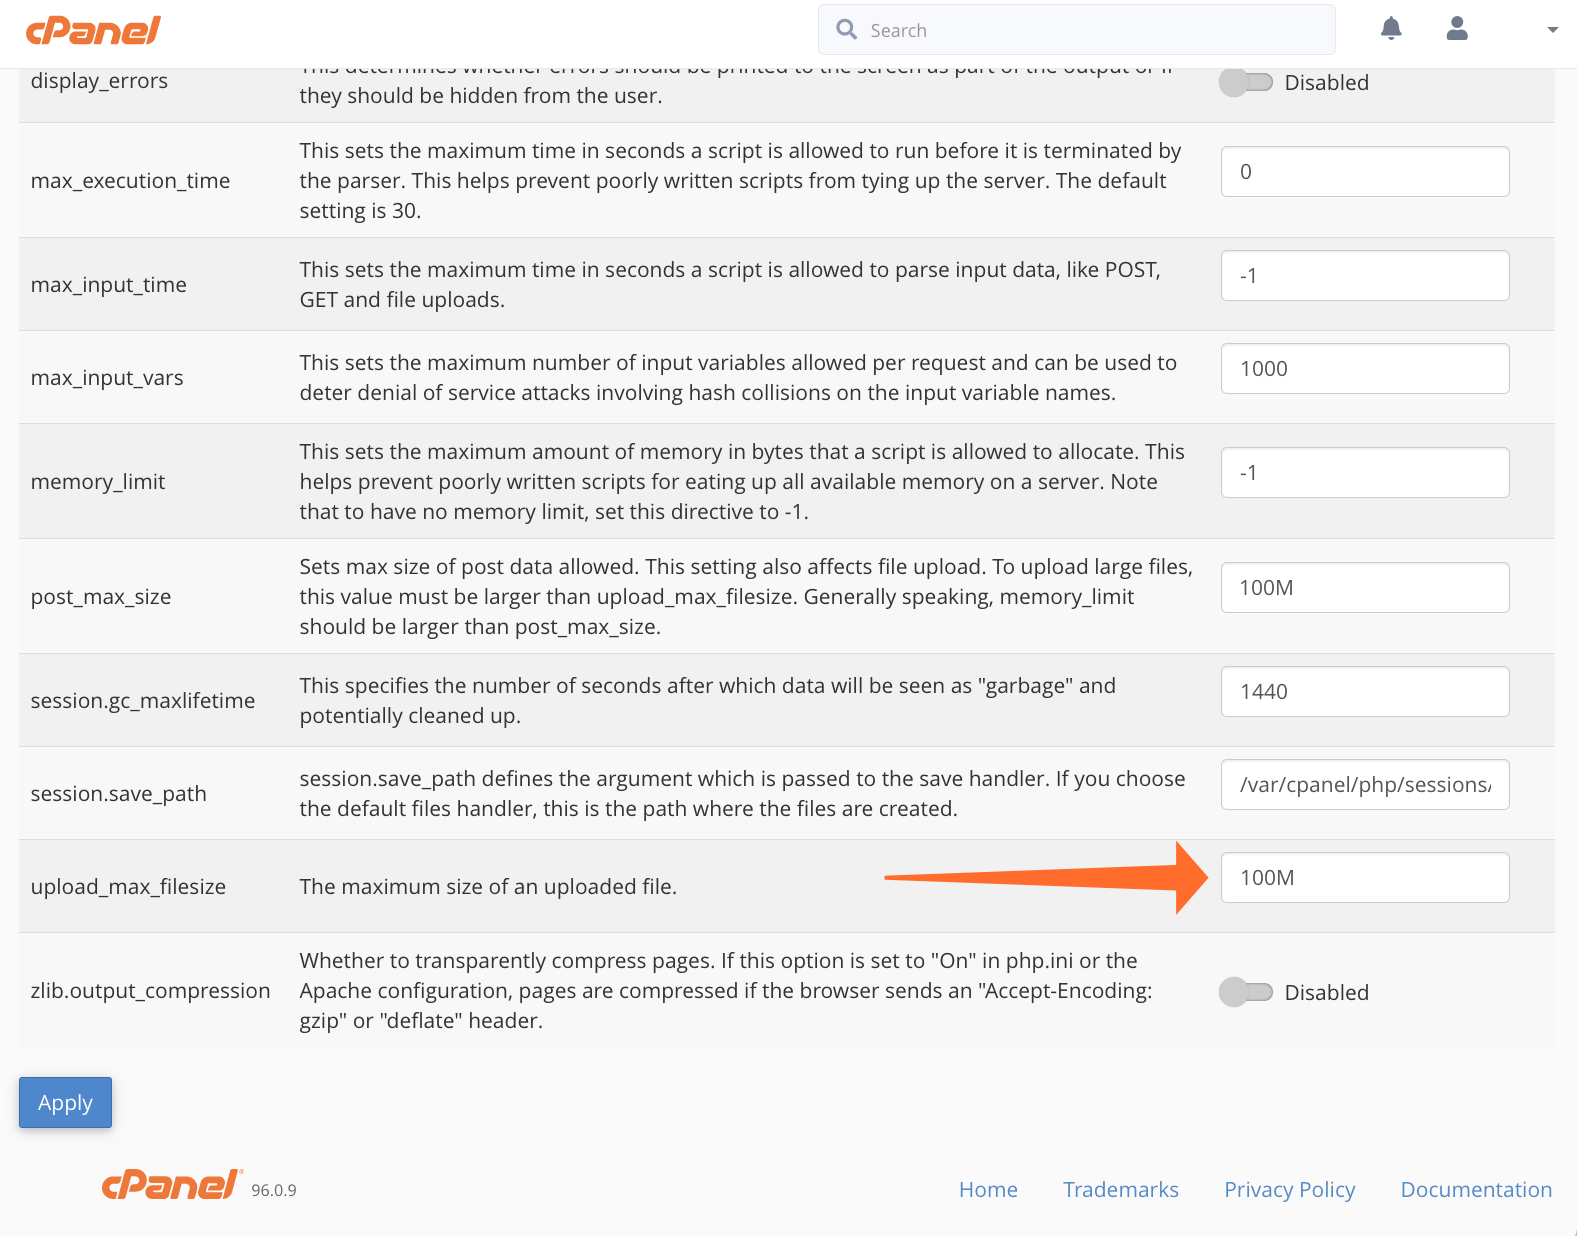
Credit: cpanel.net
Testing Changes
Upload a small file first. This checks if changes work. Use a file slightly larger than before. Ensure the upload succeeds. Note the new upload limit. This helps confirm the new settings.
Sometimes errors happen. Clear your browser cache. This can fix display issues. Check your internet connection too. A slow connection might cause problems. Ensure your hosting plan allows larger uploads. Contact support if errors persist. They can help solve the issue.
Consulting Hosting Provider
Hosting providers often set limits on upload size. These limits help keep servers safe and stable. Sometimes, the upload size is smaller than needed. It is important to know your hosting plan’s limits.
Check the hosting documentation for details. Some providers offer different limits based on the plan. Knowing these limits can save time and effort.
Reach out to your hosting provider for help. Ask if they can increase the upload size limit. They might offer a solution or point you to a guide.
Support teams can be very helpful. They know the server settings well. Sometimes a simple request can solve your problem.
Credit: www.ionos.com
Frequently Asked Questions
How Can I Increase Upload Size In WordPress?
To increase upload size in WordPress, access the php. ini file via FTP. Change the values of `upload_max_filesize`, `post_max_size`, and `memory_limit` to your desired limit. Alternatively, use a plugin like ‘Increase Maximum Upload File Size’ for a simpler approach.
Why Is My Upload Size Limited In WordPress?
WordPress limits upload size due to server settings. It ensures optimal performance and prevents resource overload. These settings are defined by your hosting provider, but you can modify them to suit your needs.
Can I Change Upload Size Using A Plugin?
Yes, you can change upload size using plugins. Plugins like ‘Increase Maximum Upload File Size’ allow easy modification of upload limits. Install the plugin, follow the instructions, and set your desired upload size.
Is Increasing Upload Size Safe For WordPress?
Increasing upload size is safe if done correctly. Ensure your server can handle larger uploads without performance issues. Regularly monitor your server resources and consult your hosting provider for guidance.
Conclusion
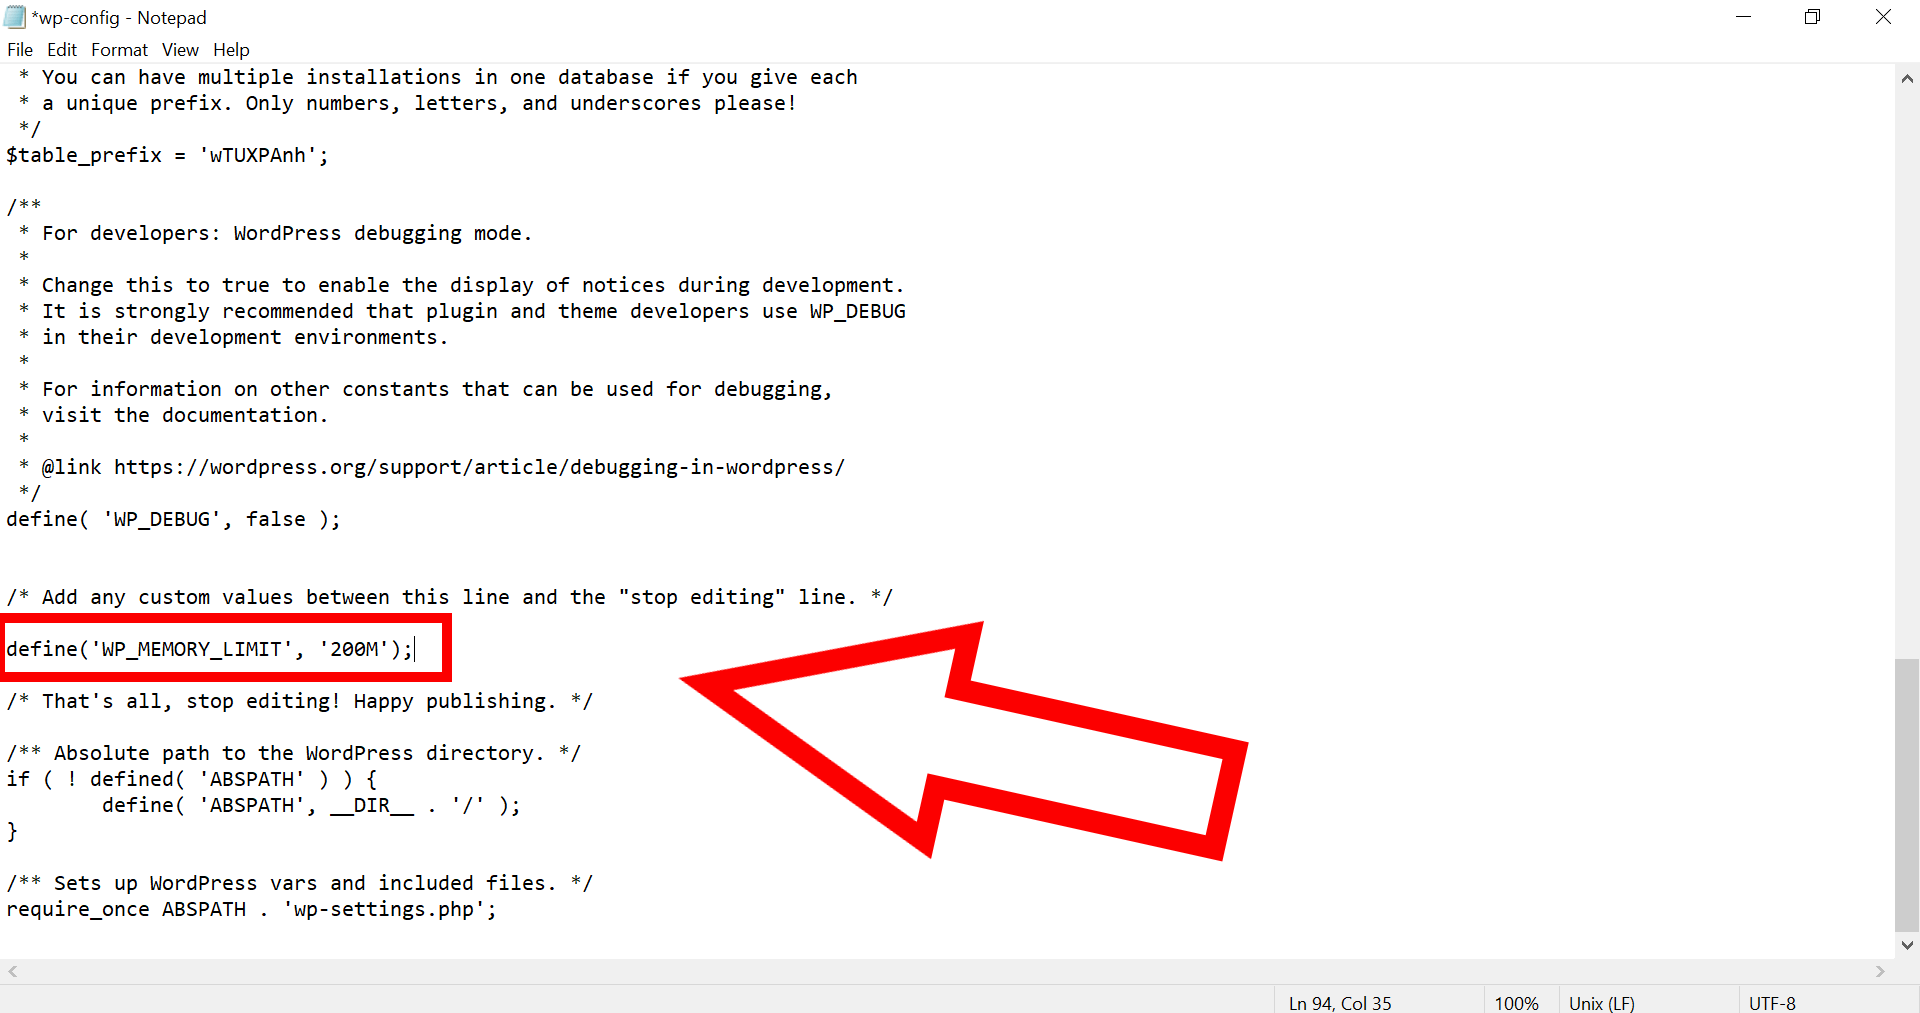
Increasing upload size in WordPress can enhance your website’s functionality. Larger files mean more options for themes and media. Following these steps simplifies the process. Start by checking your current upload limit. Then, adjust your PHP settings through cPanel or by editing the wp-config.
php file. Alternatively, use a plugin for a simpler solution. Ensure you back up your files before making changes. This prevents data loss. Regularly updating WordPress and your themes helps maintain performance. With these tips, managing upload size becomes straightforward.
Enjoy a smoother WordPress experience with more flexibility.


