
Are you eager to give your website a fresh look but worried about how to get started? Importing a demo for the Total WordPress Theme might just be the perfect solution for you.
With its impressive array of features, the Total theme offers you a quick and straightforward way to create a stunning, professional-looking website without the need for extensive design experience. Imagine having a website that stands out, attracts visitors, and retains their attention effortlessly.
Sounds enticing, right? Stick with us, and we’ll guide you through the simple steps to import the demo, transforming your vision into reality with ease and efficiency. Your website’s new look is just a few clicks away!
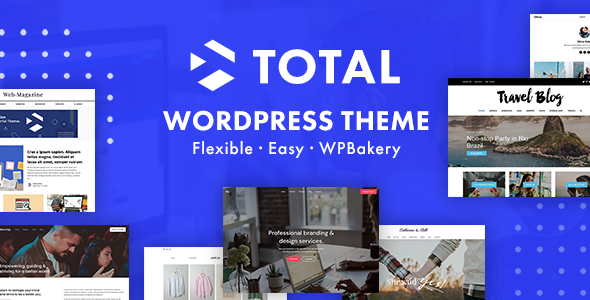
Credit: themeforest.net
Preparing For The Demo Import
Ensure Theme Installation is complete. The theme must be active. Check your WordPress dashboard for this. The right theme is essential. A wrong theme can cause errors.
Check Plugin Requirements before proceeding. Some demos need plugins. Plugins add features to your site. Check the demo documentation. Install any needed plugins first. This ensures smooth demo import.
Backup Existing Content is crucial. Save your current site data. Use a backup tool in WordPress. Backups keep your content safe. Restore from backup if something goes wrong. This step prevents data loss during import.
Accessing The Demo Importer
Open your WordPress dashboard. Find the Theme Panel on the left menu. Click on it. Look for the Demo Import option. This option helps you get demo content. It makes your website look like the demo.
In the Theme Panel, see the options. Find the one named Demo Import. Click to open it. You will see many demo choices. Select the one you like. Follow the steps to import it. Your site will soon have the demo content.
Choosing The Right Demo
Many demos are available for Total WordPress Theme. Each demo offers a unique style and layout. Choose a demo that fits your website’s needs. Some demos are best for blogs. Others work well for online shops. Think about your audience. Make sure the demo you choose matches your content.
Your website has goals. The demo should help you reach these goals. If you want to sell products, pick a demo with a strong shop layout. If your goal is to share stories, choose a demo with a clean blog layout. The right demo makes your website effective.

Credit: m.youtube.com
Initiating The Import Process
Choose the demo you like. Look at the available demos. Each one offers different styles and features. Find one that matches your needs. Click on the demo picture. This will open a preview. Make sure you are happy with it.
Go to the WordPress dashboard. Find “Theme Panel” and click. Then, select “Demo Importer.” Click on the demo you picked earlier. A progress bar will show the import status. Wait until it’s done. Do not close the browser. It might take some time. Once finished, check your site. The demo should be live now.
Troubleshooting Common Issues
Importing the demo for the Total WordPress Theme can face hiccups like server timeout or incorrect file permissions. Adjusting PHP settings or ensuring file permissions may resolve these issues. Checking server requirements is crucial for a smooth demo import experience.
Resolve Import Errors
Import errors can be tricky. First, check your internet connection. A weak connection can cause problems. Next, ensure you have enough server memory. Low memory can stop imports. Check your theme version. An outdated theme might cause issues. Update your theme to the latest version.
Address Missing Images
Missing images can be frustrating. Check your media library. If images aren’t there, try re-uploading them. Sometimes, images fail to upload during import. Verify file permissions. Incorrect permissions can block images. Make sure the path to images is correct. Wrong paths lead to broken images. Use a plugin to regenerate thumbnails if images appear blurry.
Customizing The Imported Demo
Change the layout to fit your needs. Use the customizer tool to make changes. Move sections around. You can also hide parts you do not want. Choose colors that match your brand. Fonts can be changed too. Pick a style that is easy to read. Make sure your site looks good on mobile phones. Check the preview often.
Replace the demo text with your own words. Add your own images and videos. Keep your content clear and simple. Use headings to organize information. Make sure your text is easy to read. Short sentences work best. Add links to important pages. Keep your media files small. This helps your site load faster. Check for errors before publishing.
Finalizing And Launching The Site
Importing a demo for the Total WordPress Theme is straightforward. Navigate to the theme’s demo importer section. Select your desired demo and click import. Watch as your site transforms, ready for final touches and launch.
Review Site For Consistency
Check every page for consistent design. Ensure fonts and colors match across pages. Look for any broken links or images. Make sure the site is mobile-friendly. Test it on different devices. Verify that all plugins work correctly.
Ask friends to review the site. They can spot mistakes you miss. Fix any errors they find.
Publish Finalized Website
After the review, it’s time to publish. Click the publish button on your dashboard. Make sure your site is visible to everyone. Check the site’s speed. Fast sites keep visitors happy.
Monitor the site often. Make updates when needed. Keep your content fresh. This helps in attracting visitors.
Credit: m.youtube.com
Frequently Asked Questions
How Do I Start The Demo Import?
To start importing the demo, navigate to the theme options in your WordPress dashboard. Select ‘Demo Import’ and choose the desired demo version. Click ‘Import’ to begin. Follow the prompts, and ensure your internet connection is stable for a smooth process.
This helps in replicating the theme’s look.
Can I Import Demo Without Plugins?
Importing demos usually requires specific plugins to replicate the theme’s design fully. Ensure all recommended plugins are installed and activated. These plugins facilitate the import process and ensure the demo functions correctly. Without them, some features might not appear as intended, affecting the theme’s overall look.
What If The Demo Import Fails?
If the demo import fails, check your server settings. Ensure your PHP settings meet the theme requirements. Increase execution time and memory limits if necessary. Verify that all required plugins are activated. Re-attempt the import process after adjusting settings for a successful import experience.
Is Demo Import Reversible?
Demo import is not inherently reversible; it overwrites current settings. Backup your site before importing to prevent data loss. Use a reliable WordPress backup plugin to save existing configurations. If needed, you can restore your site to its previous state using the backup files.
Conclusion
Importing a demo for the Total WordPress theme is straightforward. Follow the steps closely, and your website will look professional. Practice makes perfect, so don’t worry if it takes time. The demo content helps you visualize your site’s potential. It saves you effort and guides your design choices.
Customizing becomes easier with a clear starting point. Remember, patience is key in website building. Enjoy the process and explore different features. Your new site will soon be ready for visitors. Keep experimenting and learning as you go. Happy website building!


