
Are you looking to enhance your web development skills by hosting a PHP tester on your website? You’re in the right place.
Imagine having the power to test your PHP code instantly, right where you need it most—on your own site. This guide will walk you through the simple steps to set up a PHP tester, allowing you to streamline your coding process and boost your productivity.
You’ll discover how easy it can be to transform your website into a dynamic testing environment that not only saves you time but also elevates your coding skills. Keep reading to unlock the potential of hosting a PHP tester on your website, and take your web development game to the next level.
Choosing The Right Hosting Platform
Shared hosting means sharing a server with others. It is cost-effective for small sites. But it can be slow during peak times. Dedicated hosting gives you a whole server. It is faster and more reliable. But it is also expensive. Choose wisely based on your needs and budget.
Cloud hosting uses many servers. This makes your site fast and secure. It can handle more visitors. It is also scalable. This means you can add more resources as needed. Great for growing sites. But costs can go up with more usage.
Setting Up The Server Environment
First, you need a server. A server helps run your PHP scripts. Install PHP on your server. PHP is a scripting language. It makes web pages more dynamic. Check the PHP version. A newer version is better. Download PHP from the official site. Follow the instructions. Installation is easy and quick.
Apache and Nginx are web servers. They help deliver web pages. Choose one to use. Configure the server settings. Use simple commands for setup. Set your server root. This is where your files will go. Test your setup. Make sure everything works smoothly.
Database Integration
Setting up MySQL is easy. First, download the MySQL software. Install it on your computer. Follow the instructions on the screen. You will need to set a root password. Remember this password. It keeps your database safe.
After installation, open the MySQL command line. Type your password. Create a new database. Use this command: CREATE DATABASE php_tester; This makes a new database for your project. You can now add tables and data.
Connect to your database using PHP. Use the mysqli_connect() function. This function needs four things. First, the server name. Second, the username. Third, the password. Fourth, the database name. Here is an example:
Check if the connection works. Use the mysqli_connect_error() function. If there is an error, show a message. This helps you fix problems quickly. Always test your connection before using it.

Credit: www.amazon.com
Security Measures
SSL certificates keep data safe. They make your site secure. Information sent is encrypted. This means hackers can’t read it. Users trust sites with SSL. Browsers show a lock icon. This icon means it’s a safe site. Every website should have SSL. It’s a basic need. Without it, data is at risk.
A firewall protects your site. It stops bad traffic. Only safe traffic can enter. This keeps your site safe. Firewalls block hackers. They stop malware attacks. Setting up a firewall is easy. Many tools can help. Your site will be much safer with a firewall. Always keep it updated. This helps block new threats.
Deploying The Php Tester
Start by uploading the PHP files to your web server. Use an FTP client for this task. Ensure your server supports PHP. Select the correct directory for the files. This is usually the public_html folder. Verify all files are uploaded completely. Double-check for missing files. Missing files can cause errors.
Once files are uploaded, test their functionality. Open your browser and enter your website’s URL. Check if the PHP tester appears. Run a few sample tests to ensure it works. Look for errors or bugs. Fix any issues immediately. Test all main functions of the tester. Make sure everything runs smoothly. An error-free tester is crucial for users.
Performance Optimization
Host a PHP tester on your website to enhance performance optimization. Simplify testing by integrating tools directly into your platform. Ensure efficient debugging and seamless coding experiences for developers.
Caching Techniques
Caching makes websites faster. It stores data for quick access. This reduces the time to load pages. Use PHP opcode caching. It keeps compiled code in memory. This helps skip repeated compiling. Another method is data caching. It stores database results. This avoids running the same query again. Choose the right caching for your needs. Memcached or Redis are popular options. They handle cached data efficiently. Always clear cache if data updates. This ensures fresh content delivery.
Load Balancing
Load balancing shares traffic among servers. It prevents any one server from overloading. This keeps the site running smoothly. Use a load balancer to direct requests. It distributes them evenly. This improves performance and reliability. If one server fails, others take over. This ensures the site stays online. Round-robin is a simple load balancing method. It rotates requests among servers. More advanced options include least connections. It sends traffic to the server with the fewest connections.
Monitoring And Maintenance
Keep your PHP Tester running smoothly by checking it often. Regular updates and backups are essential. These steps ensure security and reliability for users.
Regular Updates
Keeping your Php Tester updated is important. Updates make things work better. They fix bugs and improve security. Always check for new versions. Install updates as soon as possible. This keeps your tester running smoothly. It also protects your site from hacks. Set a reminder to check for updates weekly.
Error Logs
Error logs help find problems. They show what went wrong. Check error logs often. They tell you where errors happen. Fixing errors helps your tester work right. It also helps your site stay safe. Use error logs to find common issues. Then, solve them quickly. This keeps your users happy.

Credit: computingforgeeks.com
Credit: kodekloud.com
Frequently Asked Questions
How Do You Host A Php Website?
Choose a reliable web hosting provider offering PHP support. Upload your PHP files using FTP or a hosting control panel. Configure necessary settings like database connections. Ensure your domain points to the hosting server. Test your website to confirm it’s functioning correctly.
How To Run Php Code On Web?
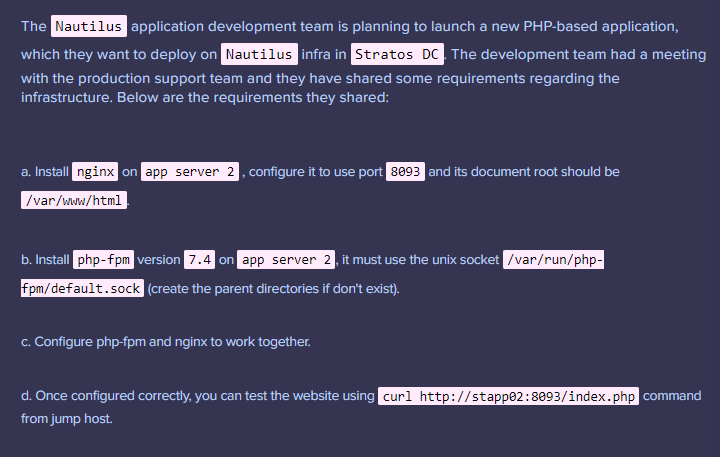
Install a web server like Apache or Nginx. Ensure PHP is installed. Place PHP files in the server’s root directory. Access files via a browser using “http://yourdomain. com/filename. php”. Ensure PHP code starts with “<? php" and ends with "?
>”. Configure server settings if needed for PHP execution.
How To Locally Host Php?
Install XAMPP or WAMP to host PHP locally. Download and run the installer. Start Apache and MySQL services. Place PHP files in the ‘htdocs’ folder. Access via browser using ‘localhost/[your-folder-name]’. Ensure PHP is installed and configured correctly. This setup allows testing and development on your computer.
How To Display Php Output In Web Browser?
To display PHP output in a browser, embed PHP code in HTML files. Use the “ tags. Save the file with a `. php` extension. Ensure the server supports PHP, then open the file in a browser. The server processes PHP code, showing dynamic content.
Conclusion
Hosting a PHP tester on your website is simple. It helps test code effectively. Follow the steps and ensure a smooth setup. Always prioritize security to protect data. Regular updates keep your tester functioning well. Troubleshooting issues promptly is important.
Reliable hosting guarantees better performance. Make sure your server supports PHP. This ensures the tester works seamlessly. Implementing these tips enhances your website’s capability. You can now test PHP code confidently. Enjoy improved efficiency and functionality. Your web development process becomes more streamlined.
Happy coding!


