
Are you ready to take full control of your WordPress blog and make it truly yours? Hosting your blog on your own domain is the key to building a stronger online presence and gaining more credibility.
Imagine your blog’s name right in your web address—simple, memorable, and professional. In this guide, you’ll discover easy, step-by-step instructions to get your WordPress blog hosted on your own domain. By the end, you’ll have the confidence to make your blog stand out and attract the audience it deserves.
Keep reading to unlock the full potential of your blog!
Choosing Your Domain Name
Choosing the right domain name is the first step to hosting your WordPress blog on your own domain. Your domain name is your blog’s address on the internet. It helps people find you easily. A good domain name makes your blog look professional and trustworthy.
Take time to pick a name that fits your blog’s topic and style. It should be simple, clear, and easy to remember. Avoid complicated spellings or long words. A strong domain name can help your blog grow and attract more visitors.
Tips For A Memorable Domain
Choose a name that is short and easy to spell. Avoid numbers and special characters. Use words that relate to your blog’s theme or content. Try to make it catchy and unique. Think about how it sounds when spoken aloud. A memorable domain helps people find your blog again.
Domain Extensions Explained
Domain extensions are the endings of your domain name. Common ones include .com, .net, and .org. The .com extension is the most popular and trusted. New extensions like .blog or .site also work well. Choose an extension that fits your blog’s purpose. Keep it simple to help visitors remember your site.
Where To Register Your Domain
Register your domain through a reliable domain registrar. Popular options include GoDaddy, Namecheap, and Google Domains. Compare prices and services before buying. Look for easy management tools and good customer support. Secure your domain by registering it for multiple years.
Selecting A Web Hosting Provider
Choosing the right web hosting provider is important for your WordPress blog. The host affects your site’s speed, security, and uptime. Good hosting ensures visitors can access your blog quickly and safely. It also supports your blog’s growth over time. This section explains the main types of hosting, key features to check, and compares popular services.
Types Of Hosting Available
Shared hosting means many websites share one server. It is cheaper but slower at times. VPS hosting gives more power by dividing a server into virtual parts. Each site gets dedicated resources. Dedicated hosting offers a whole server for your blog. It is fast and secure but costs more. Cloud hosting spreads your site over many servers. It is flexible and handles traffic spikes well.
Key Features To Look For
Choose hosting with good uptime, 99.9% or higher. Fast server speed helps your blog load quickly. Security features like SSL certificates and backups keep your site safe. Easy WordPress installation saves time. Look for helpful customer support available 24/7. Enough storage and bandwidth matter as your blog grows. Control panel access makes managing your site simpler.
Comparing Popular Hosting Services
Some popular hosts are Bluehost, SiteGround, and HostGator. Bluehost offers beginner-friendly plans with good WordPress support. SiteGround focuses on speed and strong security features. HostGator provides affordable plans with flexible options. Check each host’s pricing and renewal fees. See what features come with each plan. Read real user reviews for honest feedback. Choose a host that fits your blog’s needs and budget.
Setting Up Your Hosting Account
Setting up your hosting account is the first step to hosting your WordPress blog on your own domain. It involves choosing a hosting plan, accessing the control panel, and configuring the basic settings. These steps prepare your server to run WordPress smoothly and keep your site secure.
Registering Your Hosting Plan
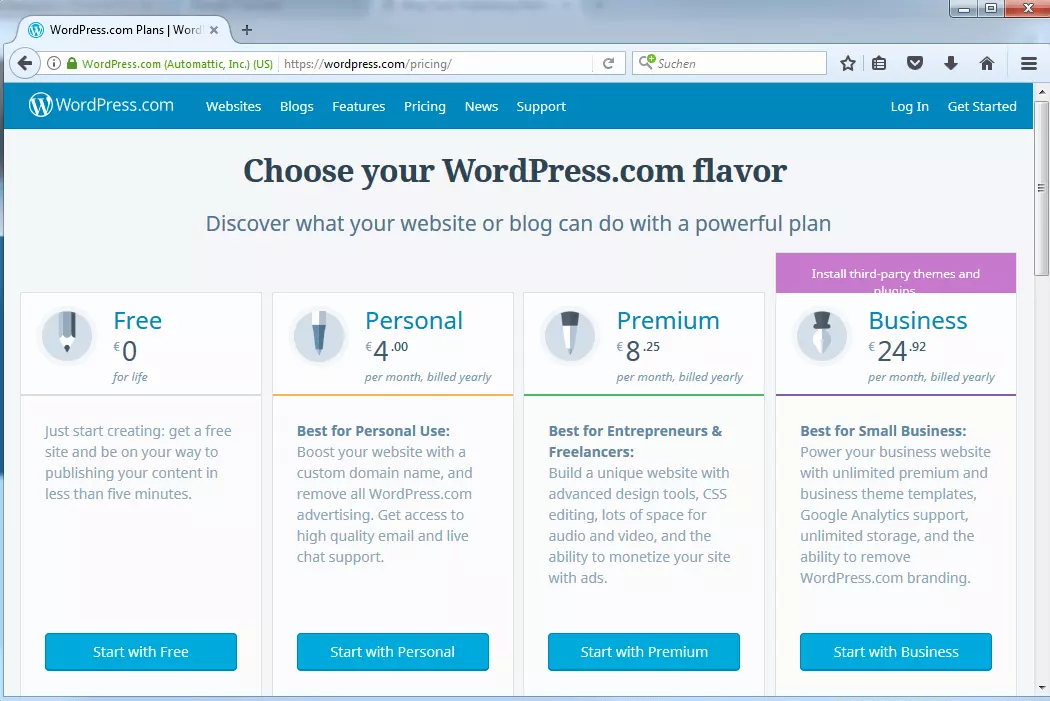
Start by selecting a hosting provider that fits your needs. Choose a plan with enough storage and bandwidth for your blog. Provide your contact details and create an account. Complete the payment process to activate your hosting. You will receive a confirmation email with login details.
Accessing The Control Panel
Use the link from the confirmation email to open the control panel. Enter your username and password to log in. The control panel is your dashboard for managing your hosting. It lets you install WordPress, create email accounts, and monitor your site’s performance.
Configuring Basic Settings
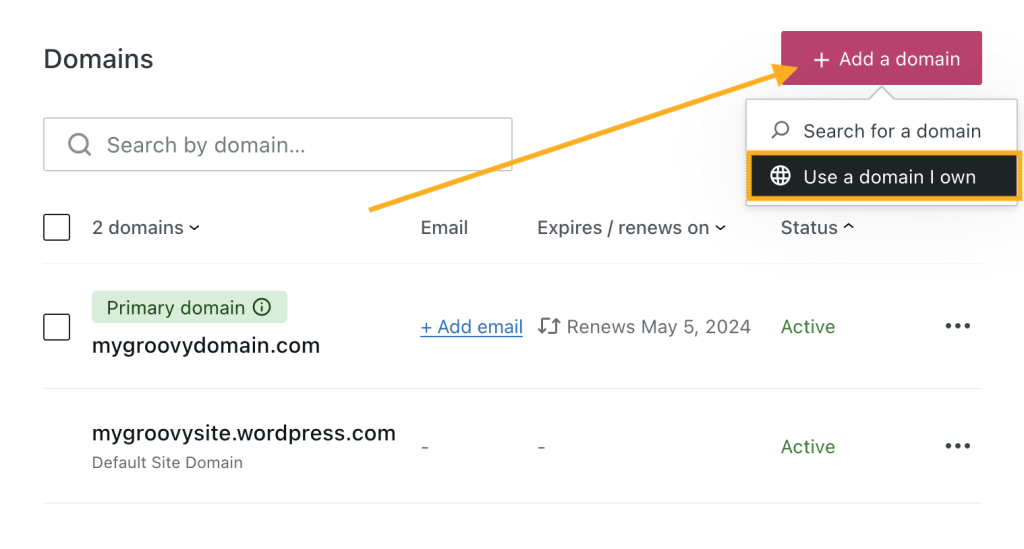
Set your preferred language and time zone in the control panel. Create a strong password for your account to keep it secure. Set up your domain name by linking it to your hosting plan. Check your email settings to receive important notifications. These steps ensure your hosting environment is ready for WordPress.
Credit: www.ionos.com
Connecting Domain To Hosting
Connecting your domain to your hosting is a key step to make your WordPress blog live. This process links your website address to the server where your blog files are stored. It allows visitors to find your site using your custom domain name. The steps are simple but require attention to detail.
Updating Dns Records
Start by logging into your domain registrar account. Find the DNS management section. Here, update the nameservers to point to your hosting provider. Alternatively, change the A record to your hosting server’s IP address. Save the changes carefully. This step tells the internet where to find your website.
Waiting For Propagation
DNS changes do not happen instantly. It takes time for the internet to update worldwide. This process is called propagation. It can take from a few minutes to 48 hours. During this time, your site may not appear correctly. Patience is important while waiting for full propagation.
Troubleshooting Common Issues
If your site does not load, double-check your DNS entries. Make sure the nameservers or A record match your hosting details. Clear your browser cache or try a different device. Use online tools to check DNS status. Contact your hosting or domain provider if problems persist.
Installing WordPress
Installing WordPress is the first step to hosting your blog on your own domain. It sets the foundation for your website. The process is straightforward and can be done in different ways. Choose the method that suits your skills and hosting provider. Let’s explore the common ways to install WordPress.
One-click Installation Methods
Many hosting services offer one-click WordPress installation. This tool automates the setup process. You just need to log in to your hosting control panel. Find the WordPress icon or app installer. Click it and fill in simple details like site name and admin info. The system installs WordPress in minutes. This method saves time and avoids technical steps. It is perfect for beginners.
Manual Installation Steps
Manual installation gives more control over WordPress setup. Start by downloading the latest WordPress package from wordpress.org. Upload the files to your hosting server using FTP. Create a MySQL database for WordPress in your hosting panel. Rename the wp-config-sample.php file to wp-config.php and add your database info. Visit your domain in a browser to run the installation script. Follow on-screen prompts to finish setting up your site.
Securing Your WordPress Site
Security is important after installing WordPress. Change the default admin username to something unique. Use a strong password for your admin account. Keep WordPress, themes, and plugins updated regularly. Install a security plugin to monitor and block threats. Enable SSL on your domain to protect data. Back up your site regularly to avoid data loss. These steps help keep your blog safe and reliable.
Credit: wordpress.com
Customizing Your Blog
Customizing your WordPress blog makes it truly yours. It helps you create a unique space that reflects your style and purpose. Simple changes can improve user experience and keep visitors coming back. Focus on design, functionality, and navigation to build a great blog.
Choosing And Installing Themes
The theme controls how your blog looks. Pick a theme that fits your topic and style. Use the WordPress dashboard to browse free and paid themes. Click “Install” and then “Activate” to apply the theme. Test different themes until you find one that feels right. Make sure the theme is mobile-friendly and loads fast.
Essential Plugins To Add
Plugins add new features to your blog. Install only the ones you need to keep your site fast. Some must-have plugins include SEO tools, security, and contact forms. Use the plugin search in WordPress to find and install them. Activate plugins and check their settings to customize how they work.
Setting Up Menus And Widgets
Menus help visitors find your content easily. Create menus in the Appearance section of the dashboard. Add pages, categories, and custom links to your menu. Widgets add extra content to sidebars or footers. Drag and drop widgets like search bars or recent posts into widget areas. Arrange them to improve navigation and user experience.
Optimizing For Performance
Optimizing your WordPress blog for performance improves user experience and boosts search rankings. Fast loading pages keep visitors engaged and reduce bounce rates. Simple steps can make your site much quicker and smoother. Focus on caching, image handling, and regular upkeep.
Caching And Speed Enhancements
Caching stores parts of your site so browsers load pages faster. Use plugins like W3 Total Cache or WP Super Cache for easy setup. Minify CSS and JavaScript files to reduce their size. Choose a reliable hosting provider with good server speed. A Content Delivery Network (CDN) can deliver your content worldwide swiftly.
Image Optimization Tips
Large images slow down your site. Resize images before uploading. Use formats like JPEG for photos and PNG for graphics. Compress images with tools such as TinyPNG or ShortPixel. Lazy loading helps by loading images only when visible on screen. This saves bandwidth and improves load times.
Regular Maintenance Tasks
Keep your WordPress updated to ensure smooth performance. Remove unused plugins and themes to avoid extra load. Regularly clean your database to remove clutter. Monitor your site speed with tools like Google PageSpeed Insights. Fix broken links and optimize your homepage content frequently.
Managing Backups And Security
Managing backups and security is vital for your WordPress blog. Protecting your data keeps your site safe. Regular backups help restore your site after problems. Strong security stops hackers and malware. This section explains backup solutions, security steps, and monitoring tips.
Backup Solutions For WordPress
Backups save your blog’s content and settings. Use plugins like UpdraftPlus or BackWPup for easy backups. Schedule backups daily or weekly based on your update frequency. Store backups outside your hosting server for safety. Download copies to your computer or cloud storage. Test backups by restoring them on a test site.
Implementing Security Measures
Start with strong passwords for your WordPress admin and database. Use two-factor authentication for extra login protection. Limit login attempts to stop brute-force attacks. Install security plugins like Wordfence or Sucuri to scan for threats. Disable file editing in the WordPress dashboard to reduce risks. Secure your site with an SSL certificate for encrypted data.
Monitoring And Updates
Keep WordPress core, themes, and plugins updated to fix security holes. Check your site regularly for unusual activity or errors. Use tools to monitor uptime and performance. Review security logs to detect suspicious access. Remove unused plugins and themes to reduce vulnerabilities. Regular monitoring helps catch problems early and keeps your blog safe.
Launching Your Blog
Launching your blog is an exciting step. This is when your hard work becomes visible online. Before you share your blog with the world, some important tasks need completion. These tasks will ensure your blog looks professional and works well for visitors.
Final Checks Before Going Live
Check your blog on different devices. Make sure it looks good on phones, tablets, and computers. Test all links to ensure they work. Fix any spelling or grammar mistakes. Confirm your contact form sends messages correctly. Set up a simple navigation menu. This helps visitors find posts easily. Also, check your site speed. A slow blog may lose readers quickly.
Promoting Your Blog
Share your blog on social media platforms. Tell friends and family about your new site. Join online groups related to your blog topics. Post helpful comments with a link to your blog. Use clear and catchy titles for your posts. This will attract more clicks. Consider writing guest posts for other blogs. This can bring new readers to your site.
Tracking Visitors And Analytics
Install tools like Google Analytics on your blog. This helps you see how many people visit. Learn which posts are most popular. Find out where your visitors come from. Use this information to improve your content. Track visitor behavior to make your blog better. Regularly check your blog’s stats to stay updated.

Credit: www.ssp.sh
Frequently Asked Questions
How Do I Connect My WordPress Blog To My Domain?
To connect your WordPress blog to your domain, update your domain’s DNS settings to point to your hosting server. Then, configure WordPress to use your domain URL in its settings for proper linking and visibility.
What Hosting Options Work Best For WordPress Blogs?
Shared hosting, managed WordPress hosting, and VPS hosting work well. Choose based on your budget, traffic needs, and technical skills for optimal performance and scalability.
Can I Transfer My Existing WordPress Blog To My Own Domain?
Yes, you can transfer by migrating your WordPress files and database to your new host. Update domain DNS and WordPress URL settings to reflect the new domain.
How Long Does Domain Propagation Take After Setup?
Domain propagation typically takes 24 to 48 hours to complete worldwide. During this time, your website may be intermittently accessible under the new domain.
Conclusion
Hosting your WordPress blog on your own domain gives you more control. You build your brand and make your site look professional. The steps are simple: buy a domain, get hosting, and link them. Keep your site updated and secure for best results.
Take your time and follow each step carefully. Soon, your blog will have its own home on the web. Start today and enjoy the freedom of your own domain.


