
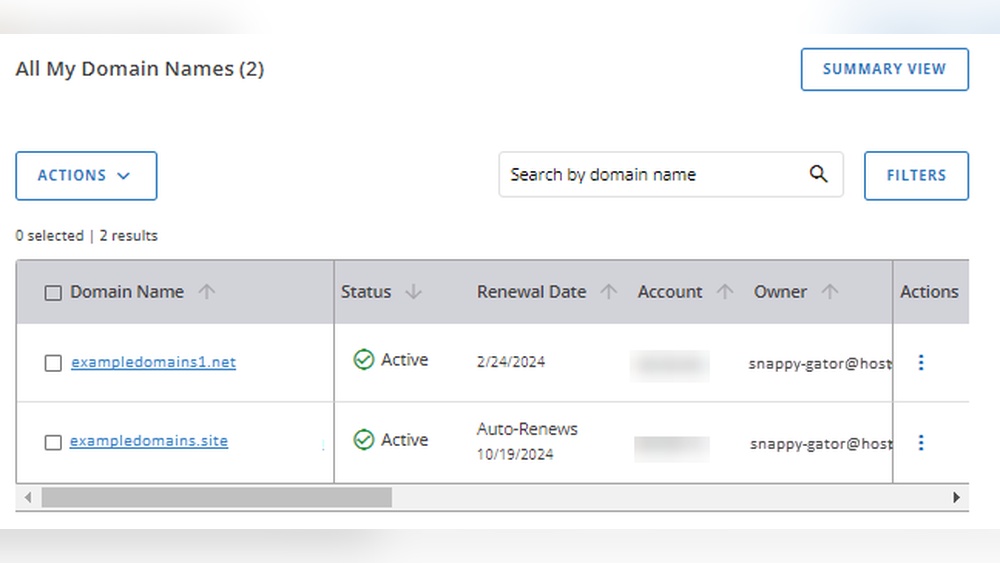
Are you looking to get more out of your HostGator account by hosting multiple domains? Managing several websites under one roof can save you time and money, but it might seem tricky at first.
Don’t worry—you’re about to discover simple, step-by-step ways to set up multiple domains on HostGator quickly and easily. By the end of this article, you’ll have the confidence to expand your online presence without extra hassle. Ready to unlock the full potential of your hosting plan?
Let’s dive in!
Choose The Right Hosting Plan
Choosing the right hosting plan is important for managing multiple domains on HostGator. The plan you pick affects site speed, security, and how many domains you can host. It also impacts your budget and the level of control you have over your hosting environment. Understanding the differences between hosting types and plans helps you make the best decision.
Shared Vs Dedicated Hosting
Shared hosting means many websites share the same server resources. It is cheaper and easy to manage. Perfect for small sites or beginners. Dedicated hosting gives you a whole server for your sites. It offers more power and control. Best for large websites with heavy traffic or special needs.
Shared hosting limits your resources but saves money. Dedicated hosting costs more but boosts performance. Choose based on your website size and traffic.
Benefits Of Hatchling And Baby Plans
HostGator’s Hatchling Plan supports one domain only. It is ideal for single websites with low traffic. This plan is affordable and includes basic features.
The Baby Plan allows hosting multiple domains on one account. It suits users who manage several small or medium sites. Both plans offer easy setup and good support.
Baby Plan gives more flexibility for domain management. Hatchling Plan fits tight budgets and simple needs.

Credit: www.binpress.com
Register And Set Up Your Domains
Registering and setting up your domains is the first step in hosting multiple websites on Hostgator. This process lets you manage different sites under one hosting account. Proper setup ensures smooth website operation and easy access for visitors.
Domain Registration Options
Choose where to register your domain names. Hostgator offers domain registration services. You can also use third-party registrars like GoDaddy or Namecheap. Register each domain with a unique name related to your brand or content. Keep your registration details accurate for easy management.
Connecting Domains To Hostgator
After registration, connect your domains to Hostgator hosting. Update the domain’s nameservers to point to Hostgator. This step allows Hostgator to manage your website files and emails. Use the Hostgator control panel to add each domain. Set up domain pointers or add-on domains depending on your plan. This setup keeps your websites organized and accessible.
Access Hostgator Cpanel
Accessing the HostGator cPanel is the first step to managing multiple domains. The cPanel is a control panel that lets you manage your website hosting easily. It provides tools for domain management, email setup, and file uploads.
Understanding how to log in and navigate the dashboard will save time. It makes adding new domains simple and efficient. This section covers the basics to help you start quickly.
Logging In
To log in, open your web browser and go to the HostGator login page. Enter your username and password. These details come from your HostGator welcome email. After entering your info, click the login button. You will be taken to your account dashboard.
If you forget your password, use the reset option. Follow the instructions sent to your email. Keep your login details safe to avoid trouble later.
Navigating The Dashboard
Once logged in, you see the main dashboard. It shows all your hosting options and accounts. Find the “cPanel” button and click it to open the control panel.
The cPanel dashboard has many icons. Look for “Domains” to manage multiple sites. Here, you can add new domains or subdomains. The layout is simple. Hover over icons for tooltips that explain their use.
Spend a few minutes exploring. Knowing where tools are helps manage your domains faster. The cPanel is designed for easy use, even if you are new.
Addon Domains Setup
Hosting multiple websites on one HostGator account saves money and effort. Addon domains make this possible without buying separate hosting plans. Setting up addon domains lets you manage several sites easily from one control panel.
This section explains how to create addon domains on HostGator. Follow these steps carefully to add new domains to your hosting account.
What Are Addon Domains?
Addon domains are extra websites hosted on a single hosting account. Each addon domain works like a separate website with its own content. They use the same hosting resources but have different domain names.
You can host multiple websites without buying multiple hosting plans. Addon domains help organize and control many sites easily. Each domain points to a specific folder in your hosting account.
Step-by-step Addon Domain Creation
Log in to your HostGator cPanel dashboard. Find the “Addon Domains” option under the “Domains” section.
Enter the new domain name you want to add. The system fills the “Subdomain” and “Document Root” fields automatically.
Check the folder path for your new domain’s files. Change it if you want a custom folder name.
Click the “Add Domain” button to complete the setup. Your new domain will now work as a separate website on your account.
Upload website files to the folder created for the addon domain. This folder holds all the content for the new site.
Manage Domain Dns Settings
Managing domain DNS settings is key to hosting multiple domains on Hostgator. DNS controls where your domain points online. Correct settings ensure your websites work smoothly. It lets you connect your domains to Hostgator servers easily.
Adjusting DNS settings helps you handle several domains from one Hostgator account. This avoids confusion and downtime. Clear DNS setup improves site speed and accessibility for visitors worldwide.
Pointing Domain To Hostgator
Point your domain to Hostgator by changing its DNS records. Login to your domain registrar’s control panel. Find the DNS management area. Add or edit A records to Hostgator’s server IP address. This directs the domain traffic to Hostgator.
Use the correct IP to avoid errors. Save changes and wait for DNS propagation. This can take a few hours to a day. Check your domain after propagation to confirm it points to Hostgator.
Using Nameservers Correctly
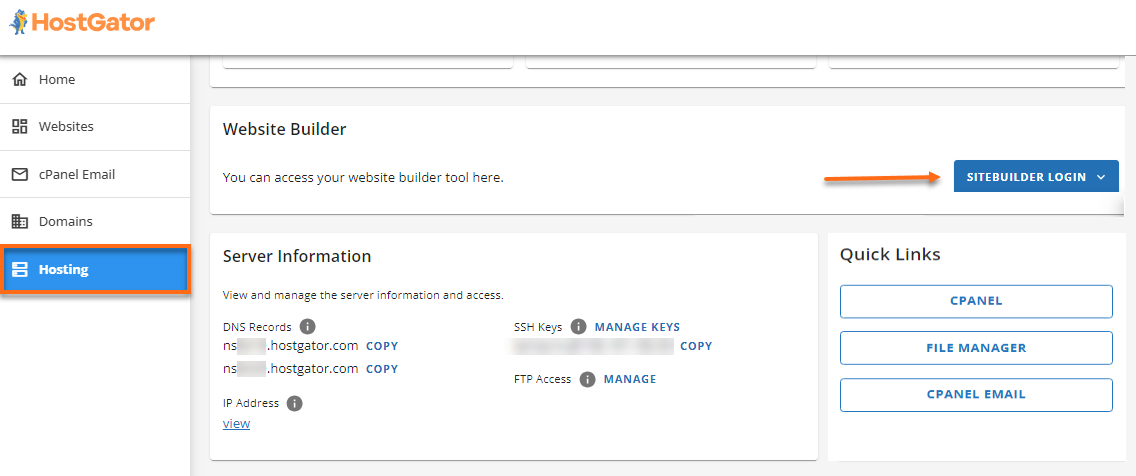
Nameservers tell the internet where to find your domain’s DNS records. Change your domain’s nameservers to Hostgator’s nameservers for easier management. Hostgator nameservers usually look like ns1.hostgator.com and ns2.hostgator.com.
Update nameservers at your domain registrar’s website. Replace old nameservers with Hostgator’s. Save changes and allow time for propagation. This method centralizes DNS control in Hostgator’s dashboard.
Using Hostgator nameservers simplifies hosting multiple domains. It helps manage all DNS settings from one place. This reduces mistakes and speeds up domain setup.
Credit: www.hostgator.com
Upload Website Files For Each Domain
Uploading website files for each domain is a key step in hosting multiple websites on HostGator. Each domain needs its own set of files in the correct folder. This ensures your websites load properly and stay organized. You can upload files in two main ways: through the File Manager or using FTP.
Using File Manager
File Manager is a tool inside your HostGator cPanel. It lets you upload files directly from your browser. Log in to cPanel, then open File Manager. Find the folder for your domain, usually under public_html or a subfolder with your domain name. Click the Upload button, select your files, and start the upload. The files will show in the folder after upload. You can also create folders and move files here.
Ftp Upload Process
FTP stands for File Transfer Protocol. It lets you upload files using a program like FileZilla. First, get your FTP details from HostGator cPanel. Open your FTP client and enter the host, username, and password. Connect to your server. Navigate to the folder for your domain. Drag and drop your website files from your computer to the server folder. FTP is faster for big files and multiple uploads.
Create Separate Email Accounts
Creating separate email accounts for each domain is essential when hosting multiple domains on HostGator. This setup keeps communication organized and professional. Each domain gets its own email addresses, making it easy to manage messages.
Separate email accounts help avoid confusion. You can assign emails to different teams or purposes. This way, emails stay relevant to each domain’s audience.
Setting Up Emails Per Domain
Log into your HostGator control panel first. Find the “Email” section and click on “Email Accounts.” Choose the domain for which you want to create an email.
Enter the email name and set a strong password. Decide the mailbox quota or leave it as default. Click “Create Account” to finish the setup. Repeat these steps for each domain’s email needs.
Managing Email Forwarders
Email forwarders send messages from one address to another automatically. This is useful if you want to receive all emails in one inbox.
Go to the “Email Forwarders” option in your control panel. Select the domain and add the email address to forward from. Then, enter the destination email address.
Save the forwarder. Test it by sending a message to the original email. This keeps your emails organized across different domains without checking multiple accounts.

Credit: www.hostgator.com
Test Your Multiple Domains
Testing your multiple domains after setting them up on HostGator is essential. This step ensures each domain works correctly and points to the right website. Skipping testing can lead to broken links or missing sites for your visitors.
Proper testing helps catch issues early. It saves time and improves your site’s performance across all domains.
Checking Domain Propagation
Domain propagation means updating DNS records across the internet. It can take up to 48 hours to complete. Use online tools like DNS Checker to see if your domain points to HostGator’s servers. Enter your domain name and check the A record or nameservers.
Clear your browser cache or try a different device. This helps see the latest changes. Once propagation finishes, your domains will load the correct websites.
Troubleshooting Common Issues
Sometimes domains do not work as expected. Start by confirming your domain is added correctly in HostGator’s control panel. Check if DNS settings match HostGator’s instructions. Incorrect DNS records cause errors.
Look for common errors like “Server not found” or “404 page.” These indicate DNS or file issues. Re-upload your website files if needed. Contact HostGator support if the problem continues.
Optimize Website Performance
Optimizing website performance is key to managing multiple domains on HostGator. Fast websites keep visitors happy and reduce bounce rates. Good performance also improves your search engine rankings. Focus on security and speed to deliver the best user experience.
Enable Ssl Certificates
SSL certificates protect your websites by encrypting data. They show visitors your site is safe. HostGator allows easy SSL installation for each domain. Secure domains build trust and improve SEO rankings. Always enable SSL on every domain you host.
Use Caching And Cdn
Caching stores copies of your pages to load them faster. It reduces server load and speeds up delivery. A Content Delivery Network (CDN) spreads your site across many servers worldwide. This makes your sites load quickly no matter where visitors are. Use caching and CDN together for the best speed.
Frequently Asked Questions
How Many Domains Can I Host On Hostgator?
Hostgator allows unlimited domains on most shared hosting plans. You can add multiple domains through your control panel. Check your specific plan details to confirm domain limits and features.
What Steps Are Needed To Add A New Domain On Hostgator?
Log in to your Hostgator cPanel, find the “Addon Domains” section, and enter your new domain details. Hostgator will guide you through setting up domain folders and DNS settings.
Does Hosting Multiple Domains Affect Website Speed On Hostgator?
Hosting multiple domains on Hostgator usually doesn’t impact speed if your plan has sufficient resources. Choose a plan that matches your traffic and resource needs to ensure optimal performance.
Can I Manage Emails For Multiple Domains On Hostgator?
Yes, Hostgator supports email accounts for each domain you host. You can create and manage separate email addresses through the cPanel for each domain.
Conclusion
Hosting multiple domains on Hostgator is simple and cost-effective. You just need to follow the right steps carefully. This way, you can manage several websites from one account. It saves time and makes website control easier. Keep your domains organized and updated regularly.
This helps your websites run smoothly and stay secure. Start today and enjoy managing multiple sites with less hassle. Your online presence will grow steadily with smart hosting choices.


