
Are you ready to take your Java web application from a local project to a live application on the internet? Hosting your Java web application online is a crucial step in bringing your ideas to life and sharing them with the world.
This process might seem daunting, but with the right guidance, you’ll find it’s more accessible than you think. Imagine the satisfaction of seeing your application available to users anywhere, anytime. This guide will walk you through every step, ensuring you have the knowledge to confidently host your Java web application.
Dive in and discover how you can make your application available to a global audience, enhancing its reach and impact. Let’s get started on turning your local project into a live, accessible web application!
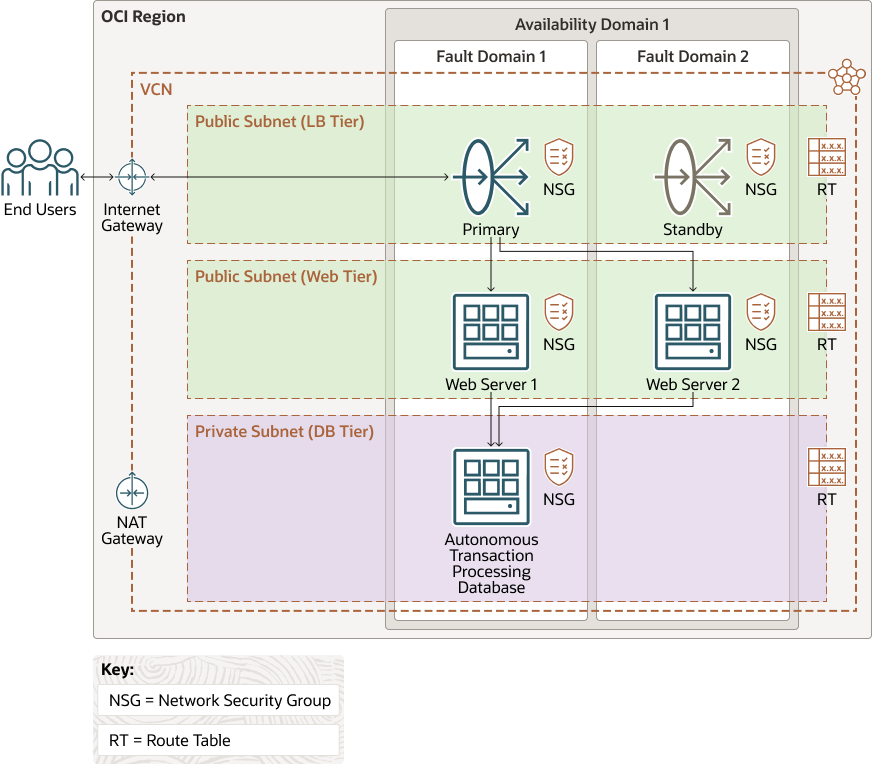
Credit: docs.oracle.com
Choosing A Hosting Provider
Picking the right hosting provider is key. Shared hosting is often cheaper. But it might be slower for big sites. Dedicated hosting gives more control. It is faster but costs more. Cloud hosting adjusts to your needs. It grows as your site grows. Check if they offer Java support. This is important for your application.
Hosting costs vary a lot. Monthly fees can be low or high. Look at the features offered. Some hosts have free SSL certificates. Others charge for this. Storage limits matter too. More storage means more room for your site. Customer support is also crucial. Good support helps when problems arise.

Credit: miap.csd.disa.mil
Setting Up The Server Environment
First, download the Java Runtime Environment (JRE). Visit the official Java website. Choose the latest version. Follow the steps to install it. Ensure that your system meets the requirements. This will help run your Java applications smoothly. Once installed, verify the installation. Open the command prompt and type java -version. It should display the installed version. If it does, the installation is successful.
A web server is needed to host your application. Popular choices include Apache Tomcat and Jetty. Download the server of your choice. Follow the installation guide. Place your Java application in the server’s webapps folder. Start the server using the provided script. Check if the server is running. Open a browser and enter localhost in the address bar. You should see the server’s welcome page. This means the server is ready.
Deploying The Java Application
First, make sure your application files are ready. All files should be in the correct format. Double-check your code for errors. Organize your files into folders. This helps in finding files easily. Compress the files if needed. Use a ZIP file for large projects. This makes transfer faster and easier. Rename files clearly. This avoids confusion later. Back up your files. Always keep a copy safe.
Choose the right tool for your needs. Apache Tomcat is popular for Java applications. It’s free and easy to use. Install the tool on your server. Follow the setup instructions carefully. Upload your application files to the server. Use FTP or similar methods. Configure the server settings. Make sure everything is correct. Test your application. Ensure it runs well on the server. Fix any issues you find.
Configuring Security Settings
SSL certificates keep data safe. They use strong encryption. This protects your web app. First, buy an SSL certificate from a trusted place. Next, install it on your server. This makes your site secure. Users see a lock icon in their browser. It shows your site is safe. Check your SSL often. Ensure it is up-to-date.
Firewalls act like guards. They block harmful traffic. Set up a firewall on your server. Choose rules for what gets through. Only allow trusted connections. Firewalls stop hackers and unwanted visitors. Keep your firewall settings up-to-date. Regular updates help block new threats. Always monitor your traffic. Ensure your firewall is working well.
Monitoring And Maintenance
Regular monitoring and maintenance ensure your Java web application runs smoothly on the internet. This process involves checking system performance, updating software, and fixing bugs. Regular attention helps prevent issues and improve user experience.
Tracking Performance Metrics
Keep track of your web app’s performance. Monitor metrics like response time and error rates. These numbers show how well your app runs. Watch for any spikes in these metrics. They can mean something is wrong. Use tools to get these numbers easily. Tools like New Relic or AppDynamics help a lot. They give you a clear picture. Adjust your settings if numbers look bad. This helps your app run smoothly. Good tracking keeps users happy.
Scheduling Regular Backups
Regular backups protect your data. Set a schedule for backups. Choose a time when the app is least busy. Use cloud storage for backups. It keeps data safe and easy to access. Test your backups often. Make sure they work well. If something breaks, you can restore data fast. Backups save you from losing important information. Keep them updated to avoid problems. A good backup plan is smart and safe.
Troubleshooting Common Issues
Server errors can cause big problems. Check the server logs first. They tell you what went wrong. Logs are like a diary for your server. They record every little event. If the server is out of memory, it might crash. Free up some space and try again. Sometimes, the server needs a restart. A simple restart can fix many problems. Make sure your server software is updated. Old software can have bugs. Update it to keep it safe and smooth.
Connectivity problems can stop your web app from working. First, check your internet connection. Is it stable? A slow connection can cause issues. Next, look at the firewall settings. Firewalls can block needed traffic. Make sure the right ports are open. Ports act like gates for data. Also, verify DNS settings. Wrong DNS settings can lead to web app issues. Adjust them if needed.

Credit: hostadvice.com
Frequently Asked Questions
How To Host A Java Web Application On The Internet?
Choose a reliable hosting provider. Set up a server with Java support. Deploy your application using tools like Apache Tomcat. Configure your domain and server settings. Ensure your application is secure and optimized for performance. Regularly update and maintain your server for smooth operation.
How To Run A Java Program In A Web Browser?
To run a Java program in a web browser, use Java applets or Java Web Start. Applets require the Java plugin, while Java Web Start uses JNLP files. Ensure your browser supports these technologies, as many modern browsers have dropped support for Java applets due to security concerns.
How Do I Put A Java Program On A Website?
Embed Java programs using applets or JSP. Convert your Java code into an applet or servlet. Use HTML to integrate. Ensure Java plugin support on browsers. Host necessary files on your server and test functionality. Maintain security standards for safe user interaction.
Where To Host A Java Web Application For Free?
Host your Java web application for free on platforms like Heroku, Render, or Vercel. These platforms offer free tier options, making them ideal for developers. They provide easy deployment, scalability, and integration with popular tools. Choose the one that best fits your project needs.
Conclusion
Ready to host your Java web application online? Start by choosing a reliable hosting provider. Ensure your server meets Java requirements. Deploy your application using tools like Tomcat or Jetty. Keep security in mind. Regular updates protect your application from threats.
Monitor performance for optimal user experience. Test thoroughly before going live. Hosting Java apps can seem tricky. But, with patience, it becomes manageable. Follow each step carefully. Soon, your application reaches users worldwide. Be prepared for challenges. They help you learn and improve.
Good luck with your hosting journey!


