
Have you ever wondered how to host your ASP.NET Web API seamlessly? Hosting your API can seem complex, but it doesn’t have to be.
Imagine having full control over your web applications, ensuring that they run smoothly and efficiently. This article is here to guide you through the process, step by step, making it easy to understand and implement. By the end of this guide, you’ll feel confident about hosting your ASP.
NET Web API. You’ll discover practical tips and techniques that simplify the process, helping you avoid common pitfalls. Whether you’re a seasoned developer or just starting out, this guide is tailored for you. Embrace the opportunity to enhance your API hosting skills and watch your projects reach new heights. Let’s dive in and unlock the secrets to effective hosting!
Setting Up The Development Environment
First, download and install Visual Studio. It’s free and easy to use. Choose the version that fits your computer. Next, get the .NET Core SDK. This helps you build your app. Make sure to have the latest version. After that, install SQL Server if needed. It stores your data. Follow the prompts to complete each installation. This ensures your environment is ready.
Open Visual Studio and start a new project. Select ASP.NET Core Web API as the template. Click next and enter a name for your project. Choose the latest ASP.NET Core version. This is important for new features. Enable authentication if needed. Then, click create. Your project setup is now complete. You are ready to start coding your API.
Creating The Web Api Project
Start by opening Visual Studio. Click on “Create a new project”. Choose the ASP.NET Core Web API template. This template gives you a basic structure. It has folders like Controllers and Models. The Controllers folder is where your code goes. The Models folder is for data classes.
After the template loads, check the Program.cs file. This file sets up your application. You will see methods to configure the server. Ensure that the necessary packages are installed. These packages help in building the API. Visual Studio makes everything easy and organized. It’s a great tool for beginners.
Configuring The Web Api
Define routes to handle requests. Use simple paths like “/api/books”. Set up controllers to manage data. Each route links to a method. This method processes the request. Define routes in the Startup class. Routes help in finding the right endpoint. Ensure each endpoint is unique. Use attributes to simplify routing. Attributes like [HttpGet] or [HttpPost] are common. They tell the API how to handle data.
Middleware acts as a pipeline. Each request passes through it. Add middleware in the Startup file. Use it to handle errors. It can also log requests. Middleware can authenticate users. It checks if users are allowed. Always put security middleware first. This keeps data safe. Use app.UseRouting() to set up the path. Add app.UseEndpoints() to define endpoints.
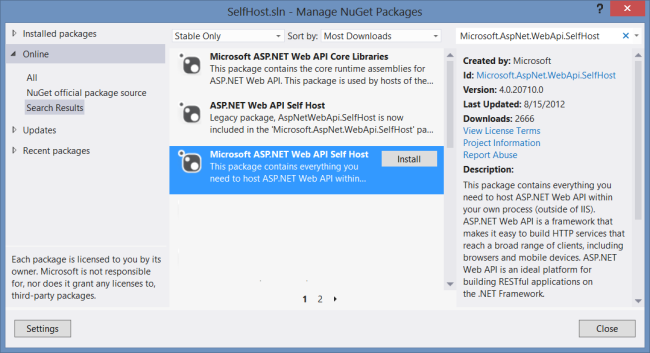
Credit: learn.microsoft.com
Implementing Security Measures
Keep your web API safe with strong security. Use authentication to check who is accessing your API. Only allow users with the right credentials. This helps keep unwanted users out. Authorization decides what each user can do. Some users might only read data. Others can make changes. This way, everyone does only what they are allowed. Always update your security rules. Keep your API protected.
HTTPS keeps data safe during transfer. It encrypts the data so others can’t read it. Setting up HTTPS is easy. Get an SSL certificate for your web server. Install the certificate properly. Ensure your API uses HTTPS for all communications. Users will feel safe knowing their data is protected. HTTPS is crucial for building trust.
Deploying The Web Api
Picking the right environment is crucial. Windows Server suits most needs. It supports Internet Information Services (IIS). Linux is another option. It works well for cross-platform apps. Consider cloud services like Azure. They offer scalability. Choose based on your app’s requirements.
IIS is common for hosting ASP.NET apps. Set up IIS on your server. Open the IIS Manager. Create a new site. Point it to your Web API folder. Ensure permissions are correct. Binding is important. Set it to the right port. Check the application pool. It should match your .NET version.
Azure offers a smooth deployment. Create an App Service in Azure. Upload your Web API files. Use Azure Portal for easy management. Configure settings as needed. Scalability is a key feature. Monitor your app’s performance. Use Azure tools for insights. Security settings are vital. Protect your data with Azure features.

Credit: www.youtube.com
Monitoring And Logging
Logging helps track issues in your web app. Use logs to record errors and important events. This helps find problems fast. Many tools can help with logging. Choose one that fits your needs. The log files should be easy to read. This makes it simple to understand what happened.
Logs can show who did what and when. This helps keep your app safe. Always store logs in a secure place. This keeps them safe from harm. Logs are a key part of monitoring your web app.
Monitoring tools watch your web app. They check if everything is working well. Use these tools to see the app’s performance. They help spot problems before they get big. Tools can alert you if something goes wrong. This means you can fix issues fast.
Choose a tool that is easy to use. It should be easy to set up. Look for tools that offer real-time data. This means you get updates as they happen. Good monitoring tools help keep your app running smoothly.
Handling Errors And Exceptions
Global Error Handling in ASP.NET Web API is crucial. It catches errors globally. This prevents crashes and helps users. Use a middleware to catch errors. It logs them for review. This is efficient and saves time.
To start, configure Exception Handling in the Startup.cs file. Add a custom middleware function. This function logs errors. It also returns a user-friendly message. Users will see a simple error message. This keeps the application professional.
Custom Error Responses
Custom Error Responses make applications user-friendly. They guide users when errors happen. Use a custom error page or JSON response. This helps users understand issues. Customize error messages for different errors. It improves user experience.
Set up custom error responses by editing the WebApiConfig.cs file. Define a response format. Include status codes and messages. This ensures clarity for users. Users can easily follow instructions. This reduces confusion and frustration.
Optimizing Performance
Caching speeds up your web API. It stores data for quick access. Use memory caching to keep data in RAM. This makes it fast. Distributed caching is helpful in larger systems. It keeps data across multiple servers. This improves response time. Output caching saves responses. It helps when data doesn’t change often. Choose the right caching strategy for your needs.
Load balancing spreads requests across servers. This helps manage traffic. It prevents one server from getting too busy. Use round-robin to distribute requests evenly. Least connections sends requests to the server with the fewest links. IP hash assigns requests based on the user’s IP address. Proper load balancing ensures your API runs smoothly.
Maintaining And Updating The Api
Keeping your API updated ensures smooth functionality and security. Regular checks prevent outdated features and vulnerabilities. Hosting Asp Net Web API requires consistent monitoring and timely updates to maintain optimal performance.
Versioning Strategies
APIs need updates. New features come up often. Old features may change. Versioning helps manage these updates. It keeps the API stable. Clients get access to the right version. This avoids errors and confusion. Use semantic versioning. It labels changes clearly. Clients know what to expect. Major changes get a new version number. Minor updates get a small bump. It’s simple and clear. Everyone stays on the same page.
Continuous Integration And Deployment
Continuous integration is key. It tests code often. Bugs get caught early. Developers fix them quickly. Continuous deployment helps too. It sends updates fast. Users get new features without delay. This keeps the API fresh. Automated tools make this easy. They handle the hard work. Developers focus on code. APIs stay reliable and up-to-date.

Credit: www.youtube.com
Frequently Asked Questions
Can We Host Asp.net Web Api Without Iis?
Yes, you can host ASP. NET Web API without IIS. Use Kestrel, a cross-platform web server. Kestrel supports self-hosting and can handle HTTP requests directly. For production, consider using Nginx or Apache as a reverse proxy. This setup is ideal for lightweight, flexible deployments.
How To Publish Asp.net Web Api?
To publish ASP. NET Web API, use Visual Studio. Select “Build” then “Publish” in the Solution Explorer. Choose a target like Azure or IIS, configure settings, and deploy. Ensure the server meets requirements. Validate deployment by accessing the API URL in a browser.
How To Create An Asp.net Web Api?
To create an ASP. NET Web API, install Visual Studio, create a new ASP. NET project, and select Web API template. Configure routing and add controllers with actions to handle requests. Test the API using tools like Postman to ensure it responds correctly.
How To Deploy Asp.net Web Api On Iis?
Deploying on IIS involves publishing your API from Visual Studio, then importing it into IIS Manager. Configure application pool settings and set permissions to ensure smooth operation. Test your deployment by accessing the API endpoints via browser or client application to confirm functionality.
Conclusion
Hosting an Asp Net Web API is simpler than you think. Start with the basics. Choose the right server setup. Follow best practices for security. Always test your API thoroughly. Keep performance in mind. Use caching to speed things up.
Document your API well. Stay updated with the latest tools. Understand the needs of your users. With these tips, your API will run smoothly. It will serve users effectively. Hosting an API requires attention to detail. But it’s worth the effort.
Enjoy the rewards of a well-hosted API. Happy hosting!


