
Are you ready to launch your own website without breaking the bank? Hosting a website can often seem like a daunting task, especially when you’re worried about costs.
But what if you could host your website for free? Yes, you heard that right! With Amazon Web Services (AWS), you can get your website up and running without spending a dime. In this guide, you’ll discover how AWS’s Free Tier can become your secret weapon to dive into the world of web hosting effortlessly.
Imagine the satisfaction of seeing your project live, all while keeping your budget intact. Intrigued? Keep reading to uncover the step-by-step process of making your website dreams a reality with AWS.

Credit: www.youtube.com
Getting Started With Aws
Creating an AWS Account is the first step. Visit the AWS website. Click on “Create an AWS Account”. Fill in your email and password. Enter your details. Choose a support plan. Verify your identity with a phone number. Now, your account is ready!
Once registered, navigating the AWS Management Console is next. The console is where you control everything. Log in with your credentials. Look for the search bar at the top. Type services you need like EC2 or S3. This helps you find services quickly. The console is your main tool. Learn it well for smooth sailing.
Setting Up Your Free Tier
Amazon Web Services offers a Free Tier for beginners. This tier has limits. You can use certain services for free each month. Storage space and data transfer are limited. Always check your usage. Exceeding limits can cost money. Choose services wisely. Free Tier is great for learning.
AWS has many services. Not all are free. EC2 and S3 are popular choices. EC2 helps run your website. S3 stores your files. Look for services marked as Free Tier. Use only what you need. Keep track of usage. Save costs by choosing wisely. Free Tier is a chance to learn AWS.
Launching An Ec2 Instance
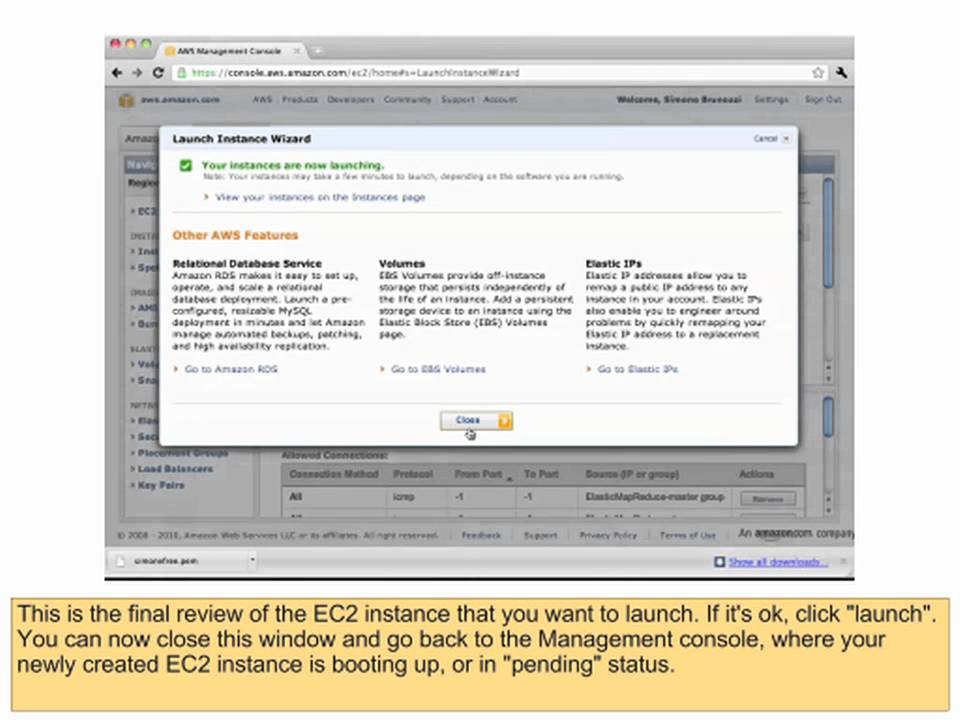
Choose the instance type that fits your needs. For beginners, the t2.micro type is free and good for small tasks. It provides a balance of CPU and memory. This is a good start for a basic website. Make sure to understand your needs first. You can change it later if needed.
Security groups protect your instance. They allow and block traffic. Create rules to control this. Allow HTTP and HTTPS for web traffic. This is important for your site to work. Limit access to your IP for SSH. This keeps your server safe. Always review these settings.

Credit: en.wikipedia.org
Installing A Web Server
Apache and Nginx are both popular web servers. Apache is easy to set up. Many people use it. Nginx is fast and good for high traffic. It can handle many users at once.
Think about your website needs. Apache is flexible. It is great for beginners. Nginx is better for speed. Choose the one that fits best.
Once you pick, start with installation. Use simple commands. Follow the instructions. Set up the server for your needs. Make sure the server runs correctly. Test it with a browser. Fix any errors you find. This ensures the server works well.
Deploying Your Website
Start by accessing the AWS S3 console. Create a new bucket for your files. Ensure the bucket name is unique and follows rules. Upload your website files into this bucket. Choose the correct permissions to make your site visible. Public access is often needed for websites. Check each file uploads correctly. This step ensures your website is ready for visitors.
Open your web browser. Enter the bucket URL in the address bar. Check if the website loads as expected. Ensure all links and images work. Fix any missing parts. Refresh the page to see changes. Testing ensures everything is in place. Visitors should see the site without errors. Make adjustments if needed.
Managing Dns With Route 53
Choose a domain name for your website. Register it with a domain registrar. Open the Route 53 dashboard in your AWS account. Click “Create Hosted Zone”. Enter your domain name. Click “Create”. Your domain is now in Route 53.
DNS records help connect your domain to your server. In Route 53, select your domain. Add a new record. Choose the record type, like A or CNAME. Enter the target value, like your server IP. Save the record. Your domain now points to your server.
Optimizing For Performance
CloudFront helps make your website faster. It is a Content Delivery Network. This means it brings your website closer to users. It stores copies of your site in many places. Users get the nearest copy. This reduces load time. Faster sites are better. They keep users happy. They also rank higher on search engines. This is good for your site. Always ensure your content is updated. CloudFront handles this easily. It checks for changes often. It makes sure users see the latest content. This is very important.
CloudWatch helps you see how your site is doing. It is a monitoring tool. It shows data about your site’s performance. You can see how fast your site loads. You can also see how many people visit. This helps find problems early. Fixing problems fast keeps users happy. CloudWatch sends alerts when something goes wrong. This means you can act quickly. Keeping your site smooth and fast is key. It makes sure users come back.
Ensuring Security And Compliance
Hosting a website on Amazon Web Services for free ensures security and compliance through robust infrastructure. AWS offers built-in security features like encryption and identity management, fostering a safe hosting environment. Use AWS Free Tier to explore these tools without costs while safeguarding your website.
Implementing Ssl Certificates
Securing a website is very important. SSL certificates help protect user data. They encrypt information sent between users and websites. Amazon Web Services (AWS) offers easy ways to add SSL certificates. Use AWS Certificate Manager to manage SSL certificates. It makes the process simple and secure. SSL certificates also improve trust with visitors. They see the secure padlock icon in their browsers. This shows the site is safe.
Regular Security Audits
Regular checks are essential for website safety. Security audits find weaknesses in systems. They help prevent attacks and data loss. AWS provides tools for audits. Use AWS Inspector for detailed checks. It scans for vulnerabilities and reports findings. Always update software to fix known issues. This keeps the website secure and compliant. A safe website protects both owners and users.
Cost Management Strategies
Setting up billing alerts helps manage costs. AWS offers tools to track spending. Users get alerts for high usage. These alerts help keep expenses in check. A simple setup can save money. Families can even use this for their accounts. Alerts ensure no unexpected bills. Users can set limits for better control.
Reducing costs on AWS is easy. Use reserved instances for savings. Turn off unused resources. This saves money fast. Choose the right instance types. Smaller ones cost less. Use AWS Free Tier for free services. Always monitor your usage. Adjust settings to fit your needs. Learn from AWS cost explorer. It provides tips and insights. These strategies help manage your budget.
Credit: www.youtube.com
Frequently Asked Questions
Can We Host A Website On Aws For Free?
Yes, AWS offers a free tier for hosting websites. It includes limited resources like EC2, S3, and RDS. Usage beyond the free tier incurs charges. Always monitor usage to avoid unexpected costs. The free tier is ideal for small projects and learning purposes.
How Much Does Aws Cost To Host A Website?
AWS hosting costs vary based on usage and services. Starting prices are around $3. 50/month for basic setups. Prices can increase with additional features, bandwidth, and storage. Utilize AWS’s cost calculator for precise estimates tailored to your needs. Free tier options available for beginners exploring hosting solutions.
Is There A Way To Use Aws For Free?
AWS offers a free tier with limited usage. It includes services like EC2, S3, and Lambda for 12 months. Always check specific service limits to avoid charges.
How Do I Host A Website On Aws?
To host a website on AWS, create an account and use the AWS Management Console. Launch an EC2 instance, configure security settings, upload files, and associate a domain using Route 53. Ensure the website is secure and optimized for performance.
Follow AWS documentation for detailed steps.
Conclusion
Hosting a website on AWS for free is possible and practical. Start with the AWS Free Tier. Utilize services like EC2 and S3. These tools are user-friendly. Set up your website efficiently. AWS offers reliable services. Secure your data and manage resources smartly.
Monitor your usage to avoid charges. Explore AWS features for better performance. Keep learning and adapting. A cloud-based approach can be beneficial. Enjoy the journey of hosting your own site. Happy building and good luck!


