
Have you ever wondered how to host a web service in Azure but felt overwhelmed by the technical jargon? You’re not alone.
Navigating the world of cloud computing can feel like trying to solve a complex puzzle without the picture on the box. But what if hosting your web service could be as straightforward as following a simple recipe? Imagine having the power to scale your business, reach a global audience, and enhance your service delivery—all while keeping your costs in check.
Azure offers you the flexibility and reliability to do just that. Whether you’re a small business owner, a developer, or someone looking to enhance your digital presence, understanding how to effectively host your web service in Azure can be a game-changer. In this guide, we’ll break down the process into bite-sized, actionable steps. You’ll discover how to leverage Azure’s robust platform to meet your unique needs, boost your efficiency, and drive your business forward. Let’s dive in and unlock the potential of your web service with Azure, transforming a daunting task into an exciting opportunity for growth. Keep reading, and you’ll be ready to take the next step with confidence!
Credit: gunnarpeipman.com
Setting Up Your Azure Account
Start by creating an account on Azure’s official website. Navigate to their sign-up page. Click the “Create account” button. Follow the steps to enter your details. You will need an email and a strong password. Azure will send a verification link to your email. Click on it to verify your account.
Once verified, log in to your Azure account. You can explore different features and services. Azure offers a free tier for beginners. This helps you get familiar with the platform without spending money. You can access the Azure Portal after logging in. Here, you will manage all your services. It is user-friendly and intuitive.
Choosing The Right Azure Service
Virtual Machines are like computers in the cloud. They can run any app. These machines offer full control over the system. You can choose the operating system. Install software as needed. They are good for apps needing custom setups. But, they require more management and care.
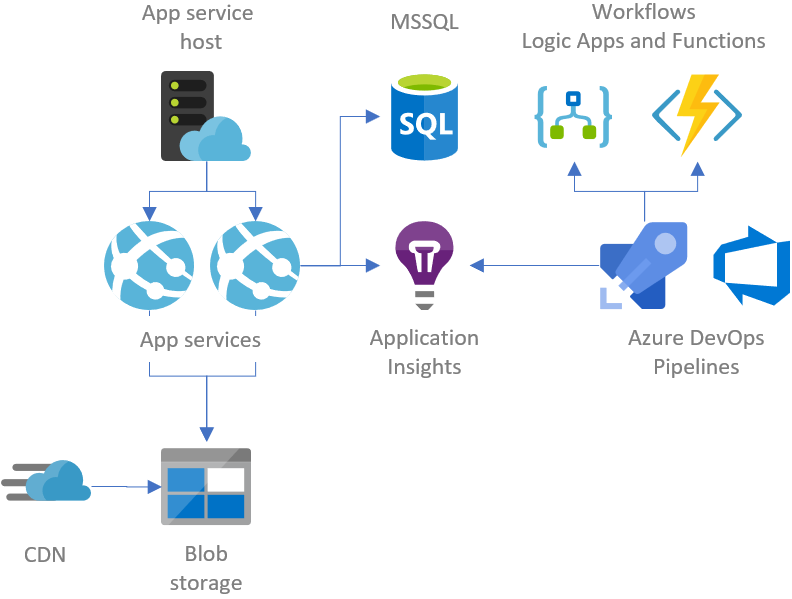
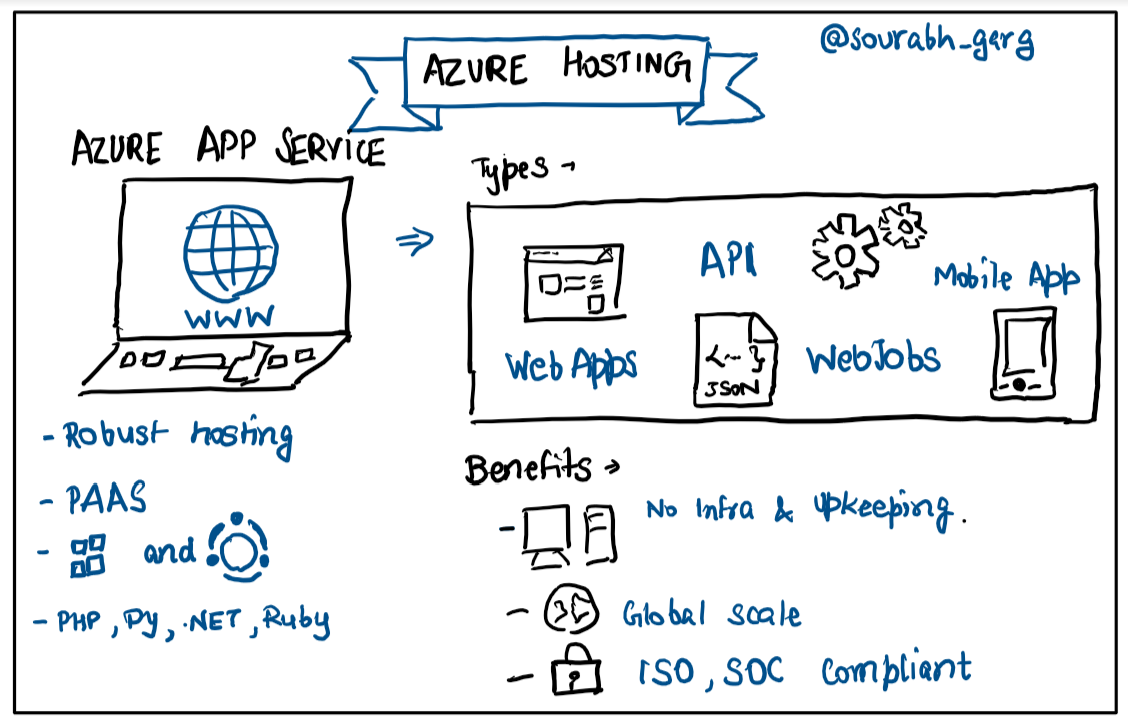
App Service is for web apps. It helps developers with easy setups. You can use it to host websites and APIs. It handles scaling automatically. This means it adjusts to how many users visit. It is a good choice for most web apps. Developers find it easy to use.
Azure Kubernetes Service manages containers. Containers are like tiny packages for apps. They help apps run smoothly. This service makes scaling simple. It is helpful for apps with many parts. Developers can update parts easily. It is a strong choice for large apps.
Configuring Your Environment
Picking the right operating system is crucial. Windows Server and Linux are popular choices. Windows is good for apps using Microsoft tech. Linux is best for open-source tools. Both can run on Azure smoothly. Check your application needs before choosing.
After choosing the OS, install key software. Install a web server like Apache or IIS. You may need a database such as SQL Server or MySQL. Ensure you have the latest version for security. Also, install any development tools your app needs. Double-check everything is configured correctly.
Credit: m.facebook.com
Deploying Your Web Service
Start by logging into the Azure Portal. Use your account details. Click on the “Create a resource” button. Choose Web App from the list. Fill in the required fields like app name and resource group. Make sure to select the correct subscription and plan. Lastly, review and hit create. Your web service is now live.
First, install the Azure CLI on your computer. Open the terminal and log in with your Azure account. Use the command az webapp up to deploy. Set the app name and resource group. Make sure you are in the right directory. Watch the terminal for success messages. Your app should now be running.
Start by creating a DevOps project. Link your Azure Repo or GitHub. Set up a pipeline for build and release. Use the templates provided by Azure. Make sure to configure the triggers for continuous deployment. Verify everything using the logs. Your updates will now deploy automatically.
Managing Resources
Azure helps you keep track of your web service. Tools like Azure Monitor show how your service is working. They send alerts if something is wrong. This helps you fix problems quickly. Alerts can be set for different events. Like when your server is too busy. This keeps your service running smoothly.
Azure lets you scale your web service easily. You can add or remove resources as needed. This means if more users visit your site, it won’t slow down. Azure’s scaling options help you manage traffic without hassle. It’s like having extra hands when you need them. This keeps your service fast and reliable.
Managing costs is important in Azure. You pay only for what you use. Azure provides tools to track your spending. This helps you stay within budget. You can set budgets and get alerts. This way, you know when you are spending too much. Cost management ensures you save money while using Azure.
Securing Your Web Service
Host your web service in Azure to ensure robust security and reliability. Azure provides tools for easy setup and management, enhancing your service’s protection. Take advantage of Azure’s scalable solutions for efficient web hosting tailored to your needs.
Setting Up Network Security
Network security is crucial for your web service. Use a firewall to block unwanted traffic. Firewalls act as a protective barrier. Only trusted sources should access your service. Configure Virtual Networks in Azure. They help manage traffic safely. Set up subnets for different resources. Subnets add an extra layer of security. Use Network Security Groups (NSGs) to control access. NSGs filter network traffic. Ensure only authorized users connect. This keeps your service safe.
Implementing Identity And Access Management
Identity and Access Management (IAM) is vital. IAM ensures the right users access the right resources. Use Azure Active Directory for user management. It helps in organizing users and groups. Assign roles based on job needs. Role-based access control restricts access. Limit admin access to a few trusted people. Regularly review permissions to avoid risks. Always use strong passwords for accounts. Enable multi-factor authentication for extra security. This adds a second layer of protection.
Troubleshooting Common Issues
Setting up a web service in Azure often involves tackling common problems. Issues like configuration errors or deployment failures can arise. Efficient troubleshooting ensures smooth operation and reduces downtime.
Debugging Deployment Errors
Deployment errors can be tricky. Check logs for clues. Look for error codes. These codes tell you what went wrong. Ensure all dependencies are met. Sometimes, files are missing. Verify settings in your environment. Wrong settings cause errors. Permissions can also be a problem. Ensure you have access. If an error persists, seek help. Azure has support options.
Handling Performance Bottlenecks
Performance issues slow things down. Monitor resources regularly. Check CPU usage. High CPU usage means trouble. Network traffic can cause bottlenecks. Too much traffic slows things. Optimize database queries. Slow queries affect speed. Scale resources if needed. More resources improve performance. Use Azure’s tools for monitoring. These tools help find issues. Azure support can help too.
Credit: faun.pub
Optimizing Performance
Caching helps speed up web services. It stores data temporarily. This reduces the need to fetch data again. Use Azure Redis Cache. It is powerful and easy to use. It saves time and improves performance. Keep often-used data in the cache. This makes web services fast and efficient. Choose caching wisely. It can greatly help your web service.
Load balancing spreads work evenly. It helps avoid overload on one server. Azure Load Balancer is a good tool. It shares tasks between servers. This keeps services running smoothly. It improves reliability. It also keeps users happy. Balance load carefully. It ensures stable and fast web services. It’s a smart way to manage traffic. Always use load balancing for better results.
Backup And Recovery
Azure makes hosting a web service straightforward. Ensure robust backup and recovery by using Azure’s built-in features. Protect your data with regular backups, minimizing downtime and data loss.
Setting Up Regular Backups
Regular backups are important for data safety. Azure provides tools for easy backups. You should schedule backups daily or weekly. This keeps your data safe from loss. Azure backups are stored in the cloud. It’s a secure place for your data. Make sure to check backup logs often. This ensures everything is working well. Always keep your backup settings updated. This helps in avoiding issues later.
Restoring From Backups
Sometimes data gets lost or damaged. That’s when you use backups. Azure makes restoring data simple. Just select the backup file you need. Then, start the restore process. It takes a few minutes. Once done, your data is back. Always test your restored data. This checks if everything works fine. Having backups means you can fix data quickly. No need to worry about lost files.
Frequently Asked Questions
How To Create A Web Service In Azure?
Sign in to Azure Portal. Navigate to “Create a Resource” and select “Web Service”. Choose your configurations, then click “Create”. Deploy your service with the desired code and settings.
Does Azure Offer Web Hosting?
Yes, Azure offers web hosting services. It provides scalable and secure options for hosting websites. Azure supports various programming languages and frameworks. Users can leverage Azure’s global data centers for optimal performance. Azure Web Apps, a part of Azure App Service, simplifies deployment and management of web applications.
Does Azure Have Web Services?
Yes, Azure provides web services. Azure offers a variety of services like App Services, API Management, and Logic Apps. These services help build, deploy, and manage web applications efficiently. Azure’s web services are scalable, secure, and reliable for businesses.
How Do I Setup An Azure Web Server?
Set up an Azure web server by creating a Virtual Machine. Choose a server image, configure settings, and deploy. Access through Azure Portal, manage resources, and ensure security protocols. Follow Azure documentation for detailed steps and best practices.
Conclusion
Hosting a web service in Azure is simple and efficient. Azure offers reliable and scalable solutions. You can set up your service quickly. Azure helps manage resources smoothly. It supports various programming languages. Security features protect your data. Azure’s tools make deployment easy.
Monitor performance with built-in analytics. Save time and reduce costs. Azure makes cloud management straightforward. Anyone can learn to host with Azure. Follow the steps and enjoy seamless service. Azure empowers your web service needs. Start hosting today and experience the benefits.


