
Are you ready to unlock the power of Java web services right from your own computer? Hosting a Java web service on localhost might sound complex, but it’s simpler than you think.
Imagine having the ability to test and develop your applications seamlessly, without the need for external servers. This guide is crafted just for you, to empower your development skills and enhance your project efficiency. Dive in to discover a step-by-step approach that will transform your localhost into a powerful development environment.
Curious to learn more? Let’s get started on this exciting journey and see just how straightforward it can be to host a Java web service on your local machine.
Setting Up Your Development Environment
First, download the Java Development Kit (JDK). Visit the official Java website. Choose the version that fits your computer. Follow the steps on the site. Install JDK on your computer. Ensure your system recognizes Java. Check with a simple command prompt test. Type “java -version”. If it shows the version, Java is ready.
Choose an Integrated Development Environment (IDE). Many prefer Eclipse or IntelliJ IDEA. Download your chosen IDE. Install it on your computer. Open the IDE. Set up your workspace. Connect the IDE with JDK. Go to settings, link Java path. Now, create a new Java project. Write simple Java code. Run the code to test setup. Ensure no errors appear.
Credit: code.visualstudio.com
Creating A Java Web Service
Java web services need a clear plan. First, outline the service structure. Use a simple model. Define service endpoints. Use basic methods. For example, GET and POST. Each method needs a clear path. Paths help locate the service. Use a reliable framework. Popular ones are Spring and JAX-RS. These make tasks simple. They also ensure clean code.
The next step is coding the service logic. Start with basic operations. Use simple data types. Focus on clear logic flow. Test each part carefully. Proper testing finds errors early. Use tools like JUnit. This helps in fixing issues fast. Always keep the logic easy to read. This helps others understand the code.
Using Apache Tomcat For Hosting
Apache Tomcat is a popular server for Java apps. First, visit the Apache Tomcat website. Download the latest version. Choose the version that matches your system. After downloading, locate the file. Double-click to run the installer. Follow the steps in the setup. Make sure you install Java Development Kit (JDK) before starting. Without JDK, Tomcat won’t run. Tomcat needs JDK to execute Java code.
After installation, configure Tomcat. Open the Tomcat folder on your computer. Locate the ‘conf’ folder. Find the ‘server.xml’ file inside. Open it with a text editor. Set the port number for localhost. The default is usually 8080. Check if it’s available. Change it if needed. Save changes. Restart Tomcat to apply settings. Open a browser. Type ‘localhost:8080’. Check if Tomcat is running. You should see the Tomcat homepage.
Credit: openliberty.io
Deploying Your Java Web Service
First, create a WAR file for your Java web service. A WAR file is like a box. It holds all your web files. These files include Java classes, libraries, and configuration files. Use your favorite IDE. Many people choose Eclipse or IntelliJ IDEA. These tools can package your project into a WAR file. Save this file in a safe place. You will need it for deployment.
Now, use Apache Tomcat for deployment. It is a popular server. It helps run Java web services. Install Tomcat on your computer. Place the WAR file in the ‘webapps’ directory. Then, start Tomcat. Your web service should now be running. Open your browser. Type localhost in the address bar. You will see your web service. It is now live!
Testing Your Web Service Locally
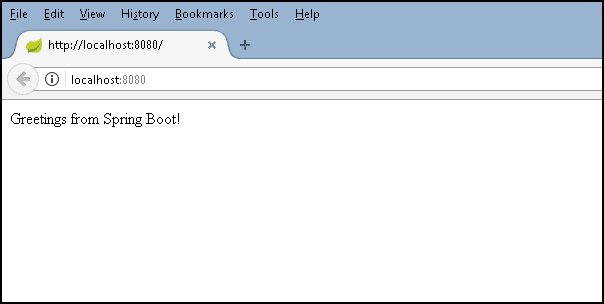
Open your web browser. Enter the local address of your service. It usually looks like http://localhost:8080/yourService. Check if the page loads. If it does, your service works.
Look for any error messages. They help you fix issues. Make sure the Java service is running. Otherwise, the page won’t show.
Download and open Postman. Create a new request. Use the same local address as before. Set the method to GET. Click Send. This checks if the service responds.
Look at the response. It should show data or a message. If not, check your service settings. Make sure everything is correct. Test different endpoints. Ensure all work properly.
Troubleshooting Common Issues
Setting up a Java web service locally involves common troubleshooting steps. Check server configurations and ensure ports are correctly mapped. Verify your Java environment and dependencies are properly installed to avoid errors.
Resolving Port Conflicts
Port conflicts happen when two apps want the same port. Check which ports your service uses. Use a tool to see what ports are busy. Close apps using the same port. Or, change your service to use a free port. Restart your service after making changes. This helps fix the conflict.
Debugging Service Errors
Errors can show up for many reasons. Check error messages in the log. Logs often tell you what went wrong. Look for common errors like missing files or bad code. Update your Java software if it’s old. Sometimes, old versions have bugs. Test your service after each fix. This makes sure it works well.

Credit: stackoverflow.com
Frequently Asked Questions
How Do I Host A Website On Localhost?
Install software like XAMPP or WAMP. Place your website files in the ‘htdocs’ or ‘www’ directory. Launch the software. Access your website via ‘localhost’ in your browser.
How To Host A Java Web Server?
Install Java Development Kit (JDK) and Apache Tomcat on your server. Configure your Java application. Deploy it using Tomcat’s manager app. Ensure ports 8080 (or your chosen port) are open in your firewall settings. Start the Tomcat server and access your Java web application through your domain or server IP.
How To Run Java Web Service?
Install a Java Development Kit (JDK) and Apache Tomcat server. Deploy your web service on Tomcat. Use tools like Eclipse or IntelliJ IDEA for development. Access the service through a web browser or client application by entering the server URL.
Ensure all dependencies are correctly configured.
How To Run A Java Project Locally?
Install Java Development Kit (JDK) and an Integrated Development Environment (IDE) like Eclipse. Open the project in the IDE, configure the build path, and set the main class. Run the project using the IDE’s run feature. Ensure dependencies are correctly set in the build configuration.
Conclusion
Hosting a Java web service on localhost is straightforward. Follow the steps carefully. Use the right tools and configurations. Start by setting up your environment. Ensure Java is installed correctly. Test your setup for any issues. Troubleshoot errors promptly. Check your firewall settings.
Verify your web service works locally. Practice makes perfect. Experiment with different configurations. Learn through trial and error. This approach builds confidence. Your localhost setup is now ready. A strong foundation for future projects. Keep exploring and refining your skills.
Happy coding!


