
Struggling with a cluttered website can be a real headache. You know your content is top-notch, but those menus just seem to take over your page.
What if you could have a cleaner, more streamlined look that keeps visitors focused on what matters most? In this guide, you’ll discover the simple steps to hide the menu on your WordPress theme. Imagine the seamless navigation and enhanced user experience you’ll create, leading to more engagement and conversions.
Don’t let your menu distract your visitors. Learn how to take control of your site’s appearance and captivate your audience from the moment they land on your page. Dive in, and let’s transform your website together!
Reasons To Hide Menu
Hiding the menu can make your website look clean. It helps visitors focus on important content. This can improve the user experience. A hidden menu can also enhance mobile view. Large menus sometimes cause issues on small screens. Simplifying the menu can make navigation easier. It’s a good choice for one-page websites. The design becomes more focused. This can help in reducing distractions.
Privacy is another reason. Some sites need to protect certain pages. Hiding the menu can limit access. This is useful for member-only content. It keeps sensitive information secure. A hidden menu can help in maintaining exclusivity. It’s also a way to control content access.

Credit: docs.themeisle.com
Preparing Your Theme
Discover how to hide the menu on a WordPress theme with a few simple steps. Customize your website by accessing the theme settings and adjusting the menu visibility. Enhance your site’s appearance effortlessly.
Backup Your Theme Files
Always save a copy of your theme files. This helps if things go wrong. Use a tool or plugin to backup your files. Save them in a safe place. This way, you can restore them if needed.
Next, open the Theme Editor in WordPress. Find it under the Appearance menu. This lets you edit your theme’s code. Be careful when changing code. One small mistake can break your site. Always have your backup ready.
Using Css To Hide Menu
First, find the menu class. Use the browser’s inspect tool to see the code. Right-click on the menu and select “Inspect.” Look for a class name with menu in it. Note it down for the next step.
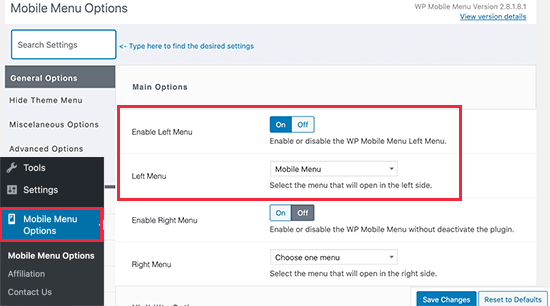
Go to the WordPress dashboard. Click on Appearance, then Customize. Find the Additional CSS option. Click on it. Now, add your CSS code. Type .your-menu-class { display: none; }. Replace your-menu-class with the class you found. Save changes. Check your site to see if the menu is hidden.
Credit: www.sktthemes.org
Modifying Php Files
Modifying PHP files allows customization of WordPress themes. Hide menu options by accessing theme files through the WordPress dashboard. Locate the specific PHP file responsible for displaying menus and adjust code to control visibility.
Locate Header File
Finding the header file is important. It controls the look of the menu. Look in your theme folder. This folder has many files. One file is named header.php. Open this file. You will see many lines of code. The menu code is inside. It might look confusing. But don’t worry. Just find the code that shows the menu.
Remove Menu Code
Once you find the menu code, you need to remove it. Be careful. Delete only the menu code. Do not touch other codes. Save the changes. Check your website. The menu should be gone now. If the menu is still there, redo the steps. Sometimes mistakes happen. Just be patient. Removing code takes time and focus. This method hides the menu. You can show it again later if needed.
Utilizing WordPress Plugins
Plugins make it easy to hide the menu on your WordPress site. First, you need to find a suitable plugin. Search the plugin store. Look for plugins with high ratings and good reviews. Popular choices include “WP Hide & Security Enhancer” or “Advanced Menu Editor”. Download and install the plugin of your choice.
Choose Suitable Plugin
Check if the plugin is compatible with your theme. Go through the plugin description and support details. Ensure it meets your needs. Once chosen, click “Install” and activate the plugin.
Configure Plugin Settings
After activation, go to the plugin settings. You will find this in your WordPress dashboard. Adjust the settings to hide the menu. The options depend on the plugin. Follow the plugin guide for best results. Save changes once done. Now, your menu should be hidden.

Credit: wordpress.stackexchange.com
Testing Changes
WordPress themes allow customization, including hiding the menu for a cleaner look. Access the theme settings in the dashboard. Navigate to appearance options and disable the menu visibility to enhance user experience and simplify navigation.
Preview Changes
Always check how the hidden menu looks. Use the preview mode in WordPress. It helps you see your changes before going live. Check every page. Make sure the menu is gone where needed.
Check On Different Devices
Websites look different on phones and computers. Use the preview on both types of devices. This ensures the menu is hidden everywhere. Test the site on tablets too. This gives a complete view of how users will see your changes.
Restoring Menu If Needed
Change CSS to make the menu visible again. Open your WordPress dashboard. Go to Appearance and click on Customize. Find the Additional CSS section. Remove or comment out any CSS code that hides the menu. Save changes to see the effect. If unsure, backup your CSS first.
Open the theme editor in WordPress. Navigate to the PHP file where changes were made. Look for any code that hides the menu. Restore the original code from backup. If no backup, consult the theme’s official support or re-download the theme. Save your changes and check the website. The menu should be back now.
Frequently Asked Questions
How To Hide Menu In WordPress Theme?
To hide a menu in a WordPress theme, access the WordPress Dashboard. Navigate to Appearance > Menus. Select the desired menu and set it to “none” for display location. Alternatively, use custom CSS to hide the menu by targeting its class or ID.
Can I Use Css To Hide WordPress Menu?
Yes, you can use CSS to hide a WordPress menu. Identify the menu’s class or ID using your browser’s inspect tool. Add custom CSS code like `display: none;` to your theme’s Additional CSS section in the Customizer. This will effectively hide the menu.
Why Hide A Menu On WordPress?
Hiding a menu can improve user experience by reducing clutter. It can also focus users on specific content or calls to action. Sometimes, menus might not be relevant for all pages, so hiding them can maintain a cleaner design.
Is Hiding A Menu Reversible?
Yes, hiding a menu is reversible. To unhide a menu, simply revert any changes made. Reset the display location in the WordPress Dashboard or remove the custom CSS code used to hide it. Your menu will be visible again.
Conclusion
Hiding a menu in your WordPress theme is straightforward. Follow the steps outlined, and you’ll manage it easily. This skill helps customize your site to suit your needs. Your site will look cleaner and more professional. Remember to save your changes.
Test your site to ensure everything works smoothly. If you encounter issues, consult WordPress forums for help. Practice makes perfect. Keep experimenting with different settings. Soon, you’ll gain confidence in WordPress customization. Enjoy the process of making your site unique.
Happy editing!


