
Imagine visiting your WordPress site and noticing elements that just don’t fit. Whether it’s a distracting sidebar, an unnecessary widget, or a banner that doesn’t align with your brand’s aesthetic, these elements can clutter your page and divert your audience’s attention from what truly matters.
If you’re using the Bridge Theme, you’re in luck. Hiding these elements doesn’t require a tech wizard or endless hours of frustration. In fact, it’s simpler than you might think. This guide will walk you through the process, step-by-step, ensuring you can tailor your website to deliver the perfect user experience.
By the end, you’ll have a cleaner, more professional-looking site that keeps your visitors engaged and enhances your brand image. Ready to transform your WordPress pages? Let’s dive in and discover how you can effortlessly hide elements on your Bridge Theme page.
Understanding The Bridge Theme
The Bridge Theme is popular on WordPress. It is known for its flexibility. Users can make custom designs easily. It offers many features for different needs. Design and style options are vast. You can build unique pages quickly.
Features Of Bridge Theme
The Bridge Theme has a drag-and-drop builder. It makes page creation simple. It supports responsive design. Your site looks good on phones and tablets. Many pre-made templates are available. These save time and effort. Users get an easy-to-use interface. Editing and customizing are straightforward.
Common Use Cases
- Blogs and personal websites
- Business sites and portfolios
- Online stores and e-commerce
- Creative agencies and studios
Bridge Theme suits many purposes. It is ideal for creative projects. It works well for businesses too. Easy to set up and manage.
Why Hide Elements
Some elements can confuse visitors. Confused visitors leave the page. Hiding clutter helps them focus. Important information stands out more. Visitors find what they need quickly. This makes them happy. Happy visitors return often. A simple page is a friendly page. Keep it clean and easy to read.
A pretty page catches the eye. Too many elements can look messy. Remove what you don’t need. This makes the page look nice. Balanced design keeps people interested. They will spend more time on your site. A neat page is like a tidy room. People feel welcome and stay longer.
Using Custom Css
Custom CSS is a handy tool to hide elements on a WordPress page using the Bridge theme. Add specific CSS rules to the theme’s settings, effectively removing unwanted sections without altering the core files. This approach keeps your site clean and visually appealing.
Accessing WordPress Customizer
To hide elements, first open your WordPress dashboard. Find the Appearance tab. Click it. Then select Customizer. The Customizer helps change your site’s look. It is easy and fast.
Writing Css To Hide Elements
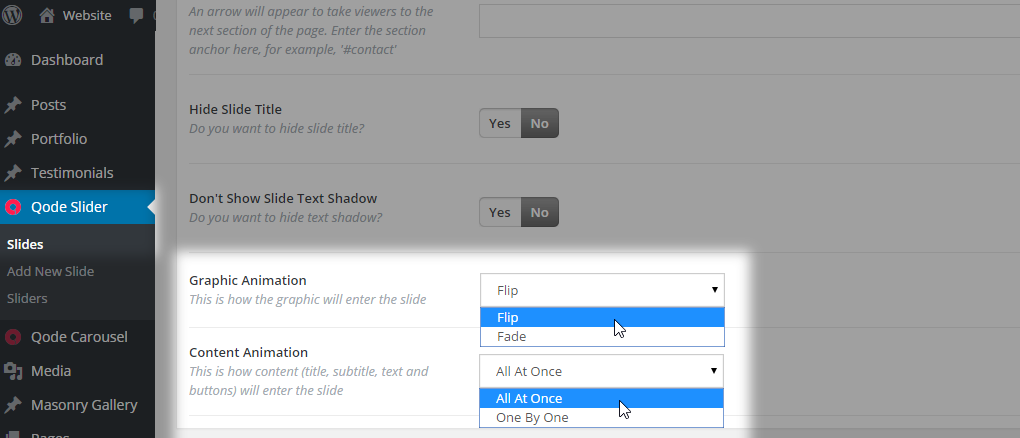
In the Customizer, locate the Additional CSS section. Here, you can write CSS code. Start with a simple code line. Type {display: none;}. This code hides elements. You can hide text, images, or buttons. Use the correct element ID or class. It is important to know your element’s name. Every element has a name. Find it using browser tools. Right-click on the element. Choose inspect option. You will see the name.
Credit: bridge.qodeinteractive.com
Leveraging Theme Options
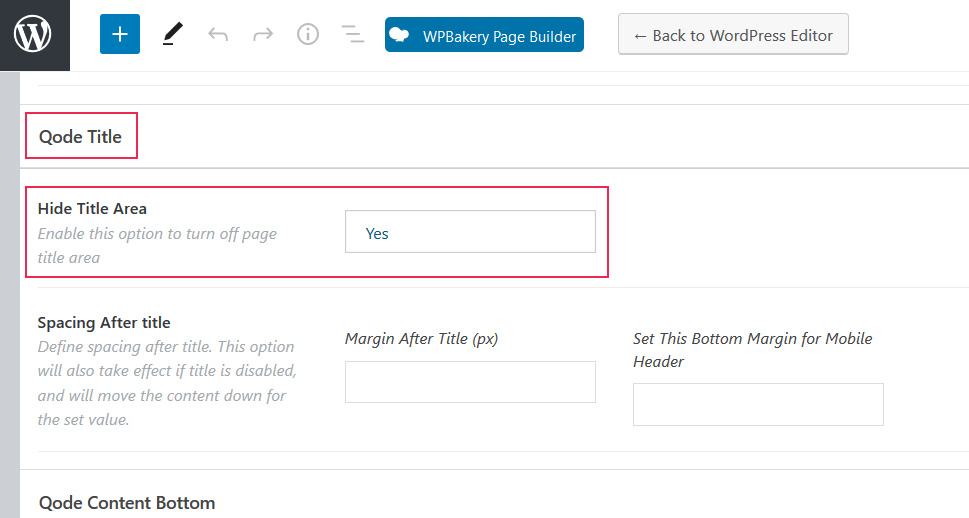
Bridge Theme offers powerful features. These are easy to use. You can hide elements directly. No coding skills needed. Start by accessing the theme options. Here, you will find many settings. These settings allow customization. You can hide headers, footers, and more.
Navigate to the dashboard. Click on Bridge Theme options. Look for the visibility settings. Choose the element you wish to hide. Toggle the switch to hide it. This action is quick and easy. It applies to specific pages. You can hide sections without hassle.
Utilizing Plugins
Plugins offer a simple way to hide elements on a WordPress page using the Bridge Theme. Select the desired plugin, configure settings, and effortlessly conceal unwanted sections for a cleaner design.
Recommended Plugins
Plugins make tasks easier on WordPress. Elementor is a top choice. It helps hide elements fast. CSS Hero is another great plugin. It allows easy customization. Hide My Site is useful too. It can hide entire pages. These plugins are simple to use. They offer great support. Choose one that suits your needs best.
Plugin Installation And Configuration
First, go to the WordPress dashboard. Click on “Plugins” and then “Add New”. Search for the plugin you want. Click “Install Now”. Wait a few seconds. Then, click “Activate”. Go to the plugin settings. Follow the instructions to configure. Adjust settings as needed. Save changes before leaving. Now your plugin is ready!
Credit: qodeinteractive.com
Testing And Verification
Make sure to save your work first. Click on the Preview button. This lets you see your changes. You can check if the element is hidden. If it’s not, go back and fix it. Refresh the page to see updates. This ensures everything looks right.
Open your website in different browsers. Use Chrome, Firefox, and Safari. Check if the hidden elements stay hidden. Sometimes browsers show things differently. You want to make sure everything works everywhere. If something is wrong, it might be a browser issue. Fix it so all users see the same site.
Troubleshooting
Easily hide elements on a WordPress page using the Bridge Theme by accessing the theme options panel. Navigate to the specific page settings, select the elements to hide, and save changes. This simple process ensures a clean and customized page layout.
Common Issues
Many users face trouble hiding elements on a WordPress page. Sometimes, elements reappear after refreshing the page. This can be due to cache issues. Clear your browser cache and check again. Another issue can be plugin conflicts. Disable all plugins and then enable them one by one. This helps find which plugin is causing trouble.
Tips For Effective Troubleshooting
- Always keep your theme and plugins updated.
- Use a child theme to avoid losing changes.
- Check if your changes are saved properly.
- Use the inspect tool to see if CSS is applied.
- Seek help from forums if the issue persists.
Credit: bridge.qodeinteractive.com
Frequently Asked Questions
How Can I Hide Elements In Bridge Theme?
To hide elements in the Bridge Theme, use the WordPress Customizer. Navigate to “Appearance,” select “Customize,” then use custom CSS. Add display: none; to the specific element’s class or ID. This will prevent it from appearing on your page, ensuring a cleaner layout.
Is It Possible To Hide Elements Without Coding?
Yes, you can hide elements using the Bridge Theme’s built-in options. Go to the page editor, and find the element. Use visibility settings or toggle options to hide it. This method requires no coding and is user-friendly for beginners.
Can Plugins Help Hide Elements On Bridge Theme?
Plugins can effectively hide elements in the Bridge Theme. Install a plugin like “Widget Options” or “Elementor. ” These plugins offer visibility controls, allowing you to hide elements without altering the theme’s code. This is perfect for those unfamiliar with coding.
Why Hide Elements On A WordPress Page?
Hiding elements improves page aesthetics and usability. It helps focus user attention on important content and reduces distractions. It can also enhance page loading speed and optimize user experience, making your website more engaging and effective.
Conclusion
Hiding elements on a WordPress Bridge theme page is simple. Use the theme’s settings for easy customization. Adjust visibility with user-friendly options. This helps create a cleaner look. With practice, you manage your site’s appearance easily. Keep your audience’s needs in mind.
A well-organized page improves user experience. Try different settings to see what works best. Remember, a clear layout attracts visitors. Regular updates keep your site fresh. Stay consistent with your design. Your site will look professional and welcoming.


