
Facing a critical error on your WordPress site can feel like hitting a brick wall. Your website stops working, visitors see a blank screen or an alarming message, and you’re left wondering what went wrong.
But don’t panic—this problem is fixable, even if you’re not a tech expert. In this guide, you’ll discover simple, step-by-step solutions to get your site back online quickly. Whether it’s a plugin conflict, theme issue, or a memory limit problem, you’ll learn exactly what to do to fix the critical error and prevent it from happening again.
Keep reading—you’re just a few easy steps away from restoring your website and peace of mind.
What Causes Critical Errors
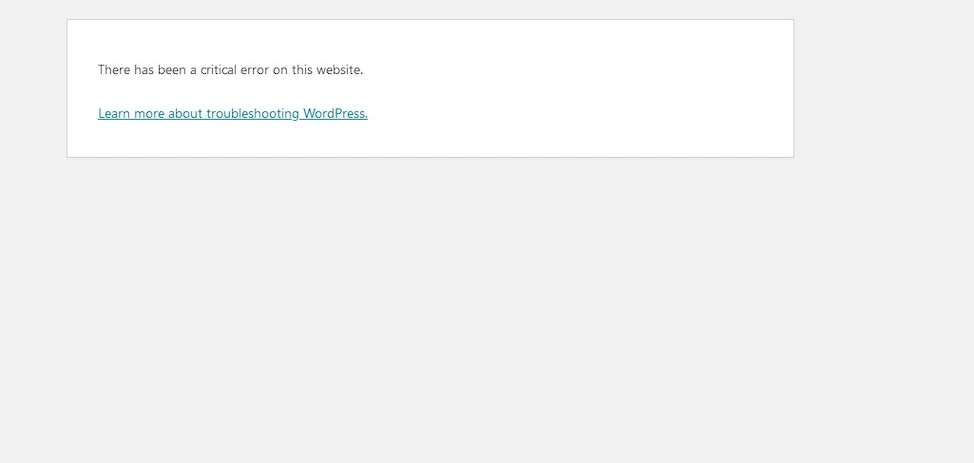
Critical errors in WordPress stop your website from working properly. These errors often show a white screen or a message saying the site has a problem. Understanding what causes these errors helps you fix them fast. Several issues can trigger critical errors on your WordPress site. Each source relates to different parts of your website’s setup or code.
Php Fatal Errors
PHP fatal errors occur when a script stops running. This happens if the code has mistakes or calls unavailable functions. Such errors break the process and stop your site from loading. Common causes include outdated PHP versions or bugs in custom code.
Plugin Conflicts
Plugins add features to WordPress but may clash with each other. Conflicts happen if two plugins try to change the same feature. Sometimes, an update to one plugin causes errors with others. These conflicts often result in critical errors.
Theme Issues
The theme controls how your site looks and works. Problems arise if the theme is old or poorly coded. Updates to WordPress or plugins can cause themes to break. A faulty theme can cause critical errors and stop your site.
Memory Limit Exceeded
WordPress needs enough memory to run smoothly. If your site uses too much memory, it hits the limit set by the server. This shortage leads to critical errors. Heavy plugins or large images often cause memory limits to be exceeded.
File Permission Problems
File permissions control who can read or write files on your server. Incorrect permissions block WordPress from accessing needed files. This problem can cause critical errors and make your site inaccessible. Setting proper permissions fixes this issue.
Credit: www.liquidweb.com
Checking Error Notifications
Checking error notifications is the first step to fix a WordPress critical error. These alerts give clear clues about the problem. They often point to a faulty plugin or theme causing the issue. By reviewing notifications, you can act fast and prevent downtime.
WordPress has built-in features to notify the site administrator. These alerts help identify the error source quickly. Knowing where the problem lies saves time and effort. Below are key ways to check for error notifications.
Admin Email Alerts
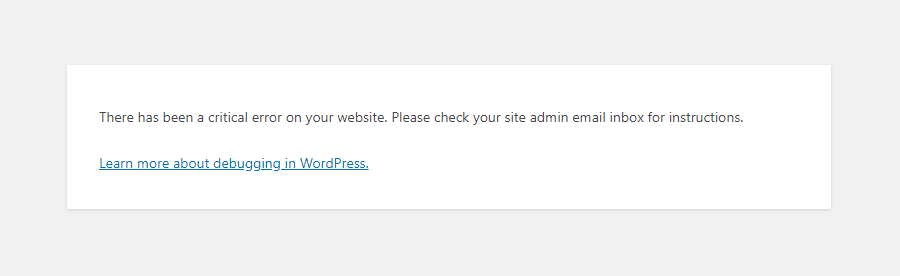
WordPress sends automatic emails to the admin address when a critical error occurs. These emails include details about the error. They often name the plugin or theme causing the fault. The message also contains a special link to enter recovery mode. Check your inbox and spam folder regularly. This alert is the fastest way to understand the error and start fixing it.
Recovery Mode Access
Recovery mode allows you to log into WordPress despite the critical error. Use the link from the admin email to access it. This mode disables the broken plugin or theme temporarily. It lets you fix the problem without crashing the entire site. Recovery mode shows error details on the dashboard. You can deactivate or delete the faulty item from here. This tool is essential for safe troubleshooting and quick recovery.
Enabling Debugging Mode
Enabling debugging mode in WordPress helps find the cause of critical errors. It shows detailed error messages instead of a generic white screen. This makes fixing problems easier and faster. Debug mode is off by default for security. Turning it on reveals PHP errors, warnings, and notices. These details guide you to the exact file and line causing the issue.
Editing Wp-config.php
To enable debugging, open the wp-config.php file in your WordPress root folder. Use an FTP client or your hosting file manager. Find the line that says define('WP_DEBUG', false);. Change false to true. If the line is missing, add this code above / That's all, stop editing! /:
define('WP_DEBUG', true);Save the file. This change activates debug mode and shows errors on your site. Be careful not to leave debug mode on in a live environment for long. It may expose sensitive information.
Using Debug Logs
Instead of showing errors on the screen, you can log them to a file. This keeps your site clean while you check errors later. Add these lines to wp-config.php:
define('WP_DEBUG_LOG', true); define('WP_DEBUG_DISPLAY', false);WordPress saves errors in the wp-content/debug.log file. Open this file to review error details. It records all PHP errors and warnings. This method is safer for live sites. It prevents visitors from seeing error messages.
Interpreting Error Messages
Error messages provide clues about the problem. They show the file name, line number, and error type. Read the message carefully to identify the faulty plugin or theme. Common errors include missing files, syntax mistakes, or memory limits. Use the details to search online for fixes or ask support forums. Understanding these messages speeds up resolving the critical error.
Managing Plugins
Plugins add features to your WordPress site. Sometimes, they cause conflicts that lead to a critical error. Managing plugins carefully can fix the problem quickly. Follow these steps to handle plugins when your site breaks.
Deactivating All Plugins
Start by turning off all plugins. This stops any plugin from running and causing errors. You can do this from your WordPress dashboard if accessible. If not, use FTP or your hosting control panel to rename the plugins folder. This disables all plugins at once.
After deactivating, check if the site loads correctly. If it does, the issue is with one or more plugins.
Identifying The Problem Plugin
Reactivate plugins one by one. Test your site after enabling each plugin. This helps find which plugin causes the error. When the site breaks again, the last activated plugin is likely the problem.
Note the plugin name for further action. This step may take some time but is necessary for accuracy.
Replacing Or Updating Plugins
Once you find the faulty plugin, try updating it first. Updates often fix bugs and compatibility issues. If updating does not help, look for a similar plugin as a replacement.
Deleting the problem plugin is an option if it is not essential. Always backup your site before making changes. Keeping plugins updated prevents many critical errors.
Switching Themes
Switching themes can quickly resolve a WordPress critical error. Themes control your site’s appearance and functionality. Sometimes, a theme may cause conflicts or code errors that stop your site from working. Changing to a default theme helps check if the issue is theme-related. This process is simple and does not affect your content or settings.
Activating Default Themes
To activate a default theme, log in to your WordPress dashboard. Go to Appearance > Themes. Choose a default theme like Twenty Twenty-One or Twenty Twenty-Two. Click “Activate” to switch. If you cannot access the dashboard, use recovery mode from the email WordPress sent. Activating a default theme often fixes critical errors caused by custom themes. It lets you test if the theme is the problem.
Renaming Theme Folders
Renaming your theme folder forces WordPress to use a default theme. Access your site files using FTP or a file manager in your hosting control panel. Find the /wp-content/themes/ folder. Locate your active theme’s folder and rename it, for example, add “-old” at the end. This disables the theme without deleting it. WordPress will switch to a default theme automatically. This method is useful when you cannot reach the admin area. It helps identify if the theme causes the critical error.
Reinstalling Core Files
Reinstalling core files is a reliable way to fix critical WordPress errors. It refreshes the essential WordPress system files without affecting your content. This method helps replace any corrupted or missing files causing the issue. Always back up your website before starting this process to avoid data loss.
Downloading Fresh WordPress
Start by visiting the official WordPress website. Download the latest version of WordPress as a ZIP file. Save it on your computer and unzip the folder. This folder contains all the core files needed to run WordPress smoothly. Using fresh files ensures no damaged files remain.
Replacing Wp-admin And Wp-includes
Access your website files via FTP or your hosting file manager. Locate the wp-admin and wp-includes folders in your WordPress root directory. Delete these two folders carefully. Next, upload the fresh wp-admin and wp-includes folders from the unzipped WordPress package. Overwrite the old folders to replace all files. This step refreshes the core system files that often cause critical errors.
Restoring From Backup
Restoring from a backup is a reliable way to fix a WordPress critical error. This method returns your site to a previous working state. It helps undo changes that caused the problem. Backups protect your website data and settings. Keeping regular backups avoids data loss and long downtime.
Choose a backup made before the error appeared. This ensures the site will run smoothly again. Restoring takes only a few steps but needs care to avoid mistakes. Follow the right process for your backup type and hosting provider.
Identifying The Right Backup
Check the date and contents of your backups. Pick one that has all your website files and database. Avoid backups made after the error started. Using the wrong backup can make things worse. Use your hosting control panel or backup plugin to find backups easily.
Restoring Files And Database
Start by restoring the WordPress files. These include themes, plugins, and uploads folders. Use FTP or your hosting file manager to upload files. Next, restore the database using phpMyAdmin or a similar tool. Import the backup SQL file to replace the corrupted database. This step is vital to fix database-related errors.
Verifying The Restoration
After restoring, clear your browser cache. Visit your website to check if it loads correctly. Log in to the WordPress admin area to confirm full access. Test important pages and functions to ensure everything works. If the error persists, consider restoring an older backup or try other fixes.

Credit: www.youtube.com
Clearing Cache
Clearing cache is a key step to fix the WordPress critical error. Cache stores temporary files to speed up your site. Sometimes, these files get outdated or corrupted. This causes conflicts and errors on your website. Clearing cache removes these old files. It forces WordPress to load fresh data. This can often resolve critical errors quickly. Cache can exist in different places. Each type needs to be cleared separately. This guide covers plugin cache, server cache, and browser cache.
Clearing Plugin Cache
Many WordPress plugins create their own cache. Popular caching plugins include W3 Total Cache and WP Super Cache. To clear plugin cache, go to the plugin’s settings in your WordPress dashboard. Look for options like “Clear Cache” or “Purge Cache.” Click the button to remove stored cache files. This action refreshes the plugin data. It helps fix conflicts caused by old cache files. Clear plugin cache after updating themes or plugins.
Clearing Server Cache
Some hosting providers add server-level caching. This cache speeds up your site by storing files on the server. Access your hosting control panel or dashboard. Find caching options or performance settings. Look for buttons labeled “Clear Cache” or “Flush Cache.” Click to remove the server cache. If unsure, contact your hosting support for help. Clearing server cache ensures the latest site version loads. This step is crucial after making changes on your site.
Clearing Browser Cache
Your web browser also saves cached versions of website pages. This can cause you to see an older, error-prone version of your site. To clear browser cache, open your browser settings. Find the option to clear browsing data or history. Select cached images and files for deletion. Clear the cache and reload your WordPress site. Using a private or incognito window can also bypass cached files. Clear browser cache regularly to avoid display issues.
Increasing Php Memory
Increasing PHP memory can resolve many WordPress critical errors. Low memory limits cause scripts to stop running. This often triggers fatal errors on your website. Raising the PHP memory limit lets WordPress run smoothly. It supports plugins and themes that need more resources.
You can increase PHP memory by editing files or contacting your host. Both methods are simple and effective. Choose the one that suits your comfort level. Here are two main ways to increase PHP memory.
Editing Php.ini Or Wp-config.php
Start by accessing your site’s root folder. Use an FTP client or file manager in your hosting panel. Locate the php.ini or wp-config.php file. Open it with a text editor.
In php.ini, add or update this line:
memory_limit = 256MThis sets the memory limit to 256 megabytes. Save changes and upload the file back.
For wp-config.php, add this line before the “That’s all, stop editing” comment:
define('WP_MEMORY_LIMIT', '256M');Save and upload the file. This change increases memory for WordPress specifically.
Clear your site cache and reload the page. Check if the error disappears. If it persists, try the next method.
Contacting Hosting Provider
Some hosts restrict manual changes to PHP memory. You may not find or access php.ini.
Contact your hosting provider’s support team. Ask them to raise your PHP memory limit. Specify the amount, such as 256M or 512M.
Most hosts respond quickly and adjust the settings for you. After they confirm, clear your cache and test your site.
Keep your hosting provider’s contact details handy. They help with server-related issues beyond your control.
Checking File Permissions
File permissions control who can read, write, or execute files on your WordPress site. Incorrect permissions cause critical errors by blocking access to essential files. Checking and fixing these permissions often resolves the problem quickly. This step ensures your server can properly run WordPress scripts and load your website.
Correct Permissions For Files And Folders
Files should have permissions set to 644. This setting allows the owner to read and write the file, while others can only read it. Folders need permissions set to 755. This allows the owner to read, write, and execute, while others can read and execute only. Avoid setting permissions to 777, as it is a security risk and often causes errors.
Using Ftp Or Hosting Panel
Access your website files using an FTP client or your hosting control panel. Navigate to your WordPress directory and right-click on files or folders to change permissions. Set files to 644 and folders to 755. Apply changes recursively to all subfolders and files. This method ensures proper access rights and can fix many WordPress errors related to file permissions.
Updating Php Version
Updating your PHP version is essential to keep WordPress running smoothly. Older PHP versions can cause compatibility issues and trigger critical errors. Using a supported PHP version improves site speed and security. It also ensures your plugins and themes work without problems.
Checking Current Php Version
First, find out which PHP version your site uses now. Login to your WordPress dashboard. Go to “Tools” and then “Site Health.” Click the “Info” tab and expand the “Server” section. Here, you will see the current PHP version. Note it down for reference.
You can also check the PHP version from your hosting control panel. Look for the “PHP Info” or “Server Information” page. This helps confirm the version your server runs.
Upgrading To Supported Version
Next, upgrade to a PHP version supported by WordPress. Currently, WordPress recommends PHP 7.4 or higher. Contact your hosting provider or use the hosting control panel to update PHP. Most hosts offer an easy option to select the PHP version.
After upgrading, test your site carefully. Check if the critical error is gone. Make sure all plugins and themes work properly. If problems appear, revert to the previous PHP version and seek help from your host or developer.
Credit: kinsta.com
When To Contact Hosting Support
Knowing when to contact your hosting support can save time and prevent frustration. Some WordPress errors need expert help beyond your control. Hosting providers have tools and access to fix server-level problems. Recognizing these situations helps you get the right support quickly.
Persistent Errors
Persistent errors that do not resolve after basic troubleshooting need hosting support. Issues like repeated critical errors or failure to access recovery mode require deeper investigation. Hosting experts can check server logs and settings that you cannot access. They also have the ability to restart services or fix corrupted files on the server. Contact support if errors keep returning despite your attempts to fix them.
Server-related Issues
Problems related to the server environment need hosting support intervention. This includes low PHP memory limits, incorrect file permissions, or server misconfigurations. Hosting providers can increase memory limits or correct file permissions quickly. They can also identify if the server is down or experiencing resource overload. Reach out to your host if you suspect the issue lies with the server and not WordPress itself.
Frequently Asked Questions
How To Fix Critical Error On WordPress Site?
Deactivate all plugins via FTP by renaming the plugins folder. Switch to a default theme. Increase PHP memory limit. Enable WP_DEBUG in wp-config. php to find errors. Reinstall WordPress core files if needed. Clear cache and check file permissions. Contact your host if the issue persists.
What Does Critical Error On A Website Mean?
A critical error on a website means a fatal PHP issue stops the site from loading properly. It often involves a faulty plugin, theme, or code conflict that halts processes. WordPress usually notifies the admin with error details to help fix the problem quickly.
How To Solve Error In WordPress?
To solve a WordPress error, enable debugging in wp-config. php, deactivate plugins, switch to a default theme, increase PHP memory, and update all components. Check error logs and fix file permissions. Reinstall WordPress if needed or contact your web host for support.
Clear cache afterward.
How Do I Clear The Cache On WordPress?
To clear cache on WordPress, use a caching plugin’s clear cache option. Alternatively, clear your browser and server cache. For plugin cache, go to plugin settings and click “Clear Cache” or “Purge Cache. ” This refreshes your site and shows recent changes immediately.
Conclusion
Fixing a WordPress critical error can restore your site quickly. Start by checking error messages from WordPress notifications. Disable plugins or themes causing conflicts. Increase the PHP memory limit if needed. Clear your cache and verify file permissions. Keep WordPress and its components updated to avoid errors.
These simple steps help you fix issues without stress. Stay calm and follow the guide carefully. Your website will be back online soon and running smoothly.


