
Your website’s header is the first thing visitors see—it sets the tone and guides them through your content. If you want to make a great impression, you need to know how to edit your WordPress header effectively.
Whether you want to change the logo, update the menu, or add a call-to-action, mastering header editing puts you in control of your site’s look and feel. You’ll discover simple, step-by-step ways to edit your WordPress header—no coding skills required.
Keep reading to transform your site’s header into a powerful tool that grabs attention and keeps visitors engaged.
Accessing Header Settings
Editing the header in WordPress starts with accessing the header settings. These settings control the look and feel of your site’s top section. There are several ways to reach these options. Each method suits different user skills and needs. Choose the best way for your comfort and site setup.
Using WordPress Customizer
Open your WordPress dashboard. Go to Appearance then click Customize. This opens the WordPress Customizer panel. Look for the Header or Header & Navigation section. Here, you can change colors, layouts, and text in your header. Changes show live before saving. This method is user-friendly and needs no coding.
Navigating Theme Builder
Some themes and page builders include a Theme Builder tool. Access it from your dashboard under Templates or Theme Builder. Find the header template listed there. Click Edit to open a drag-and-drop editor. You can add or remove blocks and rearrange elements easily. This method offers more control over header design than the Customizer.
Editing Header.php File
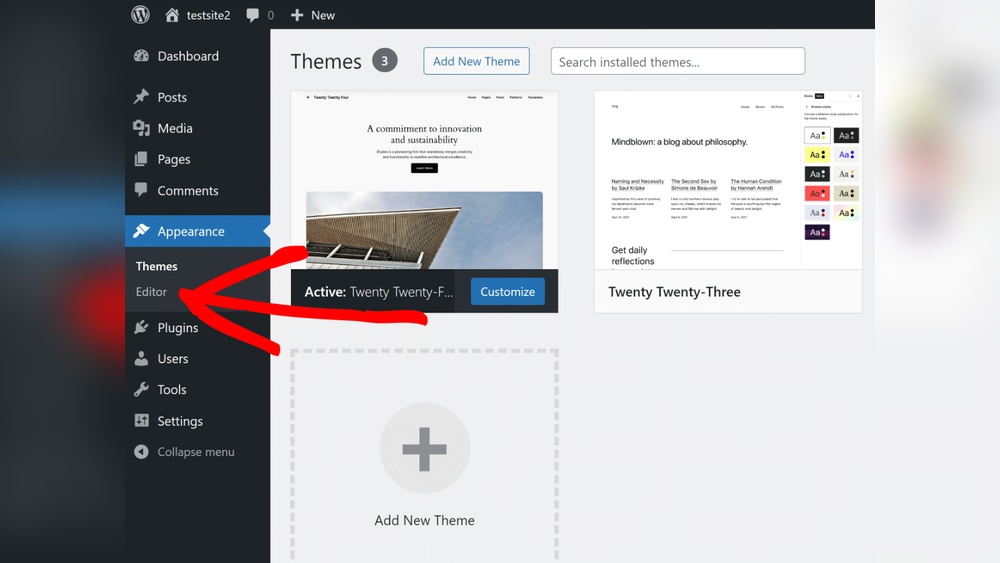
For advanced users, editing the header.php file allows full customization. Go to Appearance > Theme Editor. Select header.php from the right sidebar. Make changes to the HTML, PHP, or add custom code. Save the file carefully. Incorrect edits can break your site. Always back up your site before editing code.
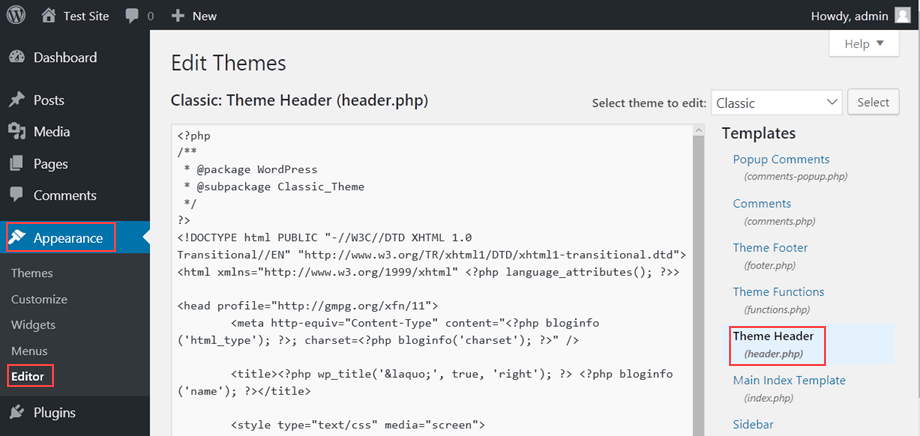
Credit: www.hostpapa.com
Editing Header Content
Editing header content in WordPress allows you to personalize your website’s top section. The header sets the first impression for visitors. It often contains your logo, navigation, and key messages. Customizing it helps your site stand out and improves user experience.
WordPress offers simple tools to change text, add images, and organize menus in the header. You do not need coding skills to make these edits. Using the block editor or theme customizer, you can update header content quickly.
Adding Text And Images
You can insert text to show your site name or a slogan. Use clear and concise words for better readability. Adding images like logos or banners strengthens your brand identity. To add these, open the header area in the editor. Click on the plus icon to add a text or image block. Upload your image or type your text directly. Adjust size and alignment to fit your design.
Inserting Navigation Menus
Navigation menus guide visitors through your site. Place menus in the header for easy access. Go to the Appearance section in your dashboard and select Menus. Create or choose a menu, then assign it to the header location. You can add links to pages, categories, or custom URLs. This keeps your site organized and user-friendly.
Using Blocks In Full Site Editing
Full Site Editing lets you build headers with blocks for more flexibility. Use the Site Editor to open your header template. Add blocks like Site Title, Logo, Navigation, or Search. Move blocks by dragging to change layout quickly. Customize block styles for colors and fonts to match your theme. This method gives control without needing code.
Customizing Header Design
Customizing your WordPress header design gives your site a unique look. The header is the first thing visitors see. It sets the tone for your website. You can change colors, fonts, layout, and add backgrounds or effects. These small changes can make your header stand out and fit your brand style. WordPress makes it simple to edit these elements without coding.
Changing Colors And Fonts
Colors and fonts create the mood of your header. Choose colors that match your brand or website theme. Use the WordPress Customizer to pick header text and background colors easily. Adjust font styles for your site title and menu. Select readable fonts that look good on all devices. Changing these settings improves your site’s visual appeal and user experience.
Adjusting Layout And Spacing
Layout controls how elements arrange in your header. You can move your logo, menu, and widgets to different positions. WordPress themes often offer options to align items left, center, or right. Adjust spacing between elements to avoid clutter. Proper spacing makes your header clean and easy to navigate. Use the block editor or theme settings to tweak these details.
Adding Backgrounds And Effects
Backgrounds add depth to your header. You can use solid colors, gradients, or images. WordPress allows you to upload custom background images for your header. Add effects like shadows or overlays to enhance text visibility. Subtle animations can also make your header more dynamic. Background choices should support your content, not distract from it.
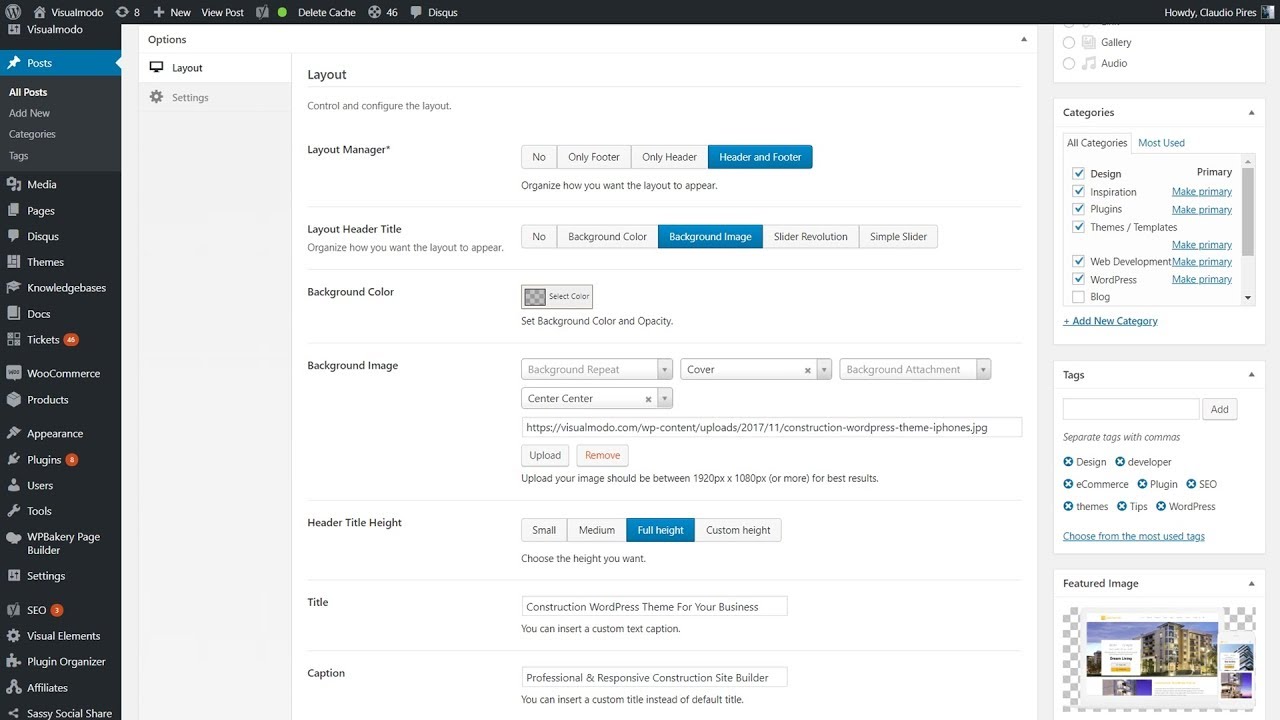
Credit: m.youtube.com
Creating Custom Headers
Creating custom headers in WordPress offers complete control over your website’s look. Custom headers make your site unique and improve user experience. They allow you to add logos, menus, and calls to action in the header area. This section covers easy ways to create custom headers using popular tools and techniques.
Using Elementor For Header Design
Elementor is a popular page builder for WordPress. It lets you design headers with a simple drag-and-drop interface. You can add text, images, buttons, and menus without coding. Start by creating a new header template in Elementor’s Theme Builder. Design your header by placing elements in the layout. Preview changes live to see how the header looks on different devices. Elementor also supports sticky headers that stay visible when users scroll.
Building Headers For Single Posts
Headers for single posts can be customized to match the post content. Use WordPress’s template hierarchy to create a header specific to single posts. This helps highlight important post details like the title, author, or date in the header area. Custom headers can improve reader engagement and provide a consistent style across your blog. Many themes and builders allow assigning different headers for posts, pages, and archives.
Implementing Template Parts
Template Parts in WordPress break your theme into reusable pieces. You can create a header template part to use across multiple pages. This method saves time and keeps your design consistent. Edit the header template part once, and changes apply site-wide. Template parts work well with Full Site Editing and block themes. They also allow developers to organize code better and simplify maintenance.
Troubleshooting Header Edits
Editing the header in WordPress can sometimes be tricky. Changes may not show up as expected. Troubleshooting these issues helps you save time and avoid frustration. Understanding common problems and their solutions makes header editing easier. This section covers typical errors, theme limits, and cache clearing tips.
Common Issues And Fixes
Sometimes, header edits do not appear on the live site. This often happens due to browser cache storing old data. Another issue is incorrect changes in the header.php file causing errors. Using the wrong method to edit the header can also block updates. Check if you are editing the right header template. Always back up before changing code. If edits break the site, restore the backup immediately.
Theme Restrictions
Many WordPress themes limit header editing options. Some themes do not allow full header customization. This can stop you from adding or changing elements freely. To fix this, check your theme’s documentation. Some themes require using their customizer or page builder. Switching to a more flexible theme might be necessary for advanced changes. Child themes are a safe way to modify headers without losing updates.
Clearing Cache And Refreshing
Cache often causes old header versions to show. Clear your browser cache to see recent changes. Also, clear WordPress cache if you use caching plugins. Server-side cache may require clearing through your hosting panel. After clearing cache, refresh the page using Ctrl + F5 or Command + Shift + R. This forces the browser to load the newest header version. Regular cache clearing improves editing accuracy.

Credit: hostarmada.com
Saving And Publishing Changes
After customizing your WordPress header, saving and publishing changes is crucial. This step ensures your updates appear on your website as intended. Properly managing these changes avoids losing your work and keeps your site professional.
Previewing Header Updates
Before publishing, preview your header changes. WordPress allows you to see how your header looks without making it live. This helps catch mistakes and ensures the design fits your site style. Use the preview button in the editor to check your work on different devices.
Publishing To Live Site
When satisfied with the preview, publish the changes to your live site. Click the publish or update button in the header editor. This makes your new header visible to all visitors immediately. Publishing finalizes your edits and improves your website’s look and feel.
Reverting To Previous Versions
WordPress saves versions of your header automatically. You can revert to earlier versions if needed. This option helps fix mistakes or undo unwanted edits. Access the revision history in the editor to restore a previous header version quickly and safely.
Frequently Asked Questions
How Do I Edit An Existing Header In WordPress?
To edit a header in WordPress, go to WP-Admin, navigate to Templates > Theme Builder. Select your header and click Edit to customize it.
Why Can’t I Edit The Header In WordPress?
You can’t edit the header in WordPress if your theme restricts changes or lacks header customization options. Use Full Site Editing or a page builder plugin to modify it easily.
How Do I Edit A Header?
To edit a header, double-click the top of the page or go to Insert > Header > Edit Header. Make your changes, then exit header editing.
How Do I Edit The Top Bar On A WordPress Website?
To edit the top bar in WordPress, go to Appearance > Customize > Header or Top Bar settings. Adjust content, colors, and layout there. Save changes to update your site’s top bar instantly. Use a page builder plugin for advanced customization if needed.
Conclusion
Editing your WordPress header can improve your site’s look and feel. It lets you add logos, menus, or custom text easily. Use the WordPress dashboard or block editor for quick changes. Keep your header simple and clear to help visitors navigate.
Regular updates keep your site fresh and user-friendly. Take time to explore header options and find what fits best. Small edits can make a big difference in your website’s appearance. Start editing today to create a header that matches your style.


