
Your website’s footer is more than just a space at the bottom of your pages—it’s a powerful tool to boost your brand, share important information, and guide visitors. If you’ve ever wondered how to edit the footer in WordPress but felt overwhelmed by the technical side, you’re in the right place.
This guide will walk you through simple, step-by-step methods to customize your footer exactly the way you want it. By the end, you’ll have the confidence to make your footer stand out, keep visitors engaged, and enhance your site’s professionalism.
Ready to transform your WordPress footer? Let’s dive in!
Footer Types In WordPress
The footer is an essential part of any WordPress website. It appears at the bottom of every page and often contains contact info, links, or legal text. WordPress offers different footer types based on the theme you use. Understanding these types helps you edit footers easily.
There are mainly two footer types in WordPress: one for block themes and one for classic themes. Each type uses a different method to customize the footer. Knowing which type your site uses saves time and effort.
Block Themes
Block themes use the WordPress Site Editor for footer customization. This editor allows you to add, remove, or rearrange blocks in the footer area. You can access it by going to Appearance > Editor in your dashboard.
The Site Editor shows a live preview of your site. Scroll down to the footer and click it to make changes. You can add new blocks like text, images, or social links using the plus (+) icon. Editing is visual and simple.
This method is flexible and modern. It suits users who want full control over the footer’s design without coding. Changes appear immediately on your site after saving.
Classic Themes
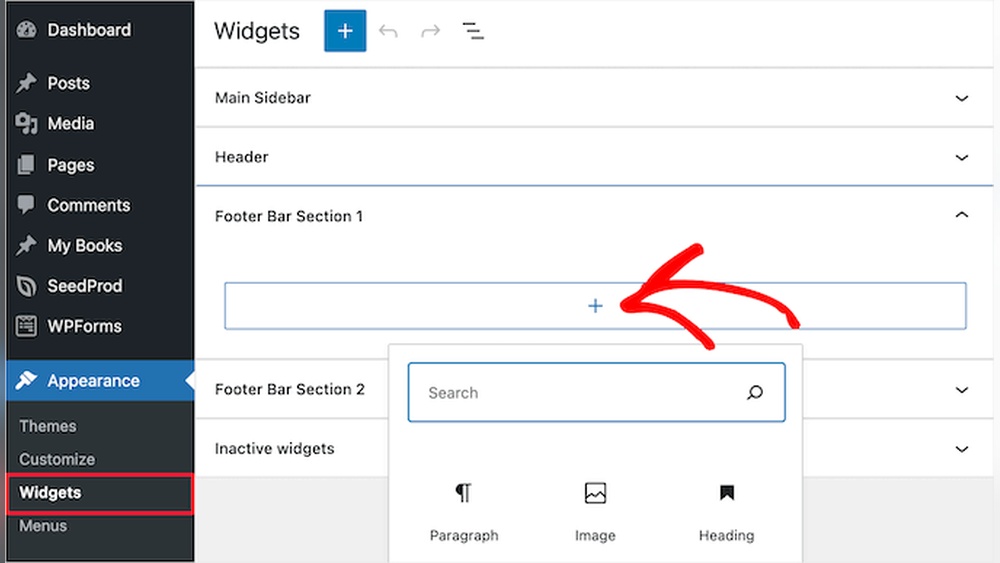
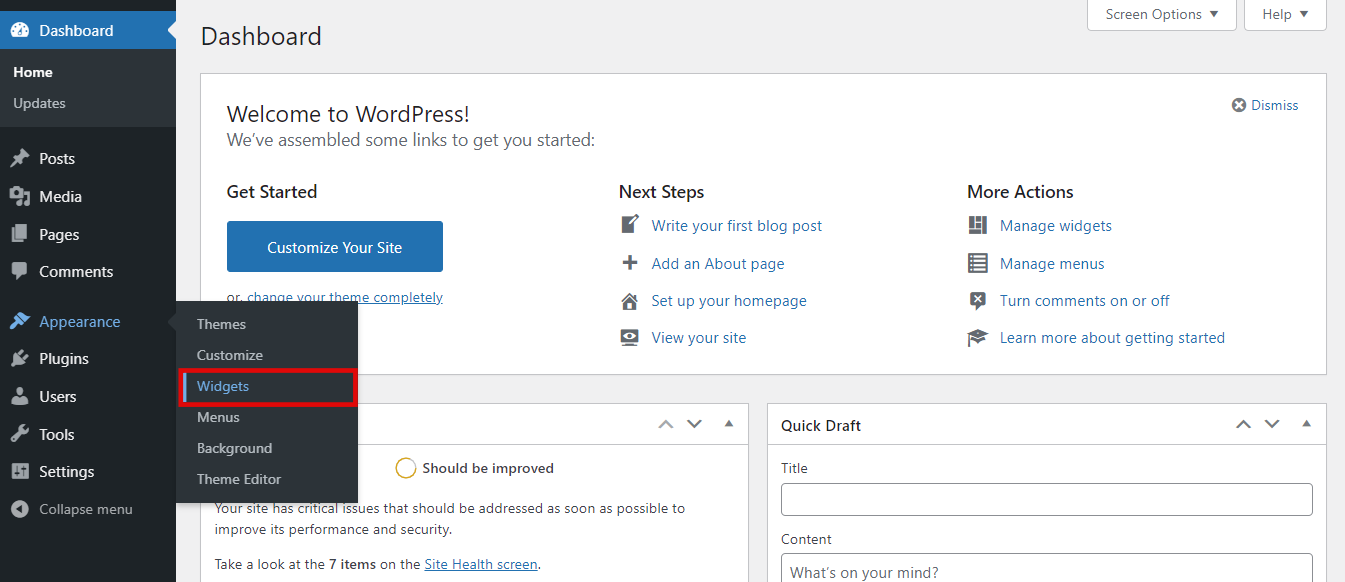
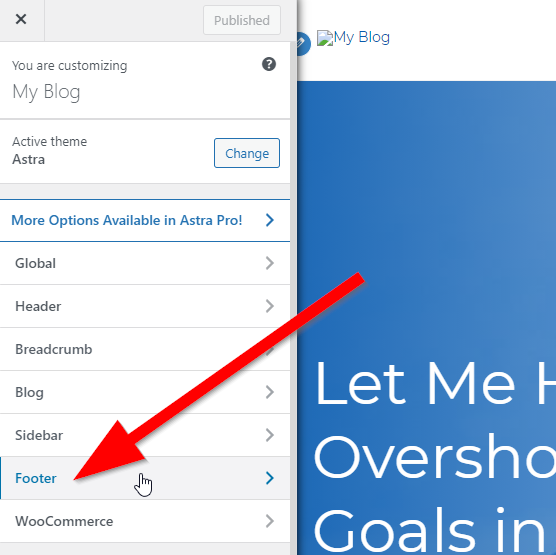
Classic themes use the WordPress Customizer for footer edits. You find this under Appearance > Customize in the dashboard. The Customizer offers a menu with options like Footer or Widgets.
Footers in classic themes often rely on widgets. You can drag and drop widgets into footer areas. Each widget can be edited for content and style. This process is straightforward and user-friendly.
After making changes, click Publish to update your footer. The Customizer also shows a live preview. It works well for users who prefer a traditional way of editing.
Credit: www.hostinger.com
Editing Footer With Site Editor
Editing the footer with the Site Editor in WordPress gives you direct control over your website’s bottom section. It works best with block themes and lets you customize the footer visually. You can add text, links, or images easily. The process is simple and does not require coding skills. Follow these steps to edit your footer using the Site Editor.
Accessing The Editor
First, log into your WordPress dashboard. Then go to Appearance > Editor. This opens the Site Editor interface. You will see a live preview of your site here. The editor lets you click and edit different parts of your website directly.
Selecting Footer Area
Scroll down to the bottom of the preview to find the footer section. Click on the footer area to select it. If you have trouble clicking the footer, use the List View icon in the top-left corner. From there, find and select the footer block easily.
Adding And Rearranging Blocks
To add new content, click the + icon. Choose from blocks like text, images, or buttons. Click on existing blocks to edit their content or style. Drag and drop blocks to rearrange the order within the footer. This helps you organize your footer layout quickly.
Saving Changes
After making edits, look for the Save button in the top-right corner. Click it to apply your changes. The new footer design will now appear on your live website. Regularly save your work to avoid losing any updates.
Using Customizer For Footer
The WordPress Customizer offers a simple way to change your website’s footer. It works well with most classic themes. Using the Customizer, you can adjust footer content and design without touching any code. This method is user-friendly and fast. It helps keep your site consistent and professional.
Opening Customizer
Start by logging into your WordPress dashboard. Next, go to Appearance and select Customize. The Customizer panel will open on the left side of your screen. You will see a live preview of your site on the right. This setup lets you see changes as you make them.
Footer And Widget Options
In the Customizer menu, find the section labeled Footer or Widgets. Different themes might name this section differently. Click on it to see the available footer options. Here, you can add text, links, or other elements. Some themes also allow changing colors and layout.
Managing Widgets
The footer area usually supports widgets. Drag widgets from the list into your footer widget areas. Common widgets include text, menus, social icons, and recent posts. Click on a widget to edit its content and settings. You can also remove or rearrange widgets easily here.
Publishing Updates
After making your changes, find the Publish button at the top of the Customizer panel. Click it to save and apply your edits. Your site’s footer will update immediately. You can revisit the Customizer anytime to make new changes or adjustments.
Credit: 10web.io
Editing Footer Text
Editing footer text in WordPress allows you to personalize your website’s bottom section. This area often shows copyright info, credits, or simple messages. Changing this text helps your site feel more unique and professional. You can update footer text directly or use plugins to make it easier.
Changing Copyright Text
To change copyright text, go to your WordPress dashboard. Navigate to Appearance > Customize. Look for the Footer or Widgets section. Some themes show a specific field for copyright text here. Enter your desired message, like “© 2024 Your Site Name.”
If your theme does not have this option, try editing footer.php. Go to Appearance > Theme Editor. Find footer.php file on the right side. Locate the copyright line and replace it with your text. Be careful when editing code. Save changes and check your site.
Using Plugins For Text Customization
Plugins make editing footer text simple without touching code. Search for “Footer Text” or “Copyright” plugins in WordPress Plugin Directory. Install and activate your chosen plugin. These tools offer easy fields to change text and style.
Some plugins also add features like links, social icons, or custom HTML. They work well for users who prefer a visual interface. Always update plugins regularly for security and compatibility. Plugins help keep your footer fresh and professional.
Advanced Footer Customization
Advanced footer customization lets you create a unique look for your WordPress site’s footer area. It goes beyond basic editing. You can add new features, change layouts, and include interactive elements. This approach helps your website stand out and improves user experience.
Using advanced methods, you control every part of the footer. You can design it to match your brand perfectly. Here are some ways to customize your footer in detail.
Using Theme Builders
Theme builders give you full control over the footer design. These tools use drag-and-drop interfaces to create custom layouts. You can add sections, columns, and style each element without coding.
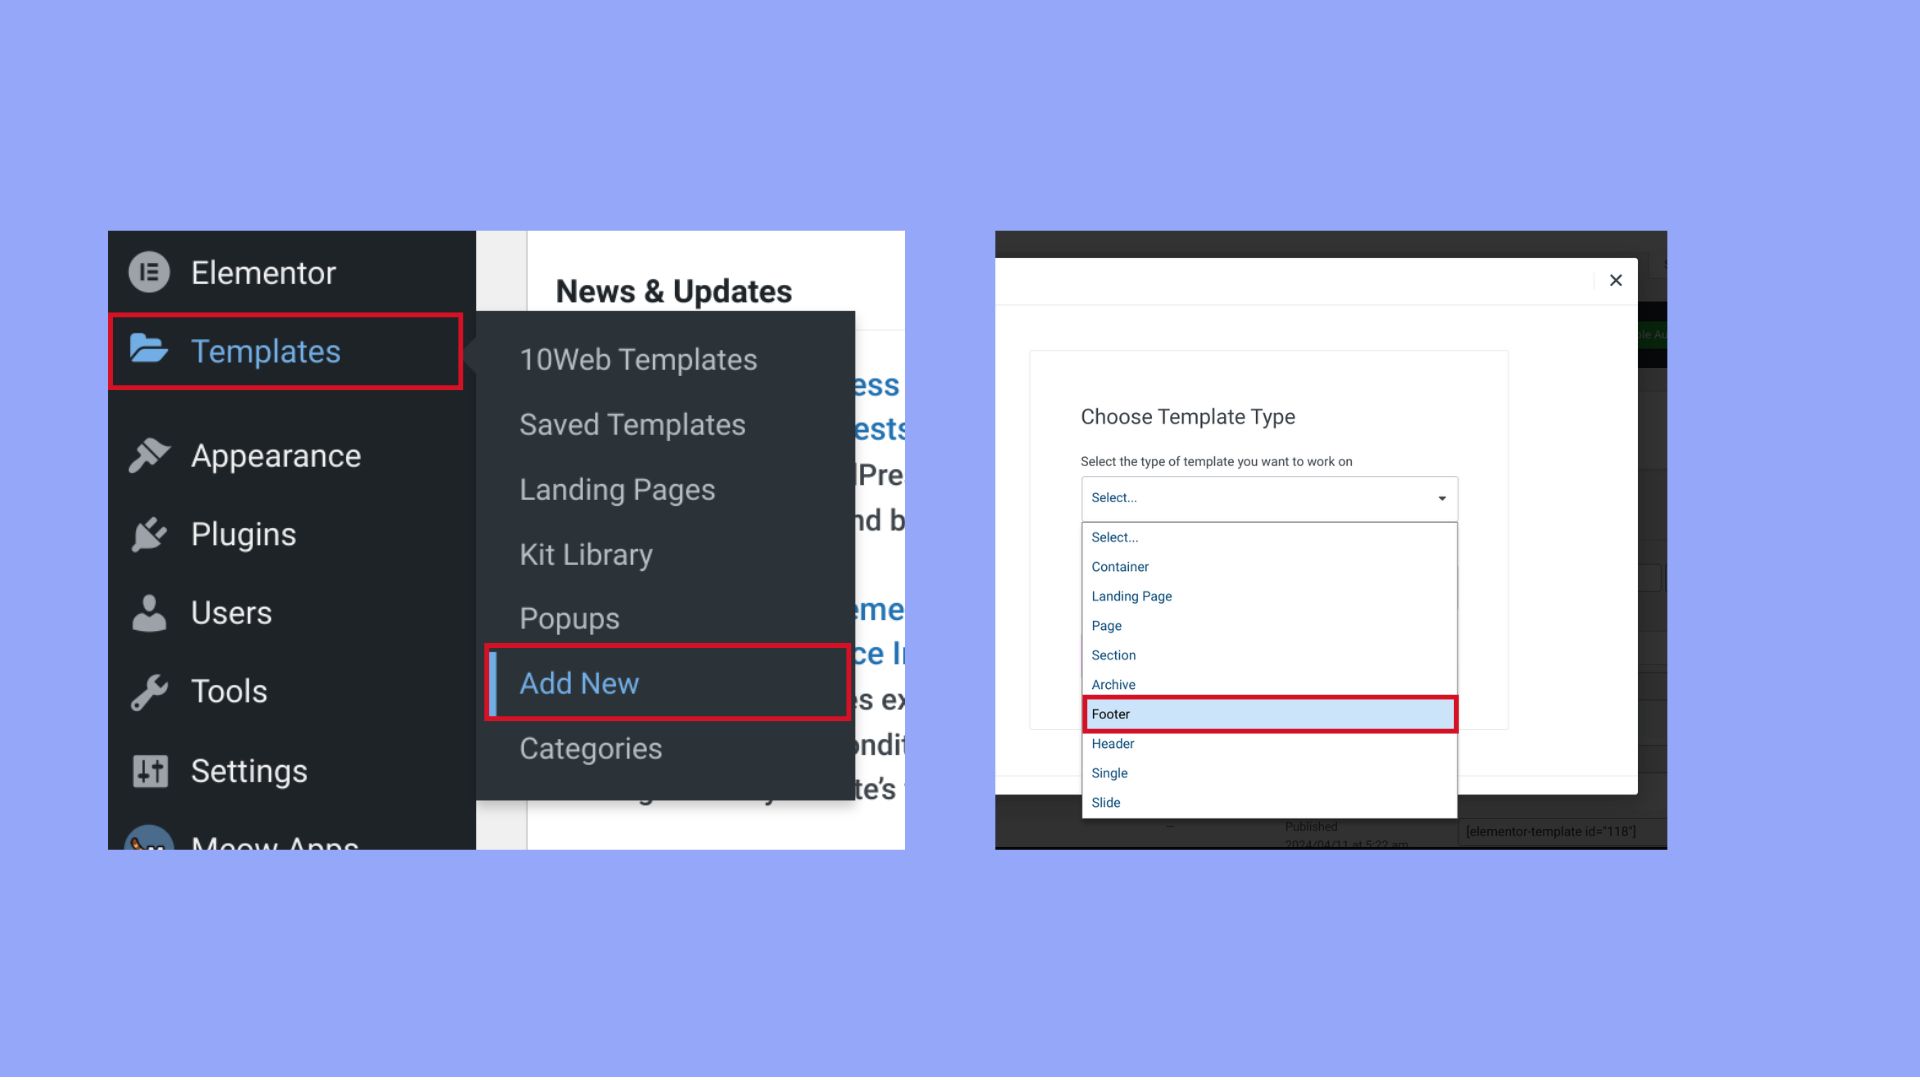
Popular theme builders like Elementor, Divi, and Beaver Builder support footer editing. They allow you to save footer templates and reuse them across your site. This method is user-friendly and flexible for various design needs.
Adding Custom Code
Custom code helps add unique features that theme builders may not offer. You can insert HTML, CSS, or JavaScript directly into the footer area. This method requires basic coding knowledge but offers great flexibility.
Use the WordPress Customizer’s “Additional CSS” section or a child theme’s footer.php file. Custom code can improve footer functionality, style, and responsiveness. Always backup your site before making code changes.
Incorporating Social Media Links
Adding social media links in the footer connects visitors to your profiles. It increases engagement and helps build your online presence. Most themes include widget areas for easy social link placement.
Use icon widgets or embed social media buttons with HTML code. Choose simple icons to keep the footer clean and organized. Place links where they are visible but not distracting from main content.
Common Footer Elements
The footer is a key part of any WordPress website. It appears at the bottom of every page. Common footer elements help visitors find important information quickly. They also improve site navigation and build trust.
Understanding these elements makes editing your footer easier. You can customize the footer to suit your site’s needs. Below are the most common elements found in WordPress footers.
Contact Information
Contact information in the footer provides visitors with ways to reach you. This often includes phone numbers, email addresses, and physical locations. Adding social media links here can also help users connect with your brand. Clear contact details improve user experience and increase engagement.
Navigation Links
Navigation links in the footer help visitors explore your website. These links usually repeat main menu items or highlight important pages. Examples include About Us, Services, Blog, and Contact pages. Footer navigation offers an easy way to browse your site without scrolling back up.
Legal Notices
Legal notices are essential for protecting your website and building trust. Common legal elements include privacy policies, terms of service, and disclaimers. Displaying these links in the footer makes them easy to find. It shows visitors your site respects privacy and follows laws.
Troubleshooting Footer Issues
Troubleshooting footer issues in WordPress can be tricky. Sometimes, changes you make do not show up on your site. Other times, widgets in the footer may not work as expected. Some themes limit what you can edit in the footer area. Understanding these common problems helps you fix footer issues faster. Here are key problems and how to handle them.
Footer Not Updating
When your footer changes do not appear, clear your browser cache first. WordPress may also use caching plugins that delay updates. Try clearing these caches or disabling caching temporarily. Check if you saved your changes properly in the editor or customizer. Sometimes, a plugin or theme conflict can block footer updates. Test by disabling plugins one at a time to find the cause.
Widget Conflicts
Footer widgets can cause conflicts if they overlap or use the same space. Some widgets may not display correctly due to outdated code or incompatibility. Remove all widgets from the footer and add them back one by one. This method helps find which widget causes the problem. Always update your plugins and themes to avoid widget conflicts.
Theme Restrictions
Many themes restrict footer edits to protect design consistency. Some themes only allow text changes, not layout changes. Others may hide footer options in the customizer or editor. Check your theme’s documentation for footer editing rules. Switching to a more flexible theme can solve these issues. Use a child theme to make advanced footer changes safely.
Credit: www.crazyegg.com
Best Practices For Footer Design
The footer is the last part visitors see on every page. It holds key information and links. Designing the footer well helps users find what they need fast. Follow best practices to keep footers neat, clear, and effective. A well-designed footer boosts user trust and site usability.
Keeping It Simple
A simple footer avoids clutter and confusion. Include only essential links like contact info, privacy policy, and social media. Use clear labels and avoid long lists. White space around elements improves readability. Simple footers load faster and look cleaner.
Ensuring Mobile Responsiveness
Many users visit websites on phones or tablets. Make sure the footer adapts to small screens. Text should be easy to read without zooming. Buttons and links need enough space for tapping. Test the footer on different devices to ensure usability.
Maintaining Brand Consistency
Footers should match the website’s style and colors. Use the same fonts and color scheme as the main site. Include your logo or brand mark for recognition. Consistent design builds trust and strengthens your brand identity across pages.
Frequently Asked Questions
How Do I Edit A Footer In WordPress?
To edit a footer in WordPress, go to Appearance > Editor for block themes or Appearance > Customize for classic themes. Select the footer area, then add, remove, or rearrange blocks or widgets. Save or publish changes to update your footer content.
How Do I Edit An Existing Footer?
To edit an existing footer, go to WordPress dashboard. For block themes, select Appearance > Editor, then edit footer blocks. For classic themes, choose Appearance > Customize, find Footer or Widgets, and modify content. Save or publish changes to apply them immediately.
How Do I Edit The Footer Of My Website?
To edit your website footer, go to WordPress dashboard. For block themes, select Appearance > Editor, then edit footer blocks. For classic themes, choose Appearance > Customize, then modify Footer or Widgets. Save changes to update your footer content and design easily.
How To Get Footer Menu In WordPress?
Access your WordPress dashboard, then go to Appearance > Editor for block themes or Appearance > Customize for classic themes. Edit or add footer menu items, then save changes.
Conclusion
Editing the footer in WordPress is simple and quick. Use the Site Editor for block themes or the Customizer for classic themes. Add, remove, or rearrange blocks or widgets to fit your needs. Always save or publish your changes to make them live.
A well-edited footer improves your website’s look and usability. Now, your site footer can show exactly what you want. Keep practicing, and editing will become even easier.


