
Are you ready to make your WordPress website truly stand out? Customizing the theme divider in WordPress is your secret weapon to captivating visitors and keeping them engaged.
Imagine a website that not only looks professional but also reflects your unique style and brand personality. With just a few tweaks, you can transform those plain dividers into eye-catching elements that guide your visitors effortlessly from one section to the next.
This article will walk you through the process, breaking it down into simple steps that anyone can follow, even if you’re not a tech wizard. Don’t miss out on the chance to elevate your website’s design and make a lasting impression—read on to discover how you can easily customize your WordPress theme divider and watch your site come to life!
Choosing The Right Theme
Picking the best theme is important. Think about your website’s purpose. A business site needs a professional look. A personal blog can be more casual. Check how easy the theme is to use. Some themes have many features. Others are simple. Ensure the theme is mobile-friendly. Many people use phones to browse. Look at the theme’s loading speed. Fast sites keep visitors happy. Make sure the theme supports plugins. Plugins add extra features to your site. Lastly, check if the theme is updated regularly. This keeps your site safe and working well.
Many themes are available. Astra is lightweight and fast. OceanWP offers many features. Both are popular. Divi is very flexible. It has a drag-and-drop builder. Neve is easy to use. It suits beginners well. Twenty Twenty-One is a default theme. It’s simple and elegant. These themes can fit different needs. Each has unique strengths.
Installing Your Theme
Open your WordPress dashboard. Find Appearance in the sidebar. Click on Themes. At the top, click Add New. Search for themes in the directory. Choose one you like. Click Install and then Activate. Your theme is now active.
Go to your WordPress dashboard. Select Appearance. Click Themes. Click Add New at the top. Choose Upload Theme. Find your theme file. It should be in .zip format. Select the file. Click Install Now. When done, click Activate. Your custom theme is ready.
Customizing Theme Divider
To begin, log into your WordPress dashboard. Locate the Appearance section on the left menu. Click on Customize to enter the theme customizer. The theme customizer is a powerful tool. It helps in making changes to your website. You can see changes live before saving them. This makes it easy to experiment with different styles.
Within the customizer, look for the Divider settings. Some themes may have this under a different name. Click on it to view customization options. You can change the color, style, and thickness. Adjust these settings to match your site’s look. If available, you can also add icons or text to dividers. Always preview changes to ensure they look right. Once satisfied, click Save & Publish to apply changes.
Utilizing WordPress Plugins
WordPress offers many plugins to help with theme customization. Plugins add special features to your site. They make tasks easier. Popular plugins are Elementor and WPBakery. These are drag-and-drop builders. They allow simple design changes. You don’t need coding skills. For styling, try Custom CSS and JS. This plugin lets you add custom styles. WooCommerce is great for online stores. It helps manage products and sales. Always choose plugins with good reviews. Make sure they are updated often. This ensures they are secure and work well.
Go to the WordPress dashboard. Click on “Plugins” then “Add New”. Search for the plugin name. Click “Install Now”. After installing, click “Activate”. The plugin is now ready to use. Always check for plugin updates. Updates keep your site safe. They fix bugs and add new features. Regular updates are important for good performance.
Adding Custom Css
Customizing theme dividers in WordPress is easy with custom CSS. Access the WordPress dashboard, navigate to Appearance, and select Customize. Use the Additional CSS tab to add your custom code, giving your theme dividers a unique look effortlessly.
Locating The Custom Css Editor
To change a theme, find the Custom CSS Editor. It is in the WordPress dashboard. Go to Appearance and click Customize. Look for the Additional CSS section. This is where you can add your custom styles. It is easy to spot and use. This editor lets you change theme designs. Make sure you save changes after editing. Saving keeps your work safe.
Basic Css For Divider Customization
CSS makes theme dividers look special. Use border for line style. Choose width for line thickness. Change color for different looks. Use margin for space around the divider. Experiment with different styles. You can also use background-color for colorful dividers. Add padding for extra space. Try different settings to see what fits best. It is fun to customize dividers. Make your site look unique.
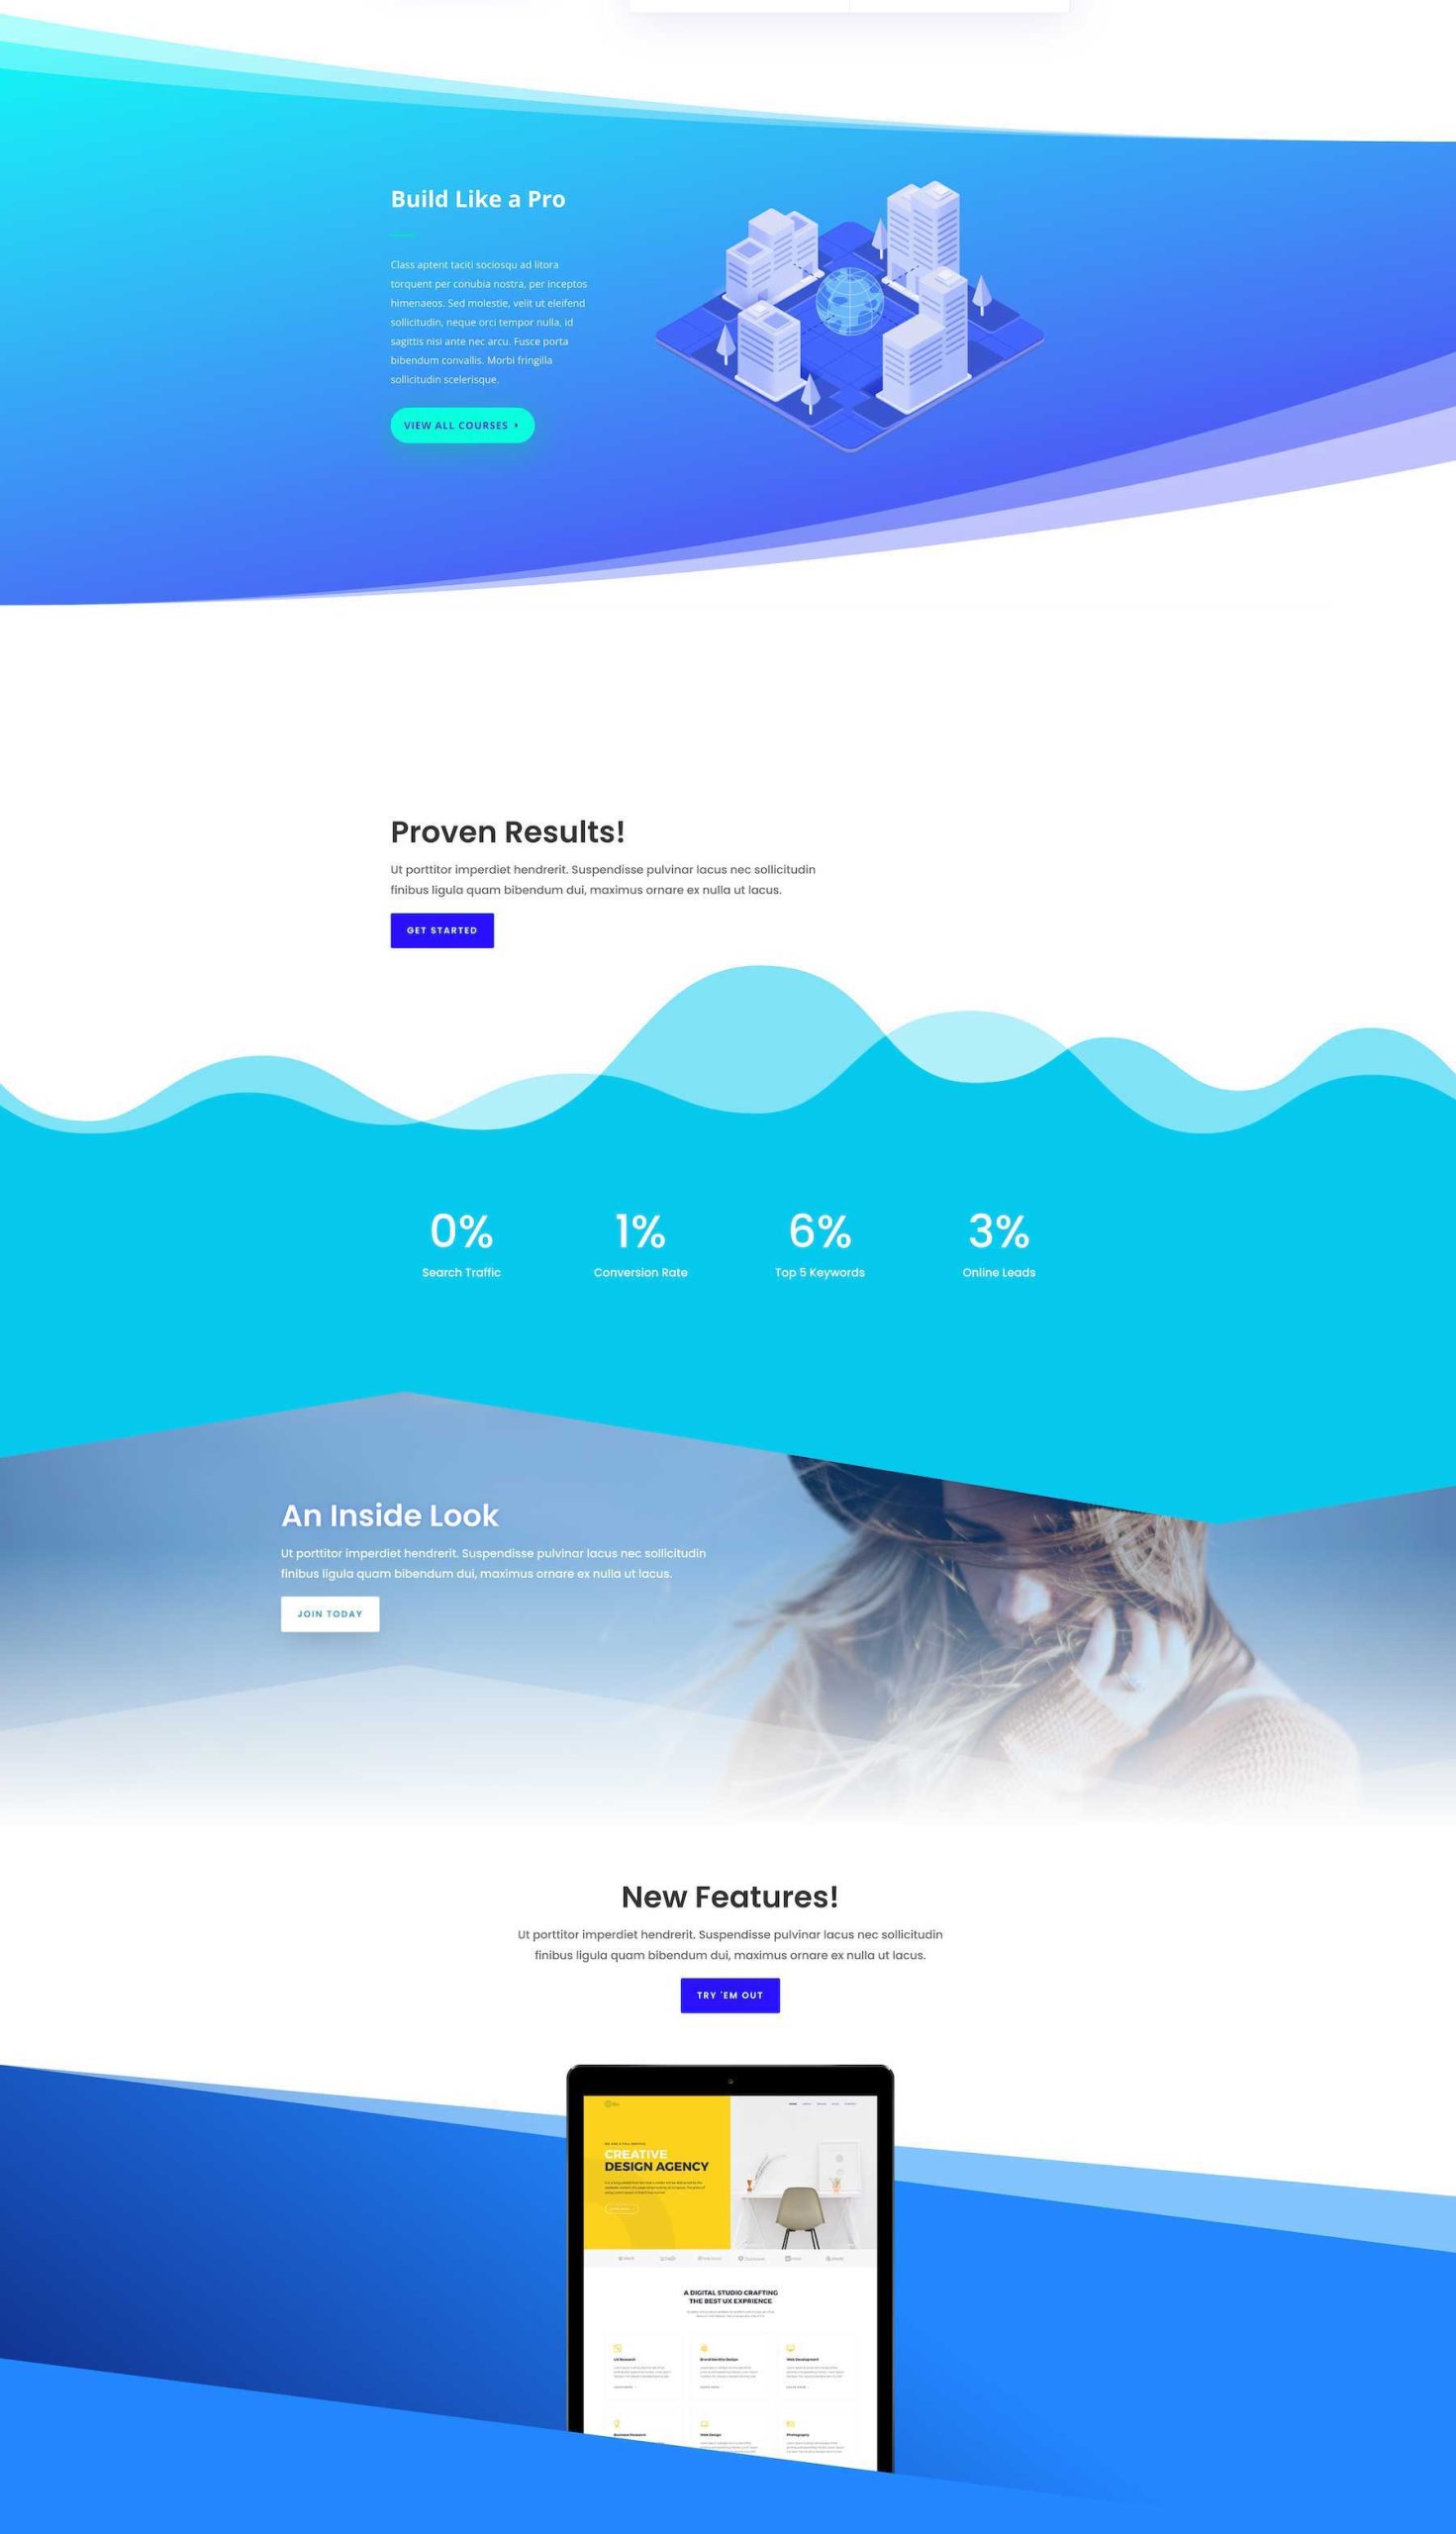
Credit: www.elegantthemes.com
Testing And Previewing Changes
Customizing theme dividers in WordPress involves testing and previewing changes effectively. Use WordPress Customizer to adjust divider styles and layouts. Preview your adjustments in real-time to ensure the design meets your expectations before going live.
Using The Preview Function
Use the Preview Function to see changes before publishing. It helps you find mistakes. Click the preview button at the top. A new tab opens. It shows how your site looks now. Make sure everything is in the right place. Preview helps avoid problems later.
Ensuring Mobile Responsiveness
Mobile Responsiveness is important. Many people use phones to browse. Check how your site looks on a phone. Use tools like the mobile view in your browser. Make sure buttons are easy to click. Text should be easy to read. Images should fit the screen. This makes your site user-friendly.
Troubleshooting Common Issues
Errors can appear in WordPress themes often. One common mistake is missing CSS files. This can cause layout problems. Another error is broken links. They make pages inaccessible.
Check your theme settings. Sometimes settings change without notice. Plugins might conflict with the theme. Review installed plugins. Disable one-by-one to spot problems.
Support is crucial for solving issues. Join forums to discuss problems. WordPress community helps quickly. Read user guides for your theme. Guides provide helpful tips.
Look for tutorials online. Many tutorials explain solutions step-by-step. Contact theme developers if needed. Developers can solve unique problems effectively.

Credit: muffingroup.com

Credit: docs.themeisle.com
Frequently Asked Questions
How Do I Change A Theme Divider?
To change a theme divider, go to your WordPress dashboard. Navigate to Appearance > Customize. Here, select the section with the divider. You can adjust its size, color, and style under the design options. Save changes to apply them to your website.
Always preview before finalizing changes.
Can I Customize Divider Without Coding?
Yes, you can customize dividers without coding using the WordPress Customizer. Many themes offer built-in options for adjusting dividers. Simply navigate to Appearance > Customize and modify the divider settings. Choose from available styles, colors, and sizes to match your design preferences.
Which Plugins Help Customize Dividers?
Several plugins can help customize dividers in WordPress. Elementor, Divi, and WPBakery are popular choices. They offer drag-and-drop functionality to easily modify dividers. With these plugins, you can change styles, colors, and sizes without coding. Check compatibility with your theme before installing.
Why Customize Theme Dividers?
Customizing theme dividers enhances your website’s design and usability. It helps maintain visual consistency and improves user experience. Unique dividers can distinguish sections and guide visitors through content. A well-designed divider aligns with your brand identity, making your site more engaging and professional.
Conclusion
Customizing your WordPress theme divider is simple. It enhances your site’s look. With easy steps, you can make your website unique. Start by choosing the right theme. Then, tweak the settings to fit your style. Don’t forget to preview changes.
This ensures everything looks perfect. Use tools and plugins for better results. Practice regularly to improve your skills. Your site will stand out from the crowd. Keep experimenting with designs. Soon, you’ll create a visually appealing website that attracts visitors.
Enjoy the process and watch your site flourish!


