

Are you ready to bring your ideas to life online? Creating a website with WordPress is easier than you might think, even if you have no prior experience.
Imagine having full control over your site’s design, content, and features—all without needing to write a single line of code. In this guide, you’ll discover simple, step-by-step instructions to build your own WordPress website from scratch. By the end, you’ll have a professional-looking site that’s ready to impress visitors and help you achieve your goals.
Let’s dive in and make your website dreams a reality!
Credit: wedevs.com
Choosing WordPress Type
Choosing the right type of WordPress is an important step in building your website. WordPress offers two main options: WordPress.com and WordPress.org. Each has its own features and limits. Knowing the difference helps you pick the best fit for your needs. This section explains the differences and lists the pros and cons of each choice.
WordPress.com Vs WordPress.org
WordPress.com is a hosted service. It means your website runs on WordPress servers. You do not need to buy hosting or manage technical details. WordPress.org is self-hosted. You download the software and install it on your own web host. This gives you full control over your site.
WordPress.com is easier for beginners. It handles updates, backups, and security for you. WordPress.org needs more effort but offers more freedom. You can add any plugin or theme you want. You can customize your site deeply.
Pros And Cons Of Each
WordPress.com pros include simple setup and free hosting options. It suits small blogs and portfolios. Its cons are limited themes and plugins. You cannot upload custom plugins on free plans. Monetization options are restricted.
WordPress.org pros are unlimited customization and plugin access. You control your data and site features. It supports e-commerce and advanced functions. Cons include cost for hosting and domain. You handle maintenance, security, and updates.

Credit: wordpress.org
Selecting Domain And Hosting
Selecting the right domain and hosting is the first step to build your WordPress website. Your domain name is the web address visitors use to find your site. Hosting is the service that stores your website files online. Both must be chosen carefully to ensure your site runs smoothly and looks professional.
Picking A Domain Name
Choose a domain name that is short, easy to remember, and matches your brand. Use common words and avoid complicated spellings. Select a domain extension like .com, .net, or .org based on your website type. Check if the domain is available using domain registration sites. Try to avoid numbers or hyphens for simplicity. A good domain name helps visitors find you easily.
Choosing A Hosting Provider
Select a hosting provider that offers good speed, uptime, and support. Look for hosts with WordPress-specific plans for easy setup. Check customer reviews to learn about reliability. Consider the server location; closer servers load your site faster for local visitors. Choose a provider with automatic backups and security features. Affordable pricing with scalable plans suits growing websites.
Setting Up Hosting Account
Create an account on your chosen hosting provider’s website. Pick a hosting plan that fits your needs and budget. Enter your domain name or register a new one during signup. Fill in your personal and payment details carefully. After payment, you will receive access to your hosting dashboard. Use the dashboard to install WordPress and manage your website files.
Installing WordPress
Installing WordPress is the first step to creating your website. It sets up the software needed to run your site. This process can be simple or detailed, depending on your choice. Two common methods are one-click installation and manual installation. Both get WordPress ready to use.
One-click Installation
Many web hosts offer one-click WordPress installation. This option is fast and easy. You just log into your hosting account. Find the WordPress installer tool. Click a few buttons, and WordPress installs automatically. No technical skills are required.
This method saves time and reduces errors. You get a working WordPress site quickly. It is perfect for beginners or those who want a hassle-free start.
Manual Installation Steps
Manual installation gives more control over setup. It involves downloading WordPress from the official site. Then, upload files to your web server using FTP. Next, create a database for WordPress on your hosting panel.
After that, run the WordPress installation script by visiting your site URL. Fill in the database and site details on the setup page. Finally, complete the setup to access your WordPress dashboard.
This method may take longer but helps you learn the basics. It is useful for custom setups or specific hosting environments.
Credit: www.websitebuilderexpert.com
Configuring Basic Settings
Configuring basic settings is the first step after installing WordPress. It helps shape your website’s identity and user experience. Proper settings ensure visitors find your site easily and enjoy smooth navigation. These settings include the site title, permalinks, timezone, and language. Adjusting them correctly will improve your site’s performance and SEO.
Setting Site Title And Tagline
The site title is your website’s name. It appears in the browser tab and search results. The tagline is a short phrase that describes your site’s purpose. Go to the WordPress dashboard, then Settings > General. Enter your site title and tagline here. Keep the title clear and the tagline simple. This helps visitors understand your site quickly.
Adjusting Permalinks
Permalinks are the URLs of your posts and pages. Clean and readable URLs improve SEO and user experience. Navigate to Settings > Permalinks in the dashboard. Choose the “Post name” option for simple URLs. This format uses your post title in the URL. It looks neat and helps search engines index your pages better.
Setting Timezone And Language
Setting the correct timezone ensures your posts show accurate publish times. It also helps with scheduling content. Go to Settings > General and find the timezone option. Select your local timezone from the dropdown menu. Below that, choose your site’s language. This sets the default language for your dashboard and user interface. Selecting the right language makes the site easier to manage.
Choosing And Installing Themes
Choosing the right theme is the first step to creating a great WordPress website. Themes control the look and feel of your site. They affect colors, layouts, and fonts. Picking a theme that fits your style and needs is important. Installing and customizing the theme helps make your website unique and user-friendly.
Free Vs Premium Themes
Free themes are easy to find and use. They offer basic designs and features. Good for simple websites and beginners. Premium themes cost money but have more options. They come with better support and regular updates. Premium themes often include extra tools for customization. Choose based on your budget and site goals.
Installing Themes From Dashboard
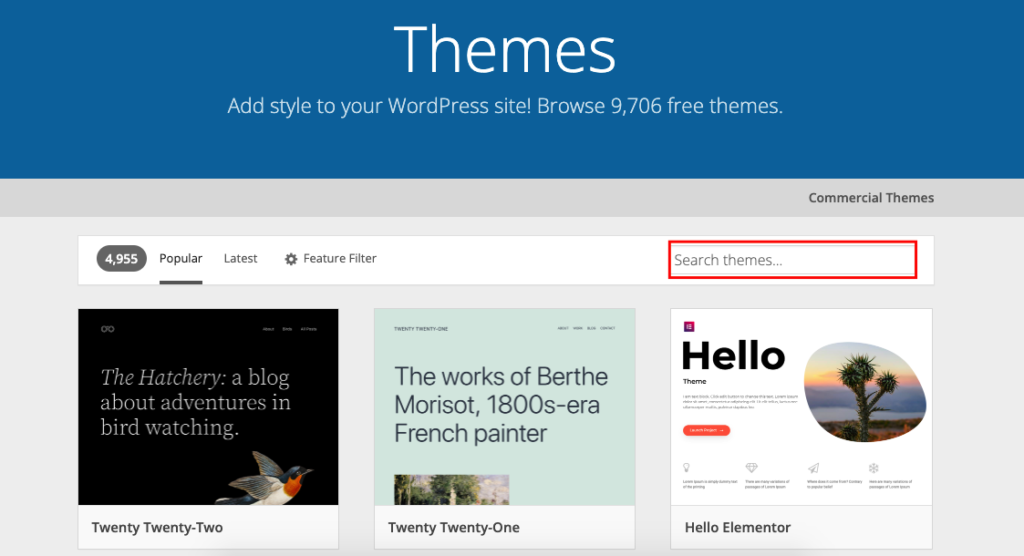
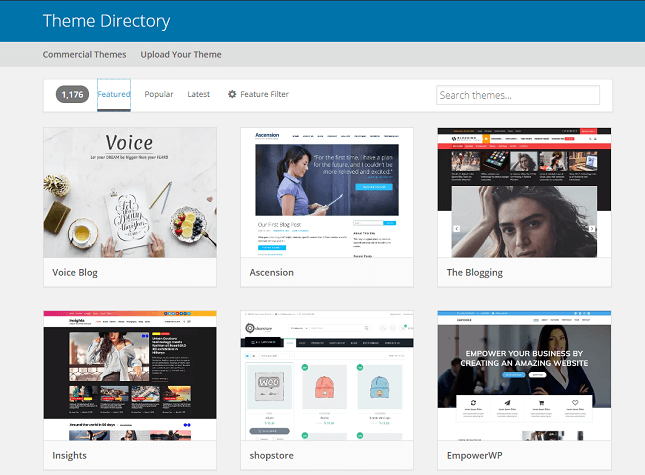
Log in to your WordPress dashboard to start. Go to Appearance > Themes > Add New. Use the search box to find themes. Preview themes before installing to see how they look. Click “Install” then “Activate” to use the theme. You can also upload themes from your computer. Installing takes only a few clicks.
Customizing Your Theme
Go to Appearance > Customize to change your theme’s settings. Adjust colors, fonts, and layout easily here. Add your logo and change the header image. Use widgets to add extra features like menus or contact forms. Preview changes live before saving. Customization helps make your site fit your brand and style perfectly.
Adding Essential Plugins
Adding essential plugins improves your WordPress website’s functionality. Plugins help add new features without coding. They make your site faster, safer, and easier to manage. Choosing the right plugins is important for a smooth experience. This section covers the must-have plugins, how to install them, and how to manage settings.
Must-have Plugins For Beginners
Start with plugins that improve security, speed, and SEO. A security plugin protects your site from hackers. Caching plugins help your site load faster for visitors. SEO plugins assist in optimizing your content for search engines. Contact form plugins make it easy for visitors to reach you. Choose plugins with good reviews and regular updates.
Installing And Activating Plugins
Go to your WordPress dashboard and open the Plugins menu. Click on “Add New” to search for plugins. Use the search box to find the plugin you want. Click “Install Now” and then “Activate” to enable the plugin. After activation, the plugin will start working on your site. Some plugins add a new menu or settings page.
Managing Plugin Settings
Access plugin settings from the dashboard menu or under Settings. Configure options to fit your website needs. For security plugins, set up firewalls and scans. SEO plugins need your website information and keywords. Test your site after changing settings to ensure it works well. Regularly update plugins to keep your site safe and fast.
Creating Website Pages
Creating website pages in WordPress is simple and flexible. Pages form the core structure of your site. They hold your content and help visitors navigate. You can add pages, change layouts, and set which page appears first. Each step shapes your website’s look and feel.
Adding New Pages
To add a new page, go to the WordPress dashboard. Click on “Pages” and then “Add New.” Enter a title for your page. Use the editor to add text, images, or videos. You can save your work as a draft or publish it immediately. Repeat this to build all the pages your site needs.
Customizing Page Layouts
WordPress offers many layout options. Use blocks to arrange content in columns, grids, or full width. Some themes include extra layout settings. Change colors, fonts, and backgrounds to fit your style. Preview changes before publishing to ensure everything looks right. Custom layouts help your pages stand out.
Setting Homepage And Blog Page
Choose which page visitors see first by setting a homepage. Go to “Settings” then “Reading” in the dashboard. Select “A static page” and pick your homepage from the list. Next, choose a page to show your blog posts. This setup helps you control your site’s front page and blog section separately.
Designing Navigation Menus
Navigation menus are essential for any website. They help visitors find important pages easily. Good menus improve user experience and keep visitors engaged. WordPress offers simple tools to design clear, effective navigation menus. This section explains how to create and manage menus in WordPress.
Creating Menus
Go to the WordPress dashboard and find the “Appearance” tab. Click on “Menus” to start creating a new menu. Give your menu a name to keep things organized. Click the “Create Menu” button to set it up. You can create multiple menus for different parts of your site.
Adding Pages And Links
Add your pages by selecting them from the list on the left. Click “Add to Menu” to include them in your navigation. You can also add custom links to external sites or specific URLs. Drag and drop menu items to arrange their order. Create drop-down menus by placing items under a parent page.
Menu Placement Options
Choose where your menu appears on your site. Common spots include the header, footer, or sidebar. Your theme controls available placement areas. Select the location under “Menu Settings” or in the “Manage Locations” tab. Preview your site to check how menus look on different devices.
Adding Content And Media
Adding content and media is a key step in building your WordPress website. It lets you share your message and connect with visitors. Clear, well-organized content helps keep readers interested. Including images and videos makes your site lively and engaging. WordPress offers simple tools for adding and managing content. Follow these tips to add text, photos, and videos easily.
Using The Gutenberg Editor
The Gutenberg editor uses blocks for content creation. Each block can hold text, images, or other media. This layout makes editing simple and flexible. You can add headings, paragraphs, lists, and more. Drag and drop blocks to change their order. The editor shows a live preview of your page. It also supports reusable blocks for common content. This helps save time and keeps your site consistent.
Uploading Images And Videos
To upload media, open the media library in WordPress. Click “Add New” and select files from your computer. WordPress accepts many file types like JPG, PNG, MP4, and GIF. After uploading, you can insert media into posts or pages. Use captions and alt text to describe images. This improves accessibility and search engine ranking. Videos can be embedded from platforms like YouTube too. Uploading media helps make your content richer and more attractive.
Optimizing Media For Web
Optimizing media speeds up your website loading time. Large files slow down page load and frustrate visitors. Resize images to fit your design before uploading. Use compression tools to reduce file size without losing quality. Choose the right file format: JPG for photos, PNG for graphics. For videos, keep the file size small and use streaming services. Add descriptive alt text to all images. This boosts SEO and helps search engines understand your content better.
Optimizing For Seo
Optimizing your WordPress website for SEO is key to attracting visitors. Search engines rank sites based on many factors. Proper SEO setup helps your site appear higher in search results. This increases traffic and boosts your site’s visibility.
Simple SEO steps improve your website’s chances of being found online. Use tools and settings to guide search engines. Focus on clear titles, descriptions, and site structure. These elements make your site more appealing to search engines and users.
Installing Seo Plugins
Start by installing SEO plugins on your WordPress site. Plugins like Yoast SEO or All in One SEO make optimization easy. They provide tools to manage titles, descriptions, and keywords. These plugins also give tips to improve your content. Regularly update and configure them for best results.
Setting Meta Titles And Descriptions
Meta titles and descriptions tell search engines what your pages are about. Write clear, concise titles that include main keywords. Keep titles under 60 characters for better display in search results. Descriptions should be around 150 characters. Use simple language to describe page content. This helps users decide to click on your site.
Creating Xml Sitemaps
XML sitemaps help search engines find and index your pages. Most SEO plugins can create sitemaps automatically. Submit your sitemap to Google Search Console to improve crawling. Keep your sitemap updated as you add or remove pages. A good sitemap ensures all important pages get noticed.
Securing Your Website
Securing your WordPress website protects your content and visitors. A secure site builds trust and avoids data loss. Taking simple steps can stop many common threats. Focus on strong passwords, trusted plugins, and regular backups. These actions create a safer online space for your site.
Choosing Secure Passwords
Pick passwords that are long and hard to guess. Use a mix of letters, numbers, and symbols. Avoid common words or easy patterns like “1234”. Change passwords regularly to keep accounts safe. Use a password manager to store and create strong passwords. Never share passwords with others or write them down openly.
Installing Security Plugins
Security plugins add protection layers to your WordPress site. They scan for malware and block hackers’ attempts. Choose plugins with good reviews and regular updates. Some popular options include Wordfence, Sucuri, and iThemes Security. Set up notifications to get alerts about security issues fast. Keep plugins updated to fix vulnerabilities.
Setting Up Backups
Backups save copies of your website files and database. They help restore your site after attacks or mistakes. Use plugins like UpdraftPlus or BackupBuddy for easy backup setup. Schedule backups to run automatically and often. Store backups in safe places like cloud storage or external drives. Test backups to ensure they work before a problem occurs.
Launching Your Website
Launching your website is the final step in your WordPress journey. It brings your ideas live for the world to see. This moment requires careful checks to ensure everything works smoothly. A well-launched site gives visitors a great first impression. Follow these simple steps to launch with confidence.
Testing Across Devices
Test your site on phones, tablets, and desktops. Each device shows your site differently. Check for broken links, images, and layout issues. Make sure navigation works well on small screens. This testing ensures your site looks good everywhere.
Checking Speed And Performance
Fast sites keep visitors happy. Use tools like Google PageSpeed Insights to measure speed. Fix slow loading by optimizing images and using caching plugins. A quick site helps with search engine rankings too. Keep performance smooth before launch.
Announcing Your Launch
Tell people your site is live. Share the news on social media and email lists. Write a simple message about what visitors will find. Invite friends, family, and followers to explore your site. A good announcement brings early visitors and feedback.
Maintaining Your Site
Maintaining your WordPress site keeps it running smoothly and securely. Regular care prevents errors and improves performance. It also protects your site from hackers and downtime. Staying consistent with updates and checks saves time and trouble later. Here are key tasks to focus on for effective site maintenance.
Updating WordPress Core
WordPress releases updates to fix bugs and improve security. Installing these updates promptly reduces risks. Updates also add new features and improve speed. You can update WordPress from your dashboard with a few clicks. Always back up your site before updating to avoid data loss.
Managing Plugins And Themes
Plugins and themes add functions and style to your site. Keep them updated to ensure compatibility and security. Remove any plugins or themes you no longer use. Too many plugins can slow your site down. Choose trusted plugins to avoid conflicts or vulnerabilities.
Monitoring Site Health
Site health tools show your website’s status and issues. Regularly check for warnings about performance or security. Fix problems like broken links, slow loading, or outdated software quickly. Use tools like WordPress Site Health or external services. Monitoring helps keep your website fast, safe, and user-friendly.
Frequently Asked Questions
How Do I Create My Own Website Using WordPress?
Choose a domain and hosting, install WordPress, pick a theme, customize your site, and add content using the WordPress dashboard.
Why Are People Moving Away From WordPress?
People move away from WordPress due to security risks, frequent updates, plugin conflicts, and the need for technical skills.
Can You Create A Website For Free With WordPress?
Yes, you can create a free website using WordPress. com’s basic plan. It includes hosting and a WordPress subdomain.
Can I Use WordPress As A Website?
Yes, you can use WordPress to create a fully functional website. It offers easy design, hosting, and management options.
Conclusion
Creating a website with WordPress is simple and cost-effective. Choose a domain and hosting to get started fast. Use themes and plugins to customize your site easily. Keep your site updated for security and performance. Practice regularly to improve your skills over time.
Building a website opens new chances to share your ideas. Start today and enjoy your online presence growing steadily.


