
Are you ready to launch your own website but feeling overwhelmed by the technicalities of setting up a web hosting account? You’re not alone, and the good news is that creating a web hosting account can be simple and stress-free.
Imagine the thrill of seeing your ideas come to life online, attracting visitors from around the globe to your virtual doorstep. Whether you’re building a personal blog, a business site, or an online store, understanding how to efficiently set up your web hosting is the crucial first step.
In this guide, we’ll walk you through the process with straightforward instructions and practical tips, ensuring you feel confident and prepared. Let’s transform your web presence from a dream into reality. Ready to dive in and discover how effortless it can be? Keep reading to unlock the secrets of a successful web hosting setup.
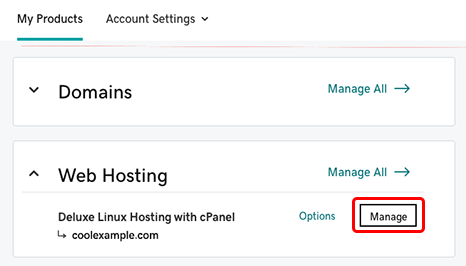
Credit: www.godaddy.com
Choosing A Web Hosting Provider
Understand your website’s goals. Is it a blog or a store? Each has different needs. Blogs need fewer resources. Stores need more power for sales. Storage and bandwidth are key. More traffic means more bandwidth. Large sites need more storage. Security features matter too. Protect your site and users. SSL certificates help keep data safe.
Shared hosting is cheap. Best for small sites. VPS hosting is a step up. Offers more control. Dedicated hosting gives full control. Best for big sites. Cloud hosting is flexible. Handles traffic well. Compare prices. Check what’s included. Look for free domain names and email accounts. Some plans offer free backups.
Check customer feedback. Reviews show real experiences. Ratings tell you how good the service is. Look for consistent patterns. Are people happy? Do they complain a lot? Focus on reliability. A good host keeps sites online. Customer service is important. Quick help solves problems fast. Compare many reviews for a full picture.

Credit: www.youtube.com
Registering A Domain Name
Picking the right domain name is important. It should be short and easy to remember. Avoid using complex words or numbers. A good domain name tells what your website is about. Try to use keywords that fit your website’s theme. The best names are unique and catchy.
Use a domain checker tool to see if your name is free. Many websites offer this service. Enter your chosen name in the search box. If it’s taken, think of a new one. Consider adding a prefix or suffix to make it unique. Check different extensions like .com, .net, or .org.
Once you find a free name, it’s time to buy it. Use a trusted registrar to make the purchase. Some popular ones are GoDaddy and Namecheap. Follow the steps on their website. You will need to create an account first. After purchase, the domain is yours. Keep your login details safe.
Setting Up Your Hosting Account
First, go to the hosting site. Look for the sign-up button. Click it to start. Enter your email and choose a password. Make sure your password is strong. Use letters, numbers, and symbols. This keeps your account safe. After that, fill in your personal details. Name, address, and phone number. Double-check everything. Click submit to finish.
Choose a plan that fits your needs. Basic plans are usually cheaper. They are good for small websites. Bigger plans offer more space. They are better for large sites. Think about how much traffic you expect. More visitors need more resources. Compare prices and features. Pick the one that suits you best.
Once you pick a plan, configure your account settings. Set your domain name if you have one. This is the website address. If not, choose a new one. Next, set your billing information. Choose how you want to pay. Credit card or PayPal work well. Review your settings. Make sure all details are correct before you save.
Configuring Server Settings
First, you must log into your control panel. Use the details from your hosting provider. Find the login page. Enter your username and password. Once inside, you will see many options. Look for server settings. These settings let you manage your website. Remember, the control panel is important. It helps you handle your web hosting.
Navigate to the DNS section. DNS records are crucial. They connect your domain to your server. Choose the option to edit DNS records. Enter the correct information. This step ensures your website is visible online. Check that each record is updated. Save changes when you finish. DNS updates might take time. Be patient.
Locate the email settings in the control panel. Email accounts are vital for communication. Create new accounts if needed. Fill in the required fields. Set passwords for security. You can also delete unused accounts. Email management keeps your site professional. Check settings regularly. Ensure everything works smoothly.
Uploading Website Files
FTP clients help move files from your computer to the web server. First, install an FTP client like FileZilla. Open the client and connect to your server. Use the host, username, and password provided by your host. Then, select files on your computer and drag them to the server panel. Watch the progress until all files upload.
Some hosts offer a built-in file manager in the control panel. Log in to your hosting account. Find the file manager tool. Click it to open. Now you can upload files directly. Choose the files on your computer. Click upload. Wait for the files to finish uploading.
Keep your files neat. Always have an index.html file. Put images in an images folder. CSS files go in a styles folder. JavaScript files belong in a scripts folder. This makes it easy to find and edit files later.

Credit: www.youtube.com
Testing And Launching Your Site
Ensure every link on your site works. Test all buttons and forms. Make sure images load quickly. Check your site on different devices. Mobile, tablet, and desktop. See if everything looks good.
Find any errors or bugs on your site. Correct broken links. Fix any spelling mistakes. Ensure forms submit correctly. Use tools to spot problems. Debugging tools help a lot.
Your site is now ready. It’s time to go live. Choose a web host. Point your domain to the host. Follow the steps to publish. Check if your site is visible online. Tell your friends to visit your site.
Maintaining Your Web Hosting Account
Keep an eye on your website’s performance. Check if your pages load quickly. Slow websites can make visitors leave. Use tools to check speed. Ensure no errors are on your site. Fix broken links. Regular checks help improve your site.
Add new content often. Keep your site fresh and interesting. Update pictures and text. Make sure all information is correct. Add new features to engage visitors. Use plugins to make tasks easy. Stay updated with new trends.
Remember to renew your domain on time. Check hosting plans regularly. Make sure you have enough space. Choose the right plan for your needs. Look at costs and features before renewing.
Frequently Asked Questions
How Do I Create A Web Hosting Account?
Sign up with a web hosting provider. Choose a hosting plan. Register a domain name. Complete the payment process. Access your hosting account through the provider’s dashboard.
How Do I Create A Host Account?
To create a host account, visit the platform’s website and click “Sign Up. ” Enter your details, verify your email, and complete the profile setup. Follow any additional instructions provided to finalize your account creation. Ensure you meet all requirements specified by the platform for hosting.
What Is A Website Hosting Account?
A website hosting account stores your website’s files on a server, making them accessible online. It provides storage, bandwidth, and security for your site. Hosting services vary in features and pricing, accommodating different website needs.
How To Start Web Hosting?
Choose a reliable hosting provider. Select a suitable hosting plan. Register a domain name. Set up your website using CMS or custom code. Optimize and secure your site for better performance and protection.
Conclusion
Creating a web hosting account is simple. Follow these steps to start. Choose a reliable hosting provider. Compare features and prices. Select a plan that fits your needs. Register your domain name. Set up your account details carefully. Confirm your payment details.
Access your control panel for management. Start uploading your website files. Monitor your site’s performance regularly. Keep your software updated for security. With these steps, you’re ready to share your site online. Enjoy your new web hosting experience. Share your thoughts in the comments below.
Your feedback helps us improve.


