
Are you looking to enhance your WordPress website by adding a custom menu? Creating a new menu in your WordPress theme can significantly improve your site’s navigation and user experience.
Whether you’re looking to highlight important pages, showcase your services, or simply organize content better, understanding how to create a new menu is a game-changer. Imagine your visitors effortlessly finding what they need, leading to longer visits and more engagement.
In this guide, you’ll discover the simple steps to design a menu that not only looks great but also functions seamlessly. Let’s dive into the process of transforming your website’s navigation and making a lasting impression on your audience.
Choosing The Right Theme
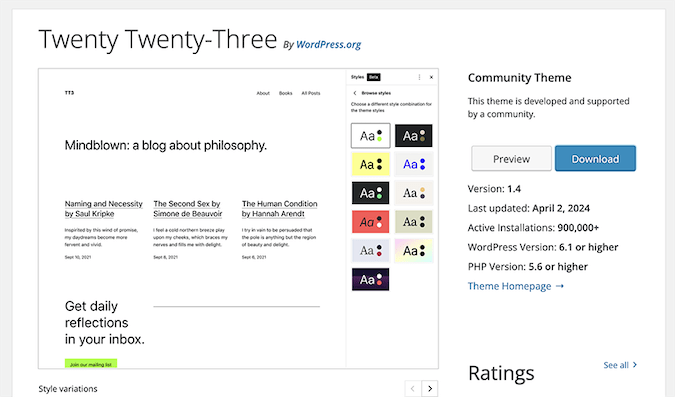
Selecting the right theme simplifies creating a new menu in WordPress. Find the menu settings under the “Appearance” section. Customize your menu by adding pages, links, and categories.
Assessing Theme Compatibility
Choose a theme that fits your needs. Check if it allows menu creation. Some themes do not support custom menus. Look for themes with menu options in their features. This makes it easier for you. Some themes may have limited options. Always test the theme before using it. This ensures it works well with your WordPress setup.
Custom Theme Vs. Pre-built Theme
Custom themes give you full control. You can design them as you like. But they need more work and time. Pre-built themes are ready-made. They save you time and effort. They often come with support and updates. Pick a custom theme for unique needs. Choose a pre-built theme for quick setup. Think about your skills before deciding.
Credit: www.crazyegg.com
Accessing The WordPress Dashboard
First, open your browser. Type your website address in the bar. Next, add /wp-admin to the end of the address. This takes you to the login page. Enter your username. Then, type your password. Click Log In. Now, you can see the WordPress dashboard. The dashboard is where you manage your site.
Once logged in, look at the left side of the screen. Find the menu labeled Appearance. Click it. A new list will appear. This list shows different options. Find the Menus option. Click on Menus. Now, you can create a new menu for your site. This helps organize your pages.
Creating A New Menu
Start by logging into your WordPress dashboard. Find the Appearance option on the left side. Click on it. A drop-down menu will appear. Look for Menus in this list. Click on Menus. This opens the Menu Editor. It helps you add or change menus.
Click on the Create a new menu link. It is at the top of the page. Type a name for your new menu. Keep it simple. Click on the Create Menu button. This makes a new menu. You can add items now. Choose pages or links you want. Click Add to Menu. Your new menu is ready.
Adding Items To Your Menu
Pages and Posts are the main parts of your menu. Start by selecting the “Pages” tab. Here, you can see all your pages. Check the box beside the page you want. Click “Add to Menu.” This will move the page to your menu list. You can also add posts. Go to the “Posts” tab. Select the posts you like. Add them to your menu the same way.
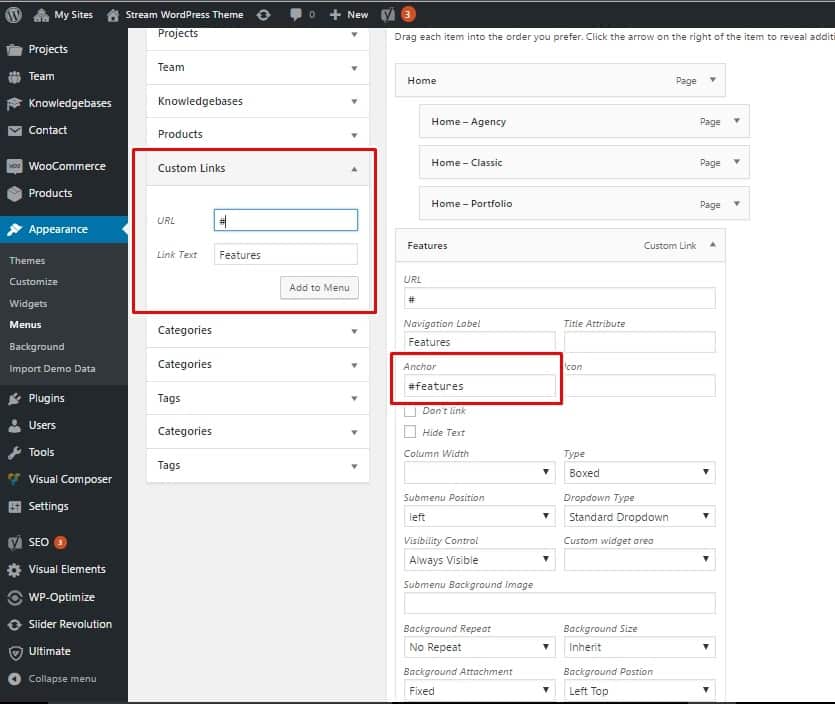
Use Custom Links to add any URL you want. Click on the “Custom Links” tab. Type the URL in the “URL” box. In the “Link Text” box, write what you want to show in the menu. Then, click “Add to Menu.” For Categories, go to the “Categories” tab. Check the categories you want. Add them to your menu with one click. This helps organize your site better.
Organizing Menu Structure
Menus help users find things easily. Submenus make the menu neat. They hide less important links. You can add a submenu under a main menu item. Click on the “Add Items” button. Choose a page or link. Drag it below the main item. This creates a submenu. It shows when you hover over the main item. Users will see everything clearly. It’s simple to do.
Drag and drop makes submenus. Move items under main menu links. Drag them a bit right. This makes them a submenu. You can add many levels. Use submenus wisely. Too many can be confusing. Keep it neat and clean. Users will find things faster. It helps organize content well.
Change the order anytime. Click and drag items up or down. Place them where you want. Reordering is simple and quick. Make important links easy to find. Users will appreciate it. It keeps the menu tidy. They will enjoy using your site.
Assigning Menu Locations
Creating a new menu in a WordPress theme involves assigning menu locations. Access the WordPress dashboard, navigate to “Appearance,” and select “Menus. ” Assign your newly created menu to a designated location to ensure proper display on your site.
Primary And Secondary Menus
Primary menus are the main navigation for your site. They usually appear at the top. Visitors use it to find important pages. Secondary menus can show less important links. For example, contact or blog pages. Set them up in the WordPress dashboard. Go to Appearance, then Menus. Select your desired menu. Assign it to either primary or secondary location. Save changes to update your site.
Footer And Sidebar Menus
Footer menus are located at the bottom. They often include links like privacy policy. Sidebar menus appear on the side of your site. They offer quick access to additional content. Assign these menus in the same way. Use the WordPress dashboard. Go to Appearance, then Menus. Choose your menu. Assign it to footer or sidebar location. Save changes to apply.
Customizing Menu Appearance
CSS makes your menu look unique. Use colors to make it pop. Choose fonts that are easy to read. Add padding for space between items. This makes the menu look neat.
Icons make the menu fun. They help users find things fast. Colors help show what is important. Choose bright colors for important items. Use soft colors for less important items. Try different styles to see what you like.

Credit: visualmodo.com
Saving And Previewing Your Menu
Create a new menu in your WordPress theme by navigating to the Appearance section. After setting your menu items, save your changes and preview them to ensure everything is in place. This quick step lets you check your menu’s appearance before it goes live.
Saving Changes
Click the Save Menu button. Your changes are now safe. Always save your work. It keeps everything updated. Don’t forget this step. Missing it means losing changes. Save often to avoid problems. This step is crucial. Keep your menu secure. It’s easy and quick. Just one click.
Previewing On The Website
Check your menu on the site. Visit your homepage. Look for the new menu. Is it there? Does it look right? Make sure everything is correct. Changes appear instantly. See how it works live. Test the links. Are they working? Verify the order. Is it correct? This helps ensure clarity. A good menu guides users. Keep it neat and useful.
Troubleshooting Common Issues
Creating a new menu in a WordPress theme can be tricky. Navigate to the Appearance section, then select Menus. From there, you can easily add, remove, or reorder items as needed.
Missing Menu Items
Sometimes, menu items go missing. Check the menu settings in your WordPress dashboard. Ensure all items are assigned correctly. If items are still missing, refresh the page. Sometimes a simple refresh solves the problem. If not, check if the theme supports the menu. Some themes may have limited menu spots. Try checking with a different theme. This can help identify the issue.
Responsive Menu Problems
Menus should work on all devices. But sometimes they don’t. Always verify responsive settings in the WordPress theme. Ensure the menu is visible on mobile. Use the customizer to check mobile view. Adjust settings if needed. Ensure media queries are correct in CSS. Sometimes, plugins can cause issues. Deactivate plugins one by one to find the problem.
Credit: visualmodo.com
Leveraging Plugins For Advanced Menus
Plugins make menus better. They add cool features. Max Mega Menu is great. It offers easy menu building. WP Mega Menu has many options. You can create menus with drag and drop. UberMenu is another choice. It offers responsive menus. Menus look good on all devices.
First, find the plugin. Go to the plugin section. Search the name in the box. Click “Install Now”. Wait for the plugin to install. After installation, click “Activate”. Go to settings. Choose the menu settings. Configure the options you want. Save the changes. Check your new menu on the site. Make sure it works well. Enjoy your advanced menu!
Frequently Asked Questions
How Do I Add A Menu In WordPress?
To add a menu in WordPress, go to your Dashboard. Navigate to Appearance > Menus. Click “Create a new menu” and name it. Add items from the left panel by checking boxes and clicking “Add to Menu. ” Save changes.
Your new menu is ready for use.
Can I Customize My WordPress Menu Style?
Yes, you can customize your WordPress menu style. Use built-in theme options or custom CSS for styling. Some themes have menu customization options. Plugins like “Max Mega Menu” offer advanced styling features. Always ensure compatibility with your theme before applying changes.
How To Set Menu Location In WordPress?
To set menu location, go to Appearance > Menus. Select your menu and scroll to “Menu Settings. ” Choose display location options like header, footer, or sidebar. Save changes. Ensure theme supports multiple menu locations for optimal customization.
What Are Common WordPress Menu Issues?
Common WordPress menu issues include menu items not displaying, styling errors, and responsiveness problems. Ensure menu locations are correctly set. Clear cache and check for plugin conflicts. Update themes and plugins regularly to prevent compatibility issues.
Conclusion
Creating a new menu in WordPress is simple and rewarding. You enhance user experience and make navigation easy. Start by accessing the dashboard. Use the menu feature in Appearance settings. Customize according to your theme’s style. Test your menu on different devices.
Ensure it displays correctly and links work. Keep your menu organized. Regularly update it as your site grows. Menus are crucial for guiding visitors. They help users find content quickly. With practice, menu management becomes second nature. Your WordPress site gains clarity and usability.
Enjoy the process of creating a seamless web experience.


