
Creating a web hosting account might seem daunting at first, but it’s much simpler than you think. Whether you’re launching your first website or expanding your online presence, setting up a web hosting account is a crucial step.
Imagine having the power to make your website accessible to the world with just a few clicks. Sounds exciting, right? With the right guidance, you can effortlessly navigate through the process and avoid common pitfalls. In this guide, you’ll discover step-by-step instructions tailored just for you.
Ready to unlock the door to your online success? Let’s dive in and get your web hosting account up and running in no time.

Credit: www.youtube.com
Choosing The Right Hosting Provider
Think about your website’s purpose. Is it for a blog, a shop, or something else? Estimate storage and bandwidth you need. Small sites need less. Big sites need more. Consider future growth too. More visitors may need more resources.
Look at the features offered. Check for disk space, bandwidth, and support. Shared hosting is cheaper. VPS and dedicated hosting offer more power. Balance cost and needs. Check renewal prices too, not just the first-time offer.
Find customer reviews online. Trustworthy sites have honest feedback. Read about uptime and support. Good support is key. Consider negative reviews too. They might show common problems. Testimonials show real experiences.
Registering A Domain Name
Choosing the right name is fun. It should be short and easy to remember. Use words that describe your site. Avoid numbers and dashes. They can confuse people.
Make sure your chosen name is available. You can check this on domain sites. Enter the name and see if it’s taken. If it’s not, you can register it. If it is, try another name.
Once you find an available name, act fast. Register it to make it yours. This involves a small fee. Keep your information safe by choosing privacy protection. This way, your details stay hidden.
Navigating The Hosting Provider’s Website
First, go to the hosting provider’s website. Look for a sign-up or get started button. It’s usually at the top right corner. Click on it to start.
Hosting providers offer different account types. They may include basic, premium, and business. Each offers various features. Choose based on your needs.
Have your personal details ready. This includes your name, email, and address. You also need a payment method. Keep your credit card or PayPal information handy.

Credit: www.youtube.com
Creating A Hosting Account
Start by entering your name and email. These are very important. Use your real name. Use a valid email address. Double-check your details. Make sure they are correct. This helps in future recovery. If you forget your password, you need your email. Your address may be needed too. Some hosts need phone numbers. This is for account security.
Select a plan that suits your needs. Plans vary in price. They offer different features. Some are for small sites. Others are for large businesses. Look at storage options. Check bandwidth limits. Make sure you understand what you are buying. Read the plan details carefully. Choose wisely. Pick what fits your budget.
Payment can be done in many ways. Credit cards are common. PayPal is also used. Some hosts accept other methods. Look for discounts. These can save money. Review the total cost. Check if there are hidden fees. Make sure the payment method is secure. Protect your financial information.
Setting Up Your Website
First, log in to your web hosting account. Find the control panel link. Click on it to enter. The control panel is like your website’s dashboard. Here, you can manage many things.
Select a Content Management System (CMS) from the options. Popular choices are WordPress, Joomla, and Drupal. Click on the install button. Follow the steps to complete the setup. Your website now has a CMS ready.
Go to the settings section in your CMS. Set your website’s title and description. Choose a language and time zone. These steps help visitors understand your site better. Save all the changes you made.
Managing Your Hosting Account
The dashboard is your hosting control center. It shows all the important information. You’ll find tools for managing your website and files. Learn to navigate the dashboard to make tasks easier. Icons and tabs help you find what you need fast. Check for updates or alerts regularly. This keeps your account safe and running well.
Always check your resource usage. Look at bandwidth and disk space often. They show how much data your site uses. High usage may mean it’s time to upgrade. Keeping track helps avoid slowdowns. Too much usage can also cause extra fees. Regular checks help you budget well and keep your site smooth.
Customer support is there to help you. If you have questions, reach out. Live chat and email are common ways to contact them. Some hosts offer phone support too. They can assist with many issues. Ask about technical problems or billing questions. Support teams are trained to solve hosting challenges. Always keep your support contact handy.
Securing Your Website
Creating a web hosting account is the first step in securing your website. Choose a reliable host with strong security features. Setting up your account involves selecting a plan, registering a domain, and configuring security options. Protect your site with secure passwords and regular updates.
Implementing Ssl Certificates
SSL certificates protect your site. They encrypt data. This keeps user information safe. Google likes secure sites. It helps with search ranking. Always check if your SSL certificate is active. Update it before expiry. A secure site builds trust. Users feel safe when visiting. They know their data is protected.
Regular Backups And Updates
Backups save your data. Do them often. Websites can crash. You need backups to recover. Updates are important too. They fix bugs. They improve security. Always update plugins and themes. Check for new versions regularly. This keeps your site running smoothly. Protects against vulnerabilities.
Setting Up Firewalls And Security Plugins
Firewalls block bad traffic. They stop hackers. Security plugins help too. They add extra protection. Install them on your site. Check settings carefully. Ensure they work correctly. They keep your site safe. Protect your content and data. Always monitor security settings. Adjust if needed.
Credit: www.hostinger.com
Frequently Asked Questions
How Do I Create A Host Account?
Sign up on the hosting platform’s website. Provide necessary details and verify your email. Follow prompts to complete your profile. Once finished, your host account will be active. Ensure all information is accurate for smooth processing.
How Do I Set Up A Web Hosting?
Choose a reliable web hosting provider. Sign up for a hosting plan. Access your control panel. Set up your domain and install necessary software. Configure settings and upload your website files.
What Is A Web Hosting Account?
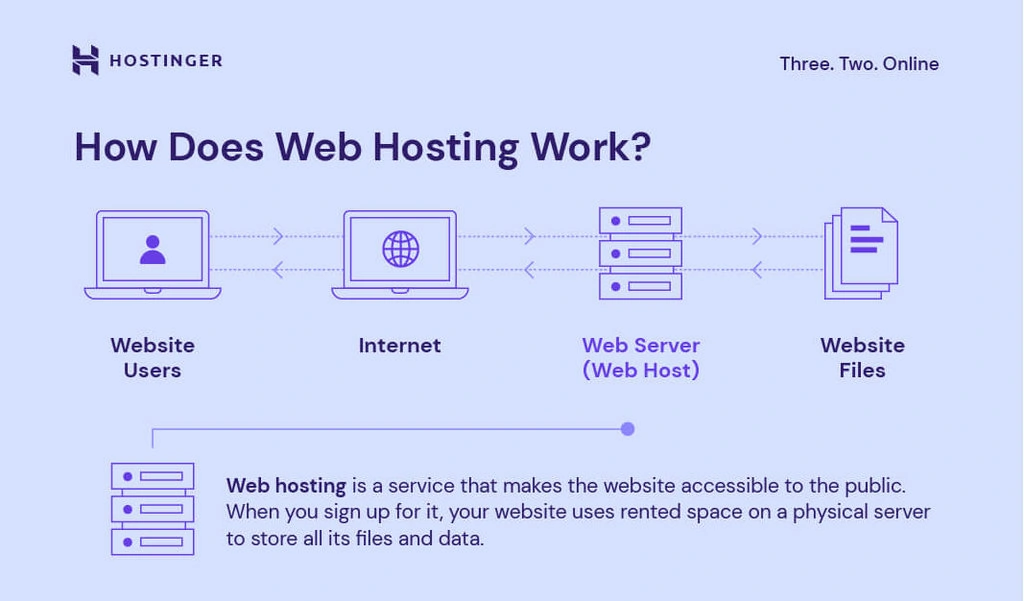
A web hosting account stores your website files on a server, making them accessible online. It provides necessary resources like bandwidth, storage, and security features. Choosing the right hosting impacts site speed and reliability, influencing user experience and SEO rankings.
Consider hosting type and provider for optimal performance.
Is Web Hosting Free?
Most web hosting services are paid, but some providers offer free plans with limited features. Free hosting may include ads and limited resources. For better performance and security, consider investing in paid hosting options. Always compare features and read reviews before choosing a web hosting service.
Conclusion
Creating a web hosting account is simple. Follow the steps. Choose a reliable provider. Sign up using your details. Select the right hosting plan. Make sure it fits your needs. Complete payment. Now, you can manage your website easily. Don’t worry if you’re new.
Many providers offer support. They guide you through the process. Remember, a good host is essential. It ensures your site’s performance. Take your time. Choose wisely. Enjoy your online journey with confidence. Your website is ready to shine.


