
Imagine having the power to access your important files from anywhere in the world. Sounds appealing, right?
Creating a web-hosted file offers just that convenience and flexibility. Whether you’re a business professional, a student, or someone who loves keeping your digital life organized, learning how to create a web-hosted file can transform the way you manage your documents.
You’ll no longer be tied to a single device or location. Instead, your files can be just a click away, waiting for you whenever and wherever you need them. In this guide, we’ll walk you through the simple steps to create a web-hosted file, making sure you feel confident and empowered every step of the way. Ready to unlock the potential of seamless file access? Let’s dive in!
Choosing A Hosting Service
Free hosting can be great for beginners. It often has limited features. Paid hosting offers more control and support. It usually includes better security. Free options might have ads. Paid options might cost more. Both have their pros and cons. Always check the features. Think about your needs.
Look at storage space. Speed is important for websites. Check if support is available. Security should be strong. Pricing matters too. Features vary widely. Consider ease of use. Some services are simple. Others might need more skill. Make a list of what you need. Compare different services.
Credit: www.hostinger.com
Preparing Your File
Choosing the right file format is important. It makes sure everyone can open it. Common formats include PDF, JPEG, and PNG. Each format serves a different purpose. PDF is great for documents. JPEG is best for photos. PNG is used for images with transparent backgrounds.
Smaller files load faster on the web. Compress your files to make them smaller. Use tools like TinyPNG for images. For PDFs, try using online compressors. This helps in faster loading. People will not wait for slow files. They might leave your site if it is too slow.
Setting Up A Hosting Account
Visit a hosting site. Look for the sign-up button. Click it. Fill out the form with your details. Name, email, and password are needed. Double-check your entries. Make sure they are correct. Click submit to register. You will get a confirmation email. Click the link in the email. Your account is now active.
Log in to your account. Go to the settings page. Change your password to something safe. Set your language preference. Choose your time zone. Check other settings. Set them to your liking. Save your changes. Your account is now ready. You can start uploading files.

Credit: www.wikihow.com
Uploading The File
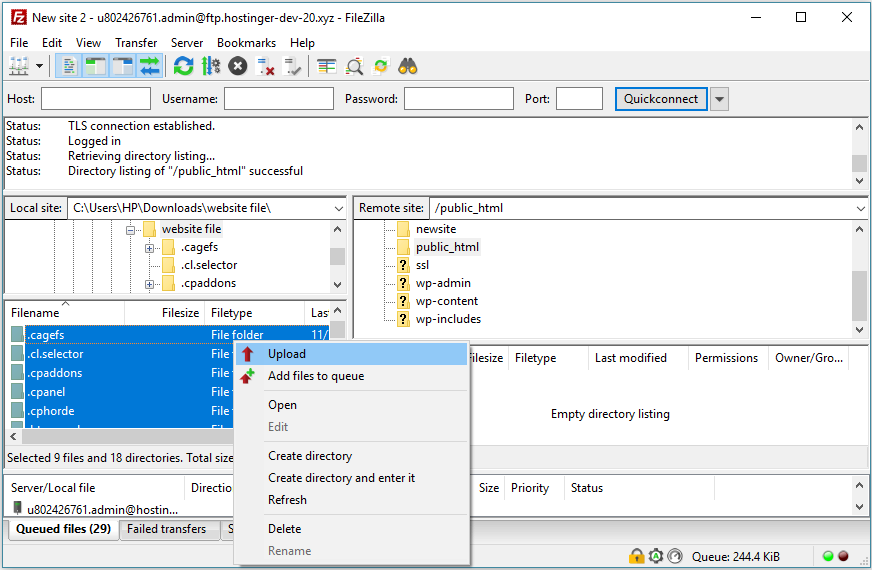
FTP clients help move files to web servers. They make the process simple. First, download an FTP client like FileZilla. Then, install it on your computer. Open the client and enter server details. You need a username and password. Connect to your server. Now, find the file you want to upload. Drag and drop it into the server folder. Your file will now be on the server. Remember to check the file size. Large files may take longer to upload.
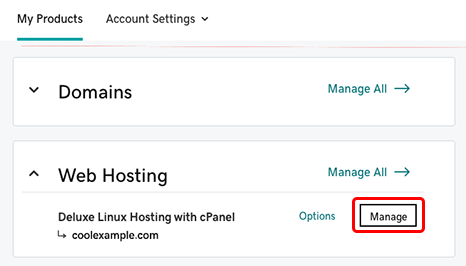
Some hosts offer web-based tools for uploads. They are easy and fast. Log into your hosting account. Look for the file manager option. Click on it to open. Choose “upload” and find your file. Select the file and start the upload. Watch the progress bar. It shows when the upload is done. This method does not need extra software.
Setting Permissions
File access rights control who can see or change your files. Choose the right settings for each file. Some files are for everyone. Others are just for you. You can set these rules in your web host. It’s easy to do. You must know what each setting means. Some settings let others change your files. Be careful with these. Too much sharing can be unsafe. Always check your settings twice.
Public access means anyone can see your file. Useful for sharing. But sometimes it’s not safe. Private access keeps files safe. Only you or chosen people can see them. This is good for important files. Think about who needs to see your file. Choose the right setting. Safety matters a lot online.
Sharing The Hosted File
After hosting a file, create a shareable link. This link lets others access your file. Use the file hosting service to generate this link. Copy the link to share with friends or colleagues. Make sure the link is public if you want everyone to see it. Always check the privacy settings before sharing.
You can embed files on websites. This helps show documents or images directly. Use the embed code given by the hosting service. Paste this code into your website’s HTML. Check if the file appears correctly. Adjust the size of the embedded file if needed. This way, your file looks good on the page.
Maintaining The Hosted File
Files need to be updated often. This helps keep them safe. New updates fix bugs and add features. Regular updates improve file performance. Always check for new versions. Use tools to automate updates if possible. Updating files keeps users happy. Updated files are less likely to break. Keep a schedule for updates. Regular updates show that you care. This can build trust with users.
Monitor usage to understand file performance. Use analytics tools. They help track downloads and views. Know when files are accessed most. Check for unusual activity. This can prevent misuse. Regular monitoring helps catch problems early. Users rely on stable files. Ensure files are always available. Monitoring helps maintain quality. It can also guide improvements. Make monitoring a routine task.
Troubleshooting Common Issues
Creating a web-hosted file can be tricky. Common issues include incorrect file paths and permission settings. Ensure your server configuration is correct for seamless file access.
File Not Loading
Sometimes, files won’t load on the web. This can be due to incorrect file paths. Check the path and ensure it’s accurate. Another reason could be server issues. Ensure the server is running smoothly. File formats might also cause loading problems. Make sure the format is compatible with the browser.
Access Denied Errors
Access denied errors are common. This occurs due to permission settings. Ensure you have the correct permissions. Files need to have proper access rights. Incorrect settings can block access. Check if the file is protected by user authentication. Adjust permissions to allow access. Always verify file and server settings.
Credit: www.godaddy.com
Frequently Asked Questions
How Do I Host A Website File?
To host a website file, choose a web hosting provider, sign up, and upload your files via FTP. Select a domain name and configure DNS settings. Ensure your website files are organized correctly for easy access. Regularly update your content to maintain website performance and security.
How To Make A Web File?
To create a web file, use an HTML editor like Sublime Text or Visual Studio Code. Write HTML, CSS, and JavaScript code. Save the file with a. html extension. Open the file in a browser to view your webpage. Ensure it is properly structured for SEO optimization.
How Do I Create A Web Host?
To create a web host, choose a reliable server provider and set up server software. Configure security settings, install necessary applications, and create user accounts. Regularly monitor and maintain server performance to ensure optimal functionality.
How To Create A Web Link File?
To create a web link file, open a text editor. Enter the URL starting with “http://” or “https://”. Save the file with a “. url” extension. Double-click to open it in your browser. Ensure the file path and extension are correct for proper functionality.
Conclusion
Creating a web hosted file is simpler than it seems. Follow the steps outlined for a smooth process. Start by selecting a reliable hosting service. Upload your file using their interface. Ensure your file is accessible with the correct permissions.
Double-check the file link for accessibility. Hosting files online provides easy sharing and access. Useful for both personal and professional needs. Practice regularly to gain confidence. Remember, simplicity is key in web hosting. Try it out today and see the benefits.
Embrace the ease of sharing files online.


