
Are you ready to take your business or personal projects to the next level? Connecting your Namecheap domain to Google Workspace is a powerful step towards enhancing your online presence and boosting productivity.
Imagine having a professional email address that matches your domain, complete with all the robust tools Google Workspace offers. It might sound complicated, but it’s easier than you think. In this guide, we’ll walk you through the process step-by-step, ensuring you can effortlessly link your Namecheap domain with Google Workspace.
Get ready to streamline your communications, enhance collaboration, and present a polished, professional image to the world. Dive in and discover just how simple it can be!

Credit: www.youtube.com
Benefits Of Connecting Domain To Google Workspace
Connecting your Namecheap domain to Google Workspace has many benefits. It can enhance business operations. This integration streamlines communication, collaboration, and security. It allows businesses to operate efficiently. A connected domain can boost brand identity and credibility. It provides a seamless platform for managing emails, documents, and calendars.
1. Streamlined CommunicationGoogle Workspace offers professional email services. Using your domain name improves brand visibility. It creates trust with customers. All communication appears unified and organized. Employees can interact effortlessly.
2. Enhanced CollaborationGoogle Workspace facilitates real-time collaboration. Teams can share documents instantly. They can work together regardless of location. Integrated tools like Google Docs, Sheets, and Slides make collaboration easy. Everyone stays updated.
3. Improved SecurityGoogle Workspace provides advanced security features. It includes two-factor authentication and spam protection. These features safeguard sensitive information. Businesses can feel secure with their data.
4. Professional ImageUsing a custom domain email looks professional. It boosts credibility. Customers recognize your brand immediately. This helps establish trust. A professional image is essential for growth.
5. Efficient ManagementGoogle Workspace offers centralized management tools. Administrators can handle user access easily. They can manage settings and permissions. This saves time and reduces complexity. Operations run smoothly.
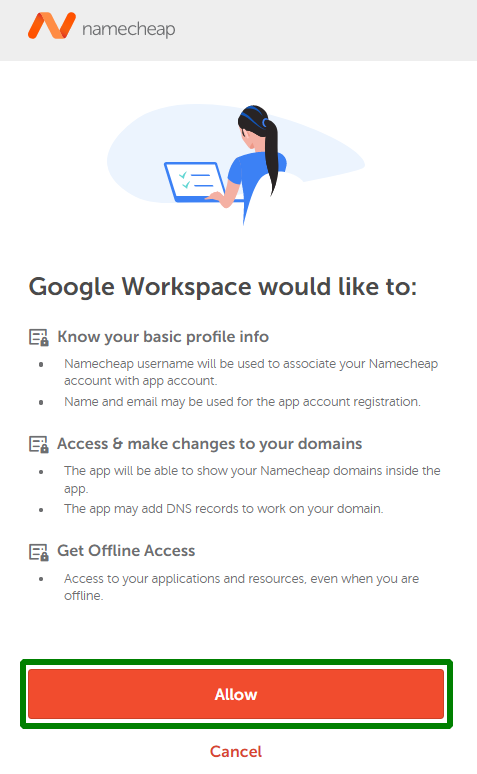
Credit: www.namecheap.com
Prerequisites For Setup
Setting up your Namecheap domain with Google Workspace requires a few essential prerequisites. Having the necessary accounts and access ensures a smooth integration process. Let’s break down what you need to get started.
Namecheap Account Access
Ensure you have access to your Namecheap account. Log in using your credentials. Check if your domain is active and ready for configuration. You will need administrative rights to make necessary changes. If you manage multiple domains, ensure you select the correct one for setup.
Google Workspace Account Setup
Before connecting your domain, set up a Google Workspace account. This account provides access to Google services for your domain. Ensure you have administrative privileges within Google Workspace. Verify your domain ownership through the Google Workspace setup wizard. This step is crucial for successful email routing and service access.
Accessing Namecheap Dashboard
Accessing Namecheap’s dashboard is easy for linking your domain to Google Workspace. Start by logging into Namecheap, navigating to the dashboard, and updating DNS settings. This connection ensures seamless email and productivity tool integration.
Accessing your Namecheap Dashboard is the first step in connecting your domain to Google Workspace. This platform is where you manage all your domain settings and configurations. Familiarizing yourself with the dashboard will make the process smooth and straightforward. Many users find the dashboard intuitive, but a little guidance can make things even easier. ###Login Procedures
To get started, you’ll need to log into your Namecheap account. Use your registered email and password to access your account. If you’ve forgotten your password, Namecheap provides a simple recovery process to get you back on track quickly. Once logged in, you’ll notice a clean, user-friendly interface. Keep your login details secure, as this account holds the keys to your domain management. Have you considered using a password manager for added security? ###Navigating To Domain Management
After logging in, head to the dashboard’s main menu. Look for the “Domain List” section. This is where all your purchased domains are listed. Click on the domain you want to connect to Google Workspace. You’ll see various options like DNS settings and email forwarding. Each option is clearly labeled, making it easy to find what you need. Need to tweak something? The user-friendly interface ensures you won’t get lost. Navigating through these settings might feel like a learning curve, but it’s a worthwhile skill to master. How confident are you in your ability to manage your domain settings? Taking control of your domain settings empowers you to make quick changes whenever needed. It’s not just about linking to Google Workspace—it’s about harnessing the full potential of your domain.Configuring Dns Settings
Easily connect your Namecheap domain to Google Workspace by configuring DNS settings. Update MX records in Namecheap’s dashboard. Ensure proper email delivery and seamless integration with Google Workspace.
Configuring DNS settings is crucial for connecting your Namecheap domain to Google Workspace. These settings ensure that emails, calendars, and other Workspace services function properly. Proper configuration avoids disruptions and enhances performance. Let’s explore how to configure these DNS settings effectively.Locating Dns Settings
First, log in to your Namecheap account. Navigate to the “Domain List” section. Select the domain you want to connect to Google Workspace. Look for the “Manage” button beside your domain name. Click it to access the domain’s management page. On the management page, find the “Advanced DNS” tab. This is where you’ll configure the DNS settings. Locating the DNS settings is your first step in the process. Keep this page open as you’ll need it for the next steps.Adding Mx Records
Once in the Advanced DNS tab, scroll down to find the “Mail Settings” section. Look for any existing MX records and remove them. This clears the path for new Google Workspace records. Next, click on “Add New Record” and select “MX Record.” Enter the Google Workspace MX records provided by Google. These records direct your emails to Google’s servers. Follow Google’s priority order when entering these records. Save changes once all records are added. This update might take a few minutes. Check for any error messages and correct them if any appear. Your Namecheap domain is now set to work with Google Workspace.Google Workspace Configuration
Configuring your Namecheap domain with Google Workspace can seem like a daunting task, but it doesn’t have to be. Knowing the right steps can make the process smooth and straightforward. By following a few key configurations, you can harness the full potential of Google Workspace for your domain.
Verifying Domain Ownership
Before you can start using Google Workspace with your Namecheap domain, you need to verify that you own the domain. This is a crucial step because Google needs to ensure that only the rightful owner can make changes.
Head over to your Google Workspace admin console and navigate to the domain setup section. You’ll find a unique TXT record that you need to add to your Namecheap DNS settings. This might sound technical, but don’t worry—Namecheap’s user-friendly interface makes it easy.
Log in to your Namecheap account, go to the Domain List, and click on ‘Manage’ next to your domain. Under the ‘Advanced DNS’ tab, add the TXT record provided by Google. Once added, go back to Google Workspace and click ‘Verify’. You’ll typically receive confirmation within a few minutes.
Setting Up Email Routing
With domain ownership verified, you’re ready to set up email routing. This ensures emails sent to your domain reach Google Workspace. First, you need to configure the MX records in your Namecheap account. These records tell where emails should be delivered.
In your Namecheap account, navigate again to the ‘Advanced DNS’ section. Here, add the MX records as specified by Google. Make sure you enter them accurately; even a small mistake can disrupt your email service. Once done, save the changes.
Check your Google Workspace admin console to ensure the records are updated. It might take some time for the changes to propagate, so be patient. Test by sending yourself an email to confirm everything is working correctly. Ever struggled with email routing before? You’re not alone. But with these steps, you’re well on your way to seamless communication.
Feeling empowered yet? Setting up Google Workspace with your Namecheap domain doesn’t have to be a techie’s job. With a little patience and the right guidance, you can master it like a pro.

Credit: www.youtube.com
Troubleshooting Common Issues
Connecting a Namecheap domain to Google Workspace can be challenging. Ensure DNS settings are correct in your Namecheap account. Follow Google’s setup guide for seamless email integration.
Connecting a Namecheap domain to Google Workspace often runs smoothly. Yet, users might face common issues during the setup. Troubleshooting these problems ensures seamless email communication. This section delves into two frequent challenges.Dns Propagation Delays
DNS changes take time to update across the internet. This delay can cause temporary disruptions. Typically, DNS propagation completes within 24-48 hours. During this time, your domain might not connect to Google Workspace. Patience is essential. Check DNS settings periodically. Ensure no errors exist in your configuration. Use online tools to verify DNS status. These tools offer real-time insights.Mx Records Errors
Incorrect MX records prevent email delivery. MX records direct emails to your domain’s mail servers. Verify that you entered them correctly in Namecheap. Google’s support page lists the required MX records. Double-check every detail, including priority values. A single error can disrupt email flow. If issues persist, consult with Namecheap support. They can provide guidance and corrections.Additional Tips For Seamless Integration
Ensure DNS settings are updated for smooth Namecheap domain connection to Google Workspace. Verify MX records for accurate email routing. Regular checks prevent downtime.
Connecting your Namecheap domain to Google Workspace is just the beginning of unlocking a suite of powerful tools. To ensure a smooth and efficient integration, consider a few additional tips that can enhance your overall experience. From fortifying your security measures to optimizing email usage, these insights can make a significant difference.Security Enhancements
Prioritizing security is crucial. Have you considered enabling two-factor authentication for your Google Workspace account? It’s a simple yet effective way to add an extra layer of protection. Regularly update your passwords and ensure they are strong. Combine numbers, letters, and symbols to make them hard to crack. Also, familiarize yourself with Google Workspace’s security settings. Spend some time exploring these options to customize your security preferences according to your needs.Optimizing Email Usage
Google Workspace offers a powerful email system. Do you fully utilize its filtering options? Set up filters to automatically sort incoming emails into folders or labels, helping you stay organized. Make use of canned responses for frequently sent emails. This feature can save you time and help maintain consistency in communication. Don’t forget to explore Google Workspace’s integration with other productivity tools. Using Google Calendar with your email can streamline scheduling and improve efficiency. A little time spent on configuration now can save hours later. Have you thought about how these tweaks could improve your workflow?Frequently Asked Questions
How Do I Link Google Workspace To My Namecheap Domain?
To link Google Workspace to your Namecheap domain, access Namecheap’s dashboard. Navigate to the “Advanced DNS” section. Add Google Workspace’s MX records to your domain’s DNS settings. Verify domain ownership in Google Workspace. Follow Google’s setup instructions for complete integration.
How Do I Connect My Domain To Google Workspace?
To connect your domain to Google Workspace, update your domain’s DNS settings. Log into your domain registrar, add the required MX records, and verify domain ownership through the Google Admin Console. Follow Google’s setup wizard for detailed instructions.
How Do I Connect My Domain To Google Sites?
To connect your domain to Google Sites, navigate to “Custom URLs” in Google Sites settings. Enter your domain name, then follow Google’s verification process. Update your domain’s DNS records as instructed. Once verified, your domain will connect to your Google Site seamlessly.
How Do I Get My Domain To Show Up On Google?
Submit your site to Google Search Console. Use relevant keywords and quality content. Obtain backlinks from reputable sites. Ensure mobile-friendliness and fast loading times. Regularly update and optimize your content for SEO.
Conclusion
Connecting your Namecheap domain to Google Workspace is straightforward. Follow the steps. First, log into Namecheap. Next, update your DNS settings. Then, verify your domain with Google Workspace. Finally, configure your email settings. Now, your domain and Workspace are linked.
Enjoy seamless communication. This integration boosts productivity and collaboration. It’s important for business success. With these steps, you’re ready. Your domain is now connected. Use this setup to enhance your digital presence. Make the most out of your tools. Stay efficient and connected.


