
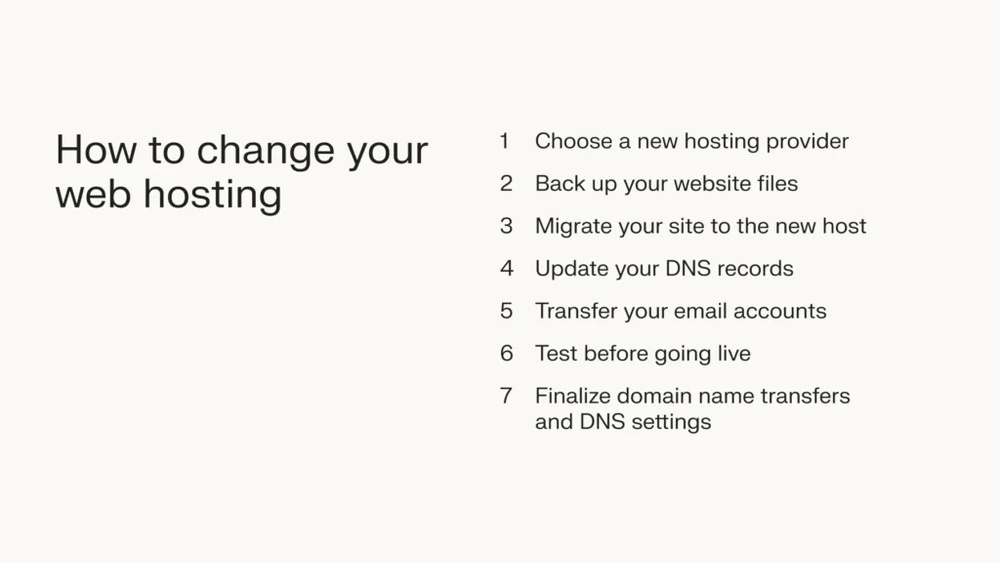
Are you ready to change your web hosting domain but don’t know where to start? Changing your domain can feel tricky, but it doesn’t have to be.
Whether you want a new name, better branding, or improved site performance, this guide will walk you through every step. By the end, you’ll have the confidence to switch your domain smoothly and keep your website running without a hitch.
Let’s dive in and make your website work exactly the way you want it to.
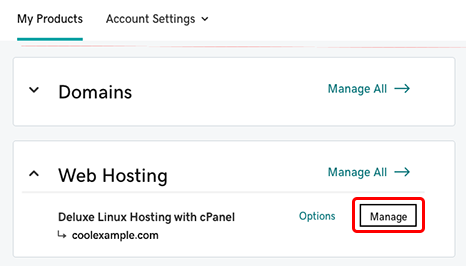
Credit: www.godaddy.com
Prepare For Domain Transfer
Preparing for a domain transfer is a key step in changing your web hosting domain. It ensures a smooth move without losing any data or website functionality. Taking the right actions before the transfer reduces risks and saves time.
Follow these simple steps carefully. They help you get ready and avoid common issues during the process.
Check Domain Eligibility
Not all domains can be transferred at any time. Check your domain’s age and status first. Domains usually must be older than 60 days to qualify. Also, make sure it is not locked or expired. Confirm your domain is eligible for transfer through your current registrar.
Backup Your Website Data
Always create a full backup of your website files and databases. This protects your content from loss during the transfer. Use your hosting control panel or a backup plugin for this task. Save backups on your computer or cloud storage for safety.
Unlock Your Domain
Domains often have a lock to prevent unauthorized changes. You must unlock it before transferring. Log into your domain registrar’s dashboard and find the domain lock setting. Disable the lock to allow the transfer to proceed.
Choose The Right Hosting Provider
Choosing the right hosting provider is a key step in changing your web hosting domain. It affects your website’s speed, security, and uptime. Picking a good host helps your site run smoothly and keeps visitors happy.
Focus on what you need and what each provider offers. This way, you avoid surprises and get the best fit for your website.
Compare Hosting Plans
Look at different plans and what they include. Check storage space, bandwidth, and price. Some plans offer extras like free SSL certificates or daily backups. Choose a plan that matches your website size and traffic.
Do not pay for more than you need. Start small and upgrade as your site grows.
Check Transfer Policies
Understand how the host handles domain and website transfers. Some providers offer free transfer services. Others charge fees or have long waiting times. Read the terms carefully to avoid extra costs or downtime.
A smooth transfer keeps your site live and visitors happy.
Review Customer Support
Good support helps solve problems fast. Check if the host offers 24/7 support through chat, phone, or email. Read reviews about their response times and helpfulness.
Reliable support gives peace of mind and saves time during issues.
Initiate The Domain Transfer
Initiating the domain transfer is the first step to change your web hosting domain. This step involves preparing your current domain and starting the move to the new host. Follow clear actions to make the process smooth and quick. Pay close attention to each part to avoid delays or errors.
Obtain Authorization Code
The authorization code is a key to unlock your domain transfer. Contact your current domain provider to get this code. It usually comes as a short string of letters and numbers. Keep this code safe and ready for the next step.
Start Transfer Process
Go to your new hosting provider’s domain transfer page. Enter your domain name and the authorization code. This starts the official transfer request. The new host will check the details and prepare the domain for moving.
Confirm Transfer Via Email
Check your email after starting the transfer. Look for a message from your current domain provider. Confirm the transfer by clicking the link in the email. This action approves the transfer and moves it forward.

Credit: www.accuwebhosting.com
Update Dns Settings
Updating DNS settings is an important step when changing your web hosting domain. DNS controls how visitors find your website on the internet. You must update these settings to point your domain to the new hosting server. This process ensures your website stays live and accessible during the transition.
Point Domain To New Server
Start by logging into your domain registrar account. Find the DNS or name server settings section. Replace the old name servers with those provided by your new hosting provider. This action directs all domain traffic to the new server. Save your changes and prepare for DNS propagation.
Set Up Dns Records
Next, configure essential DNS records on your new hosting account. Create an A record that points your domain to the new server’s IP address. Add CNAME records for subdomains if needed. Set MX records for email services to continue working. Double-check all entries for accuracy.
Verify Dns Propagation
DNS changes do not take effect instantly. It can take from a few minutes to 48 hours for full propagation. Use online tools to check if your domain points to the new server worldwide. Confirm that the website loads from the new host. This step helps avoid downtime and errors.
Test Your Website
Testing your website after changing your web hosting domain is vital. It ensures everything works well before going live. A smooth test helps avoid visitor problems and loss of traffic. Take time to check every part carefully.
Check Site Functionality
Visit your website on different devices and browsers. Make sure all pages load quickly and correctly. Test links, buttons, and forms to confirm they work. Look for missing images or broken elements. Check interactive features like shopping carts or contact forms.
Monitor Email Services
Send test emails from your domain to different accounts. Confirm you can receive emails without delay or errors. Check email forwarding and autoresponders if used. Verify spam filters do not block your messages. Ensure your email settings match the new domain hosting.
Resolve Transfer Issues
Identify any errors or downtime during the transfer. Use tools to check DNS propagation status. Fix broken links or missing files immediately. Clear your browser cache to see the updated site. Contact support if any problems persist beyond a day.
Maintain Domain And Hosting
Maintaining your domain and hosting is key to keeping your website live and running smoothly. Without regular care, your site can go offline or become vulnerable. Simple steps help avoid common issues and protect your online presence.
Renew Domain On Time
Always renew your domain before it expires. Domains usually last one year or more. Set reminders to avoid losing your domain. Losing it means someone else can buy it. Renewing early prevents downtime and traffic loss.
Keep Hosting Updated
Hosting services often update their software and features. Use the latest versions to improve speed and security. Check your hosting account regularly for updates. Staying current helps your website work better and safer.
Secure Your Website
Protect your site from hackers and malware. Use strong passwords for your hosting and domain accounts. Enable SSL certificates to encrypt visitor data. Regular backups help restore your site if problems occur.
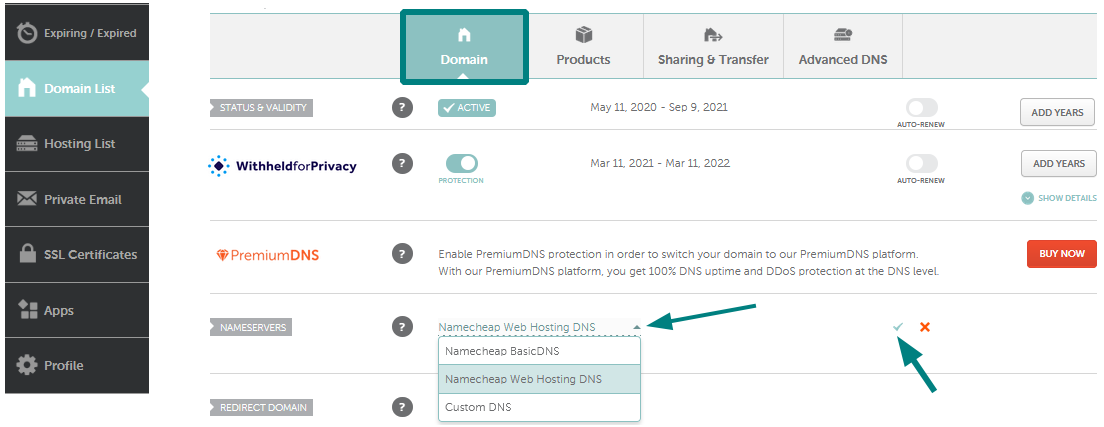
Credit: www.namecheap.com
Frequently Asked Questions
How Do I Change My Web Hosting Domain Safely?
To change your web hosting domain safely, back up your website first. Update your domain settings and DNS records carefully. Test your site after migration to ensure everything works smoothly without downtime or data loss.
Can I Keep My Email With A New Domain Host?
Yes, you can keep your email with a new domain host. Update your MX records to point to your email provider. This ensures email continuity without interruptions during the domain transfer process.
How Long Does Domain Transfer To New Host Take?
Domain transfer typically takes 5 to 7 days. However, some transfers can complete within a few hours. Timing depends on your registrar’s policies and domain extension rules.
Will Changing Domain Affect My Website Seo Rankings?
Changing your domain can impact SEO temporarily. Use 301 redirects from old URLs to new ones. This helps preserve your search rankings and maintains traffic flow during the transition.
Conclusion
Changing your web hosting domain does not have to be hard. Follow each step carefully and take your time. Always back up your website before starting the process. Check your new domain settings to avoid problems later. Test your website after the change to ensure it works well.
With patience and attention, your site will run smoothly on the new domain. Keep learning and stay calm during the switch. Your website’s online presence will stay strong and accessible.


