
Have you ever wanted to give your WordPress site a fresh look by changing its theme name, but found yourself tangled in confusion? You’re not alone.
Many WordPress users encounter this challenge when aiming to personalize their online presence. Imagine having the perfect theme, but the name doesn’t quite resonate with your brand or message. This little detail can make a world of difference in how your website is perceived.
In this guide, you’ll discover a straightforward, step-by-step process to change your theme name directly from the WordPress dashboard. No need to be a tech wizard or spend hours searching for answers. We’ll make it easy and quick, so you can get back to focusing on what truly matters—engaging your audience and amplifying your brand. Dive in to find out just how simple it can be to tailor your WordPress theme name to perfectly match your vision.
Credit: www.nexgi.com
Accessing The WordPress Dashboard
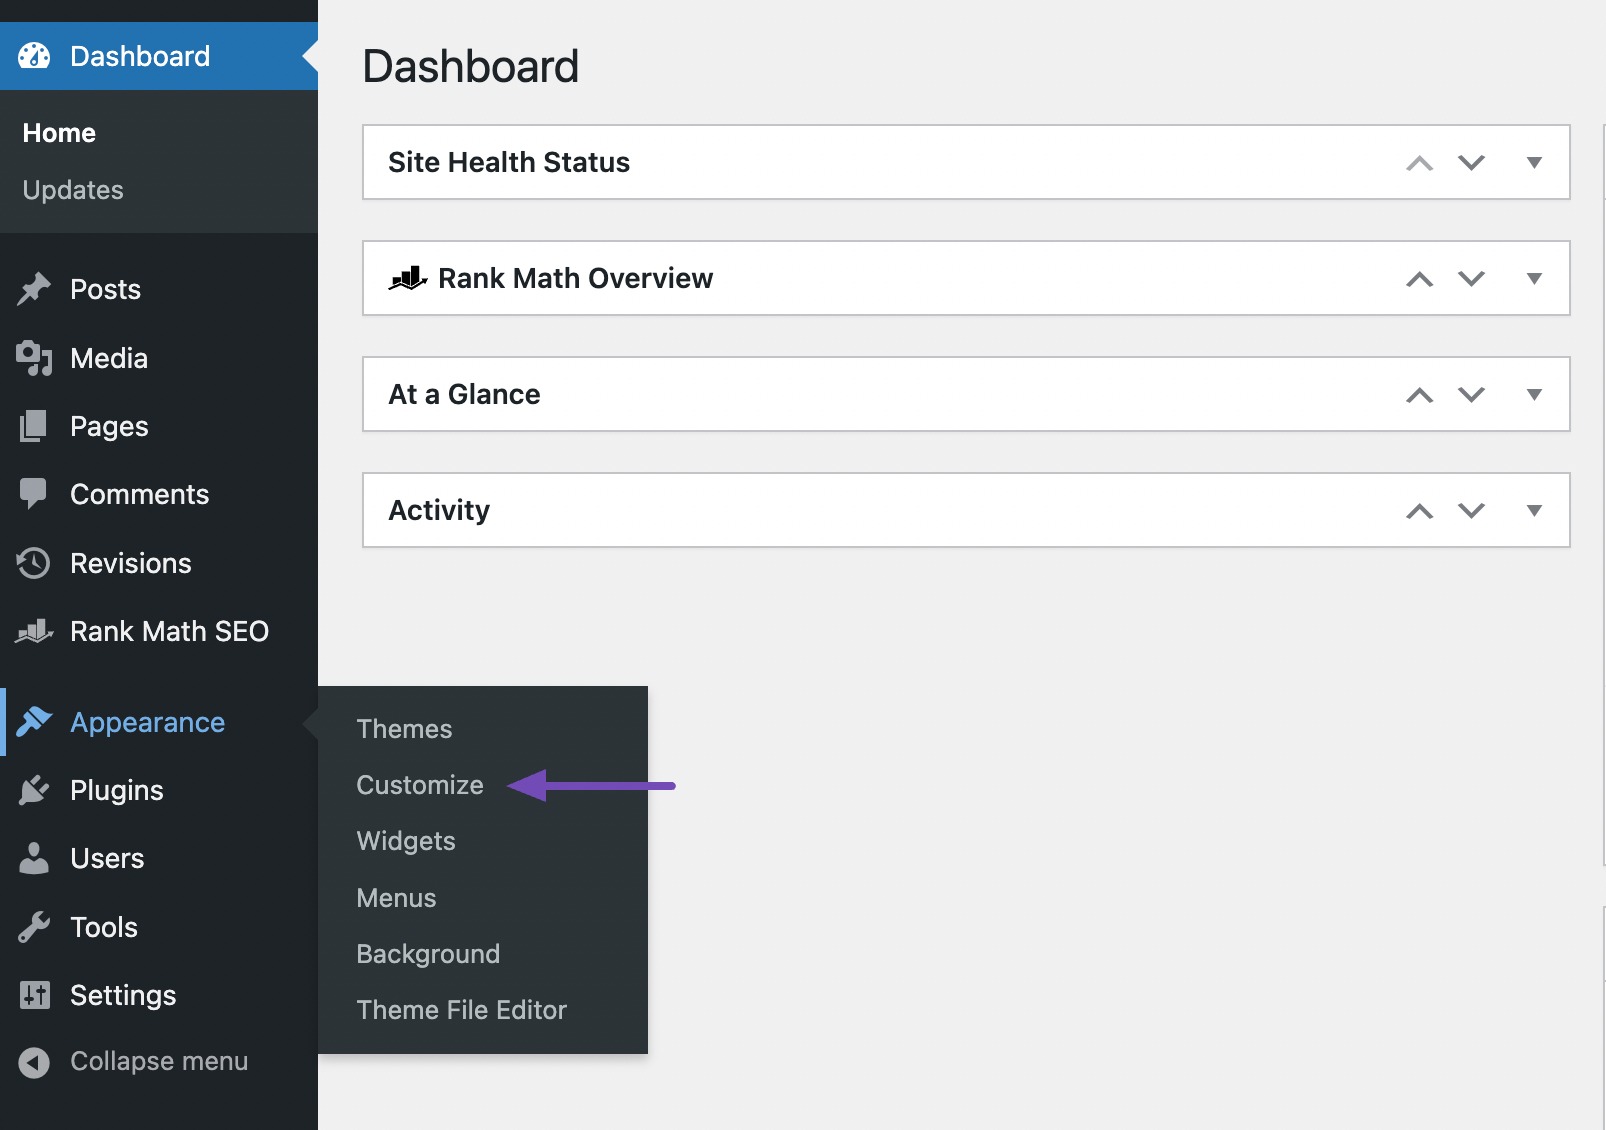
First, log into your WordPress dashboard. Use your username and password. The dashboard is the first screen you see. It is where you can manage your site. Look for the menu on the left side. Find the Appearance option. Click on it. A sub-menu will appear. In this menu, you will see Themes. Click on Themes to view the installed themes. Here, you can change or manage your themes. Remember, the dashboard is your control center. It is where all changes happen.
Navigating To The Theme Editor
First, log in to the WordPress dashboard. Find the Appearance tab on the left side. Click it to see more options.
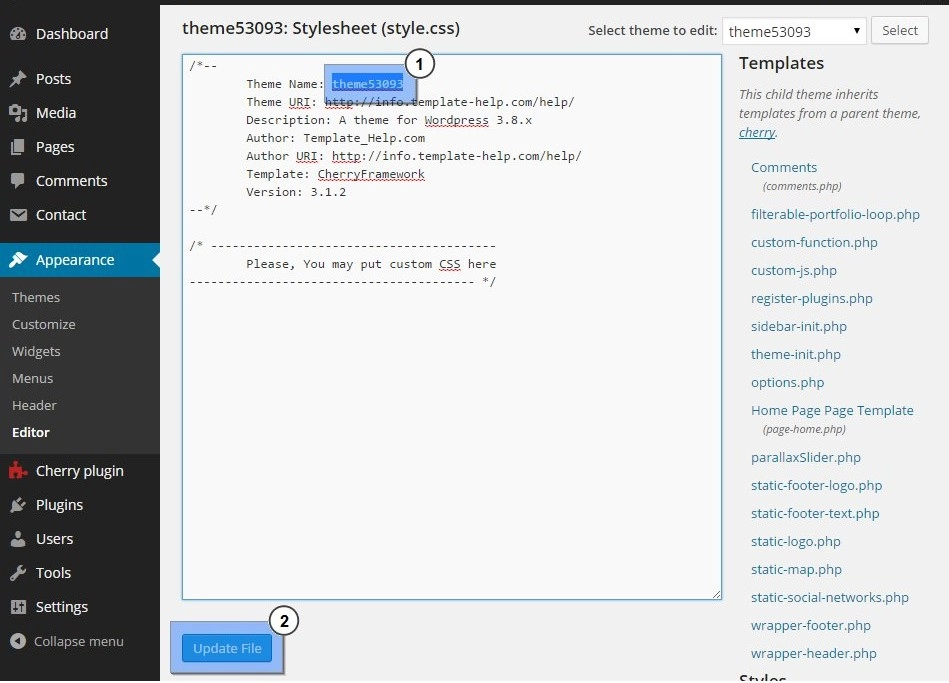
Click on Theme Editor. A new page will appear. You will see files of your current theme. Look for the style.css file. This file holds the theme name. Click it to open.
Find the line that says Theme Name. Change it to your new name. Make sure the name is clear and simple. Click Update File to save your changes.
Now, your theme has a new name. It will show in your WordPress dashboard. Always double-check the name you typed. This helps avoid mistakes.
Locating The Theme Files
First, open your WordPress Dashboard. Look for the Appearance section. Click on it. Now, choose Themes. Here, you see all your themes. Find the active theme. Note its name. Next, use a File Manager. You can use cPanel or an FTP client. Go to the wp-content folder. Then, open the themes folder. Locate your theme’s folder. This folder has the theme name.
Inside, find the style.css file. This file is important. It has your theme’s details. Open it with a text editor. Look for Theme Name. This is the name you want to change. Make sure to save your changes.
Editing The Style.css File
The style.css file holds the theme’s main information. It contains the theme’s name, author, and version. The top part is the header comment. This part tells WordPress about the theme. It is like a theme ID card. It is very important to know this structure. This helps in making changes safely. Keep a backup before editing. This is crucial to prevent loss.
To change the theme name, open the style.css file. Look for the Theme Name: tag. It is at the top. Change the name after the colon. Save the file after editing. The new name will show in the WordPress dashboard. This simple step updates the theme name. It is easy and quick to do.
Saving And Activating Changes
After changing the theme name, you need to save your work. This step is crucial. Click on the save button. It is usually at the top or bottom of the page. The changes will not be active until you save them.
Next, activate the theme. Go to the theme section in your dashboard. Find the theme with the new name. Click on the activate button. Your new theme name is now live. These steps help your site reflect the changes immediately.
Check your site to ensure everything looks good. Refresh your page to see the new theme name. If something is wrong, go back and check each step. Always ensure you follow the steps correctly. This ensures your site works smoothly.
Credit: rankmath.com
Verifying The Theme Name Update
After changing the theme name, it’s crucial to verify it. Start by opening your WordPress dashboard. Navigate to Appearance and then click Themes. Here, you should see your updated theme name. Make sure it matches the new name you set.
If the name isn’t updated, check your files again. Ensure that the style.css file has the correct information. Sometimes, a small error can prevent changes from showing. Refresh the page after making corrections.
Check the website’s frontend. The new name might appear there too. Ensuring these steps confirm a successful update. Your theme should now display the new name correctly.
Troubleshooting Common Issues
Changing the theme name in WordPress is a straightforward task. Navigate to your WordPress dashboard, go to Appearance, then Editor. Locate the style. css file and update the Theme Name. Save changes to see the updated name in your dashboard.
Always backup before making changes.
Handling File Permission Errors
File permission errors can stop theme name changes. Check file access rights first. Use FTP or your hosting panel. Navigate to your theme folder. Ensure read-write permissions are correct. Set permissions to 755 for folders and 644 for files. Incorrect permissions cause access issues. Always double-check your server settings. Consult your hosting provider for help.
Restoring Previous Theme Settings
Switching themes might erase custom settings. Backup your theme settings first. Use WordPress export tools to save them. Try to restore settings after changing themes. Navigate to your WordPress dashboard. Go to Appearance and then Customize. Check for saved settings options. Always verify settings are intact. Keep backups handy to avoid data loss.
Best Practices For Theme Modifications
Child themes help in keeping changes safe. They protect your work when the main theme updates. Start by making a new folder in the themes section. The name should include the word “child“. Add a style.css file inside. This file tells WordPress about the child theme. Use the parent theme’s code. Add it to the child theme. This keeps the design same. Make a functions.php file too. This file helps in adding extra features.
Backup is important to save your theme changes. Use plugins like UpdraftPlus or BackupBuddy. These tools keep your data safe. Save the backup files on your computer. Cloud storage works too. Google Drive or Dropbox are good options. Store backups in more than one place. It helps if you lose data. Check backups regularly. This ensures they work fine.

Credit: www.youtube.com
Frequently Asked Questions
How Can I Rename My WordPress Theme?
To rename your WordPress theme, access your theme files via FTP or your hosting panel. Locate the theme folder in `wp-content/themes`, then rename it. Update the `style. css` file within the folder, changing the `Theme Name` to your desired name.
Save the changes and refresh your WordPress dashboard.
Is It Safe To Change A Theme Name?
Yes, it’s generally safe to change a theme name. However, ensure you update any custom code or child themes referencing the old name. This prevents potential errors. Always back up your website before making changes to minimize risks. Test the changes on a staging site if possible.
Will Renaming A Theme Affect My Site?
Renaming a theme won’t affect your site’s functionality. However, ensure all references to the old theme name are updated. This includes custom code, child themes, and any theme-dependent plugins. Double-check for any theme-specific settings that might be affected, and back up your website before proceeding.
Can I Change A Theme Name Without Coding?
Yes, you can change a theme name without coding. Use a file manager plugin or access your hosting panel. Navigate to `wp-content/themes`, rename the theme folder, and update the `style. css` file. This process doesn’t require coding skills but ensure you follow the steps carefully.
Conclusion
Changing your WordPress theme name is simple. Follow the steps outlined here. Always back up your files before making changes. This prevents loss of data. Remember, clear naming helps in managing themes. It improves organization and efficiency. Explore further customizations as needed.
Keep learning to enhance your WordPress skills. A well-managed dashboard makes site updates easier. Check your changes are correctly implemented. Test your website after adjustments for smooth operation. With practice, theme management becomes second nature. Enjoy customizing your WordPress experience!


