
Have you ever wondered how to change the footer of your WordPress theme? You’re not alone.
Many WordPress users want to customize their site to reflect their unique style or brand. The footer, though often overlooked, plays a crucial role in the overall look and feel of your website. It can be a powerful tool for engaging visitors, providing essential information, and enhancing your site’s functionality.
Imagine transforming your footer into a space that not only looks good but serves a purpose. Whether it’s displaying your contact information, showcasing social media links, or adding a touch of personality, customizing your footer can make all the difference. You have the power to turn your website into a more engaging and memorable experience for your visitors. In this guide, you’ll discover simple steps to change your WordPress theme footer. No need for advanced coding skills or technical expertise. With a little guidance, you can easily make the changes yourself. So, let’s dive in and unlock the potential of your WordPress footer, making sure every part of your site resonates with your audience!
Credit: 10web.io
Choosing The Right Theme
Check your current theme’s features and style. Does it fit your needs? Look for theme settings related to the footer. Some themes allow easy footer changes. If not, you might need a new theme.
Browse the WordPress theme library. Find themes with flexible footers. Read reviews and ratings. Look for themes that are updated often. This ensures they are secure and work well. Consider themes with good support. You might need help with footer changes.
Accessing The Footer Section
Start by logging into your WordPress account. After logging in, you will see the WordPress dashboard. This is where you manage your site. On the left side, there is a menu. Look for the Appearance option. Click on it. After clicking, you will find several options. One of these options is the Editor.
Inside the Editor, you will see many files. These files control different parts of your site. Look for the file named footer.php. This file is responsible for the footer section. Click on this file to open it. Now you can make changes to your footer. Save your changes once done. Your footer will now be updated.
Editing Footer Content
Changing the footer text is easy. First, go to the WordPress dashboard. Find the Appearance menu. Click on Customize. Look for the Footer section. Here, you can edit the text. Make it unique to your site. Use simple words to keep it clear. Remember, the footer is often the last thing visitors see. Make it memorable. Check your changes. Ensure everything looks good before saving.
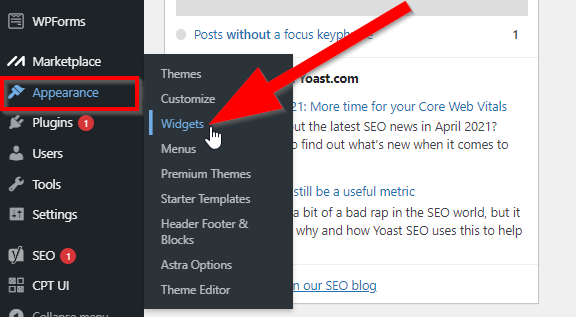
Add links to the footer to help visitors. Use Widgets in the footer area. First, go to the dashboard. Select Appearance and then Widgets. Drag and drop the desired widgets. Add links to important pages. These can be your Contact or About page. Widgets can also show recent posts or social icons. Be careful not to clutter the footer. Keep it simple and neat. Test the links. Ensure they work properly before finishing.
Using A Child Theme
A child theme keeps your site safe. Updates won’t erase changes. First, create a new folder. Name it after your theme. Add “-child” to the name. Inside, make a style.css file. In this file, add basic info. Parent theme name is key. Next, make a functions.php file. This file links to the parent theme. Now, your child theme is ready. Activate it in your WordPress dashboard. Your site now uses the child theme.
Find the footer file in your parent theme. Copy it to your child theme. Edit this copied file. Change text, links, or style. Be careful with code syntax. Mistakes can break your site. Save changes when done. Check your site. The new footer should show. If not, check for errors. Keep backups of original files. They help fix mistakes.
Incorporating Custom Css
Custom CSS makes your footer unique. It changes its style and look. First, find the footer section in your theme’s code. Use simple CSS rules to modify it. This might include changing colors, fonts, or layout. Always preview your changes. This ensures they look good.
Writing Css For Footer
Start by opening your theme editor. Locate the style.css file. This file controls design. Next, identify the footer class or ID. It might be named .footer or #footer. To change its look, write CSS rules under this class or ID. For example, background-color: blue; changes the footer’s background color. Save your changes to see the effect.
Applying Css Changes
Check your website after saving. Ensure the footer looks as planned. If changes don’t appear, clear your browser cache. This updates the displayed version. If problems persist, check your code for errors. Correct any mistakes promptly. This ensures a smooth and attractive footer design.
Utilizing WordPress Plugins
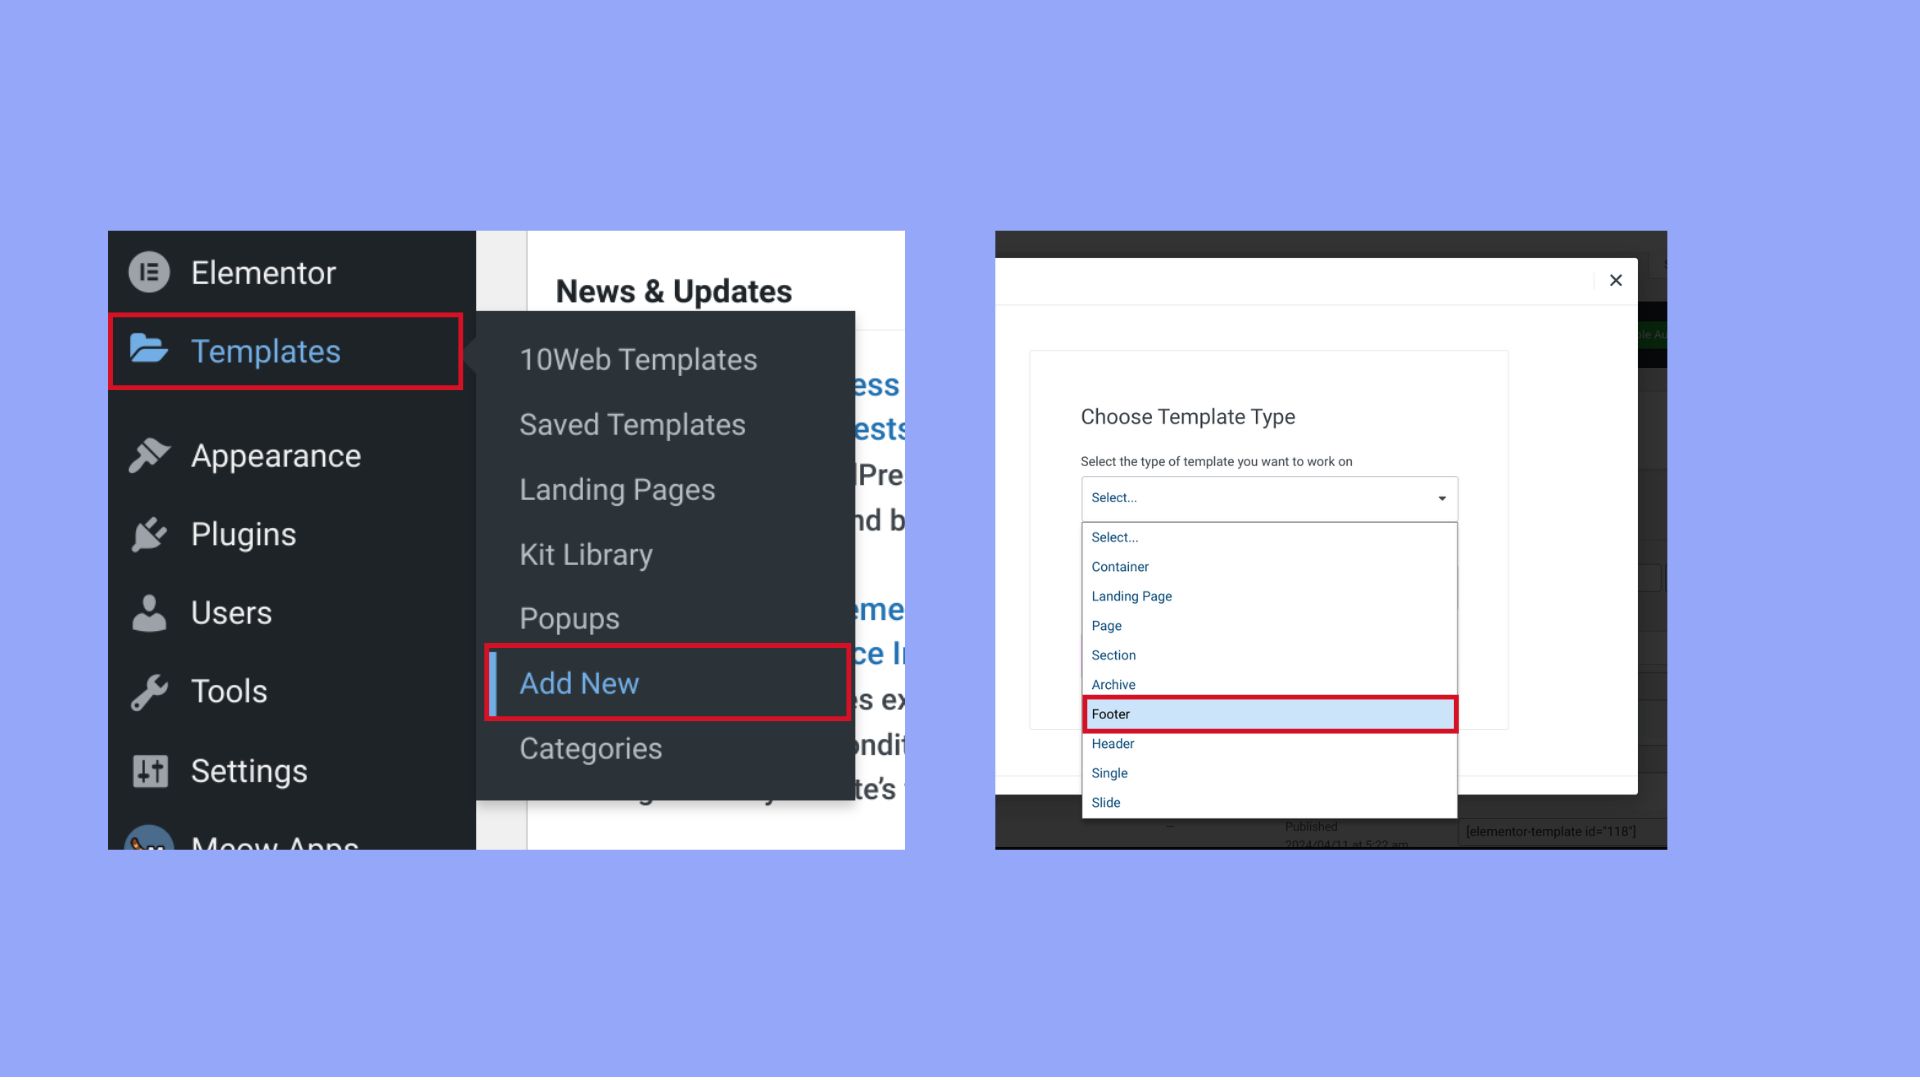
Plugins help change the footer in WordPress. Many plugins are popular for this task. Elementor is a top choice. It lets users design footers easily. Another popular plugin is Footer Putter. This plugin allows users to manage footer widgets. It also supports copyright text. WPForms is great for adding contact forms to footers. Smart Footer System is useful for adding dynamic content. These plugins are easy to use and make footers look nice.
First, go to the WordPress dashboard. Find the Plugins section. Click on Add New. Search for the desired plugin. Click Install Now. Wait for the installation. Then, click Activate. This makes the plugin work. Now, find the settings. Configure the plugin according to needs. Save the changes. Visit the site to see the new footer. Make adjustments if necessary. Plugins make changing footers easy and fun.
Testing And Previewing Changes
Changing your WordPress theme footer involves navigating to the Appearance menu. Access the Theme Editor and select the footer. php file. Make desired modifications, then preview changes to ensure they appear correctly.
Previewing On Different Devices
Always check how your changes look on phones and tablets. Use the preview function in WordPress. It helps you see how it looks on different screens. Make sure the text is clear and easy to read. Buttons should be easy to tap. The layout should not break or look strange. This is important for user experience. If it looks good on all devices, you did a great job!
Ensuring Functionality
Check if all links in the footer work. Click each link to see if it goes to the right page. Test any forms in the footer to ensure they send information properly. Look at social media icons. Do they take you to the correct profiles? A broken footer can confuse visitors. Make sure everything works well before going live.

Credit: blog.hubspot.com
Troubleshooting Common Issues
Changing a WordPress theme footer often involves navigating the dashboard. Access the theme customizer to find footer settings. Experiment with widgets and HTML for customization.
Resolving Display Errors
Display errors in a theme footer can be confusing. First, check the footer settings in your WordPress dashboard. Ensure all settings are correct. Sometimes, a simple oversight is the cause. Next, clear the browser cache. Old data can cause display problems. If errors persist, try switching to a default WordPress theme. This helps identify if the issue is theme-related.
Another step is to disable all plugins. Some plugins may interfere with the footer. Reactivate plugins one by one to find the culprit. Always keep your WordPress and theme updated. Updates fix many compatibility issues. Lastly, inspect the footer code if you have coding skills. Look for mistakes in the HTML or CSS code.
Fixing Plugin Conflicts
Plugin conflicts can cause footer problems. Deactivate all plugins first. Then, activate them one by one. This helps identify the conflicting plugin. Once found, consider finding an alternative plugin. Also, check for plugin updates. Updates often fix bugs.
Contact the plugin developer if the issue persists. They can provide specific guidance. It’s important to choose plugins from reputable sources. This reduces the chance of conflicts. Regular maintenance of your website is key. Keep plugins, themes, and WordPress updated. This ensures smooth functionality.
Credit: www.crazyegg.com
Frequently Asked Questions
How Do I Edit The Footer In WordPress?
To edit the footer in WordPress, go to your theme’s customizer or theme settings. Locate the footer section, and make changes to widgets, copyright text, or add custom HTML. Save your changes to update the footer on your site.
Can I Use Plugins To Change The Footer?
Yes, you can use plugins to modify the footer in WordPress. Plugins like “Insert Headers and Footers” allow you to add custom scripts or HTML. Alternatively, “Widget Options” can help manage footer widgets more efficiently.
What Is The Best Way To Customize Footer?
The best way to customize the footer is through your theme’s settings. Use the WordPress customizer for easy access. Modify widgets, text, or use custom HTML for advanced customization. Always preview changes before saving.
Can I Remove The Footer In WordPress?
Yes, you can remove the footer by editing your theme files. Access your theme’s footer. php file via WordPress Editor. Delete the footer section code. Alternatively, use custom CSS to hide the footer without altering theme files.
Conclusion
Changing the theme footer in WordPress is simple and effective. Start by accessing the WordPress dashboard. Navigate to “Appearance” and click “Editor. ” Select the footer file to edit. Make your changes carefully. Preview them to ensure correctness. Save your changes once satisfied.
Always back up your site before major edits. This prevents loss of important data. With these steps, personalizing your site’s footer becomes easy. A customized footer enhances your site’s look. It offers a professional touch. Enjoy the process of making your site unique.
Keep exploring different styles and designs.


