
Want to make your WordPress site truly stand out? Changing the font is one of the easiest and most powerful ways to give your website a fresh, unique look.
But if you’re not sure where to start, it can feel overwhelming. Don’t worry — this guide will walk you through simple steps to change your WordPress font quickly, whether you want to use built-in options, plugins, or custom fonts.
By the end, you’ll have the confidence to style your site exactly how you want, grabbing your visitors’ attention and making your content more readable. Ready to transform your site’s look? Let’s dive in!
Font Options In WordPress
WordPress offers several font options for customizing your website’s look. You can choose from built-in fonts, connect to popular font libraries, or upload your own fonts. These choices help make your site unique and easy to read. Understanding font options in WordPress helps you pick the best style for your content.
Default Fonts And Themes
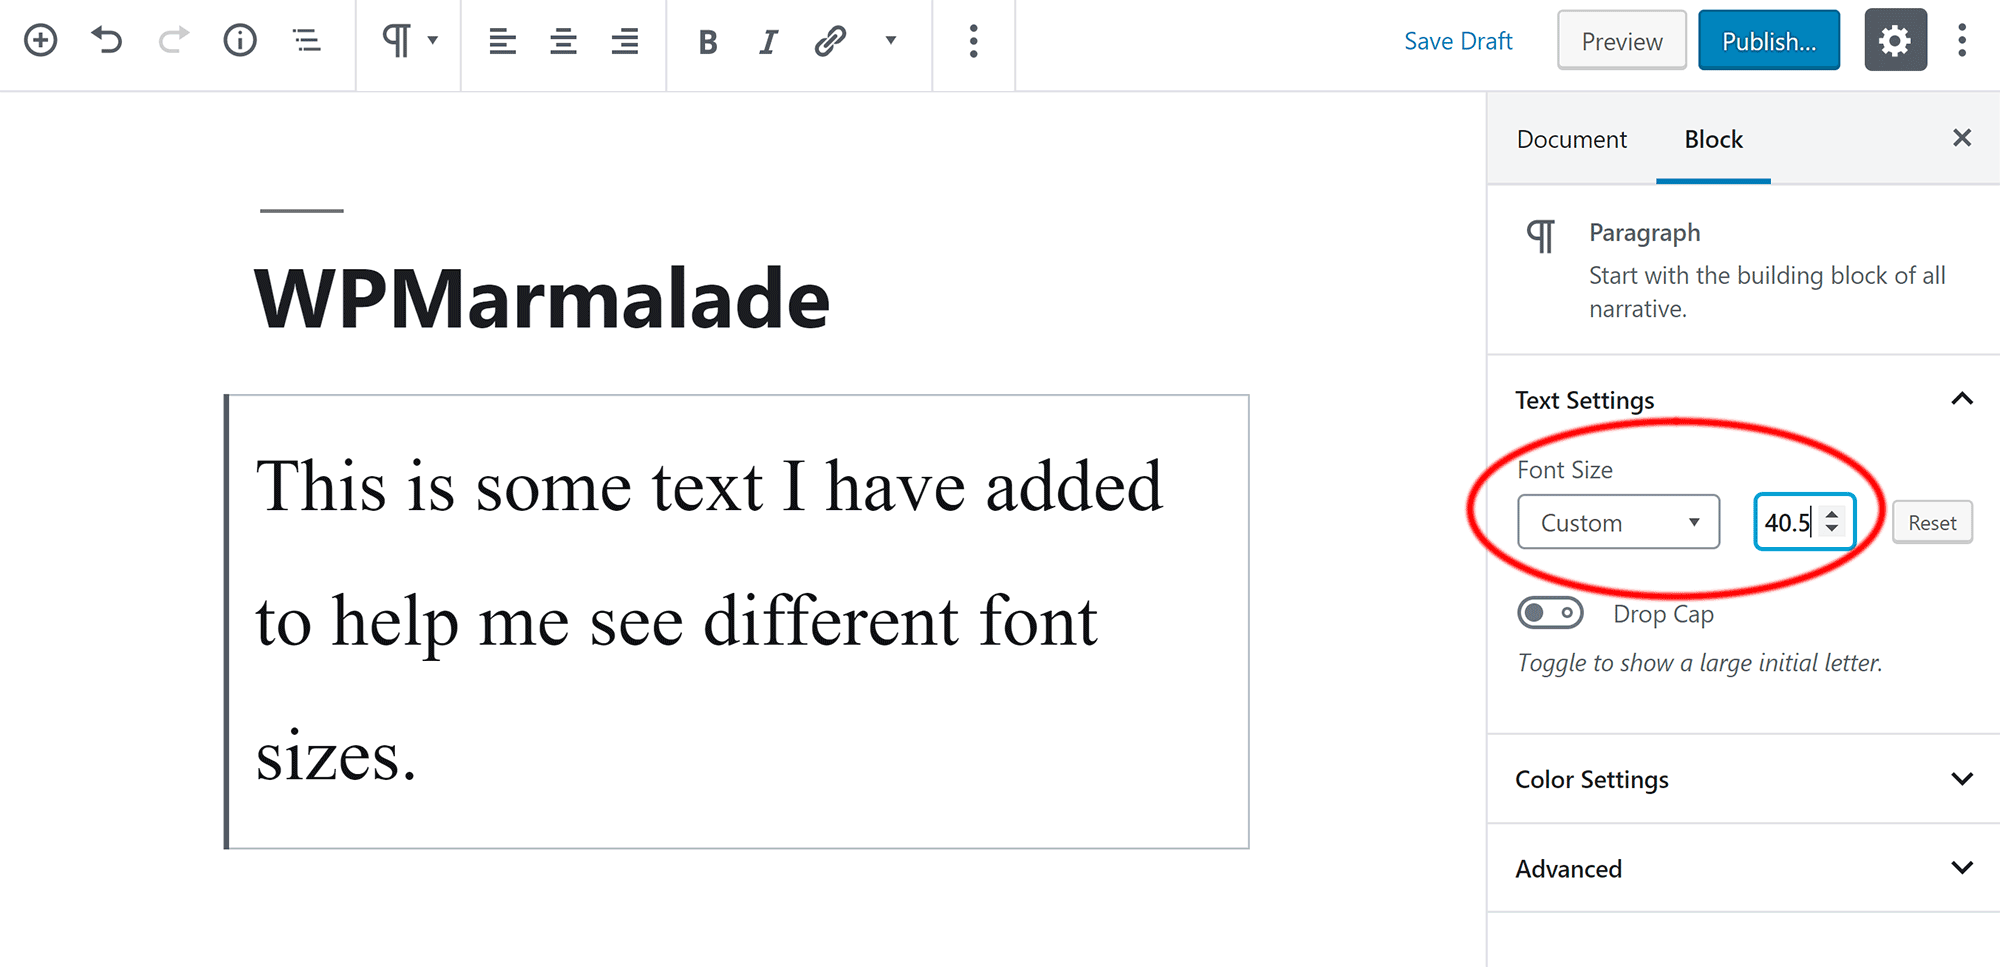
Most WordPress themes come with preset fonts. These fonts match the theme’s design and style. You can change font size and style in the theme settings. Default fonts are simple to use and require no extra setup. They work well for beginners who want a quick design update.
Google Fonts Integration
Google Fonts is a free, large library of web-friendly fonts. Many WordPress themes and plugins connect directly to Google Fonts. You can select fonts from this library in the WordPress Customizer. This integration lets you use stylish fonts without uploading files. It gives your site a professional and modern look.
Custom Fonts Support
WordPress also allows you to add custom fonts. You can upload font files like .woff or .ttf through your theme or plugins. This option gives full control over font style and branding. Custom fonts help create a unique identity for your website. Using them may require basic knowledge of CSS or plugins.
Credit: wpmarmalade.com
Using Plugins For Fonts
Changing fonts on WordPress is simple using plugins. Plugins let you add and manage fonts without coding. They offer many font choices and easy customization. This method suits beginners and saves time. Below are steps to use plugins for fonts on your site.
Popular Font Plugins
Several plugins help you change fonts easily. Easy Google Fonts is widely used for free Google fonts. Custom Fonts lets you upload your own font files. Fonts Plugin by CreativeMinds offers many font options and styles. These plugins work well with most themes and are beginner-friendly.
Installing And Activating Plugins
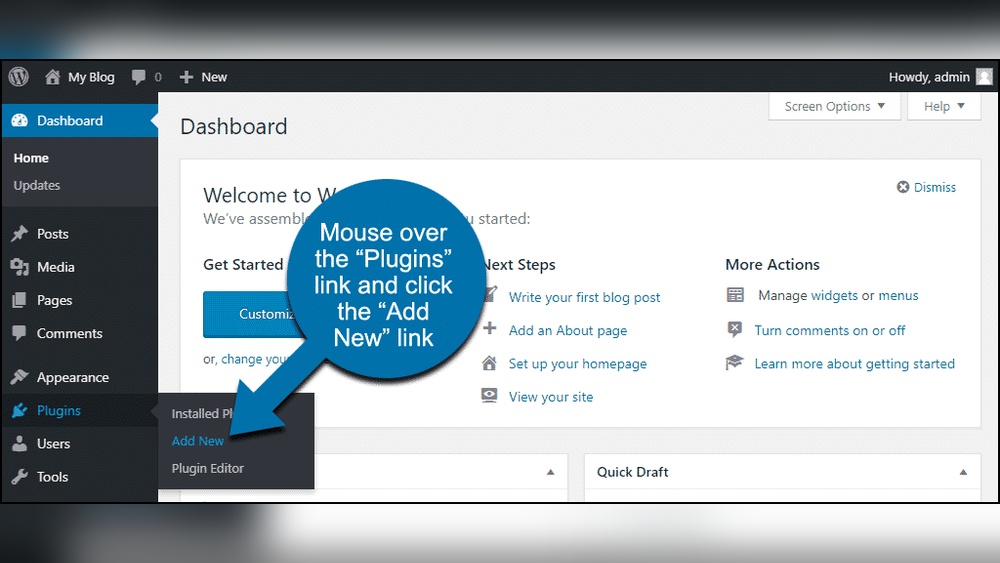
Go to your WordPress dashboard. Click on “Plugins” then “Add New”. Search for your chosen font plugin by name. Click “Install Now” and wait a moment. After installation, click “Activate” to enable the plugin. The plugin is now ready for use.
Configuring Fonts Via Customizer
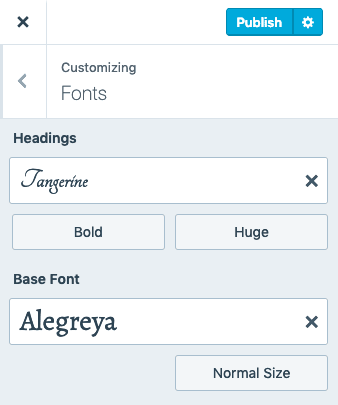
Open your dashboard and go to Appearance > Customize. Look for the typography or fonts section added by the plugin. Choose the font family you want for headings and body text. Adjust font size, weight, and style if options are available. Preview changes live before saving. Click “Publish” to apply fonts site-wide.
Manual Font Customization
Manual font customization allows full control over your website’s typography. This method involves uploading font files, writing CSS code, and assigning fonts to specific parts of your site. It may seem technical but offers precise design options. Follow the steps carefully to change fonts without relying on plugins.
Uploading Font Files
First, get the font files you want to use. These are usually in .woff, .woff2, .ttf, or .otf formats. Use an FTP client or your hosting file manager to upload them. Place the files in your theme folder, such as /wp-content/themes/your-theme/fonts/. Keep the file names simple and clear.
Adding Css For Fonts
Next, add CSS code to tell your site to use the new fonts. Open your theme’s style.css file or use the Customizer’s Additional CSS section. Use the @font-face rule to define your font, like this:
@font-face { font-family: 'CustomFont'; src: url('fonts/customfont.woff2') format('woff2'), url('fonts/customfont.woff') format('woff'); font-weight: normal; font-style: normal; } This code loads your font from the folder you uploaded it to. Change the file paths and font name to match your files.
Applying Fonts To Elements
Finally, assign your new font to website elements using CSS. Target tags like body, h1, or specific classes. Example:
body { font-family: 'CustomFont', Arial, sans-serif; } This sets your custom font as the default for the page text. You can also style headings or menus by adding similar rules for those elements. This step completes the manual font change on WordPress.
Credit: wordpress.com
Fonts With Page Builders
Page builders simplify font changes in WordPress. They offer easy tools to select and customize fonts. No coding skills needed. Fonts can be changed for headers, paragraphs, and buttons. This section covers how to work with fonts in popular page builders.
Using Elementor Font Settings
Elementor has built-in font controls. Open the Elementor editor and select any text element. The style tab shows font options. Choose font family, size, weight, and color. Changes apply instantly on the page preview.
Global font settings allow site-wide font changes. Go to Site Settings > Typography. Adjust fonts for headings and body text. This keeps font styles consistent across pages.
Uploading Fonts In Page Builders
Some page builders let you upload custom fonts. This option works for unique font files not found in default lists. Prepare font files in formats like .woff or .ttf.
Upload fonts via the page builder’s custom font feature. Assign a name and save the font. It becomes selectable in font dropdown menus. This method ensures brand-specific fonts show correctly.
Best Practices For Font Use
Choosing the right fonts for your WordPress site improves readability and user experience. Good font choices keep visitors engaged and reduce eye strain. Following best practices helps your site look professional and load quickly.
Fonts also affect how fast your site performs. Using too many or heavy fonts can slow down loading times. Editing fonts safely ensures your changes stay intact after updates.
Choosing Readable Fonts
Select fonts that are easy to read on all devices. Sans-serif fonts like Arial and Helvetica work well for body text. Limit your site to two or three font families to keep it clean.
Avoid overly decorative fonts for paragraphs. Use fancy fonts only for headings or accents. Make sure font size is large enough to read comfortably.
Maintaining Site Performance
Use web-safe fonts or Google Fonts to avoid extra loading delays. Avoid loading many font weights or styles at once. This reduces page size and speeds up your site.
Use font-display: swap in your CSS to show fallback fonts while loading. This keeps text visible and improves user experience. Regularly test your site speed to check font impact.
Using Child Themes For Edits
Make font changes in a child theme to protect your edits from theme updates. A child theme copies your main theme and lets you customize safely. It is easy to create and keeps your site stable.
Keep your font code organized in the child theme’s style.css file. Avoid editing the main theme files directly to prevent losing changes. Using a child theme is the safest way to customize fonts.

Credit: wordpress.com
Frequently Asked Questions
How Do I Change The Style In WordPress?
Change your WordPress style by installing a new theme via Appearance → Themes. Customize fonts and colors under Appearance → Customize. Use plugins like Easy Google Fonts for more font options or add custom CSS for advanced styling. Save changes to update your site’s look instantly.
How To Customize Text In WordPress?
To customize text in WordPress, use the block editor’s toolbar to format text. Change fonts via Appearance > Customize or install font plugins. Adjust colors, styles, and sizes directly in blocks or with custom CSS for more control. Save changes to apply your customizations site-wide.
How To Use Custom Fonts In WordPress?
Install a font plugin like Easy Google Fonts or Custom Fonts from Plugins > Add New. Activate it, then customize fonts via Appearance > Customize. Alternatively, upload font files and add @font-face CSS in your child theme’s style. css. Apply fonts to elements using CSS selectors.
Save changes to see custom fonts live.
How Do You Change The Font On WordPress Menu?
Change your WordPress menu font by installing a font plugin like Easy Google Fonts. Then, go to Appearance > Customize > Typography to select and apply new fonts. Alternatively, add custom fonts manually by uploading font files and editing your theme’s CSS.
Save changes in a child theme to avoid loss.
Conclusion
Changing your WordPress font is simple and improves your site’s look. Choose a method that fits your skills and needs. Plugins offer quick changes without coding. Manual edits give more control but need care. Test your font on different devices for best results.
Keep your site easy to read and visually appealing. Enjoy customizing your WordPress font to match your style.


