
Thinking about moving your domain name to a new host? You’re not alone.
Whether you want better service, lower costs, or more features, changing your domain host can feel tricky. But it doesn’t have to be confusing or stressful. In this guide, you’ll discover simple, clear steps to switch your domain smoothly. By the end, you’ll have the confidence to make the change without losing your site’s presence or traffic.
Ready to take control of your domain and get the best hosting experience? Let’s dive in.

Credit: mizitechinfo.wordpress.com
Prepare For Domain Transfer
Preparing for a domain transfer is a key step before moving your domain to a new host. It ensures a smooth and quick process without problems. Take time to complete these simple tasks. They help avoid delays and keep your website online during the transfer.
Check Domain Eligibility
Not all domains can be transferred at any time. Check if your domain is older than 60 days. Domains new or recently transferred may have restrictions. Also, make sure your domain is not expired. An active status is required to start the transfer process.
Unlock Your Domain
Domains are usually locked to protect from theft. You must unlock your domain before transferring. Log in to your current registrar account. Find the domain settings and turn off the lock. This step allows the new host to accept the domain transfer.
Obtain Authorization Code
The authorization code is a secret key for the transfer. It proves you own the domain. Request this code from your current registrar. It often arrives by email quickly. Keep this code safe. You will need to enter it during the transfer with your new host.
Choose A New Hosting Provider
Choosing a new hosting provider is a key step in moving your domain name. The right host affects your site’s speed, security, and uptime. Take time to pick one that fits your needs. This choice makes future site management easier and smoother.
Compare Hosting Plans
Start by checking different hosting plans. Look at storage space, bandwidth, and server speed. See if they offer backups and security features. Compare prices to find a plan within your budget. Check for any hidden fees or renewal costs.
Verify Domain Transfer Support
Not all hosts allow domain transfers. Confirm the new provider supports domain transfers before signing up. Ask about the transfer process and how long it takes. Check if they provide help during the transfer. This avoids surprises and delays later.
Sign Up For A New Account
Once you choose a host, create your new account. Provide accurate details to avoid issues. Set up your payment method for smooth billing. Keep login information safe for future use. This step prepares you for the next phase of transfer.
Initiate Domain Transfer
Initiating a domain transfer is the first step to move your domain name to a new hosting provider. This process starts by notifying your new host that you want to transfer your domain. It includes several important actions to ensure the transfer goes smoothly. Follow these steps carefully to avoid delays or issues.
Start Transfer Process At New Host
Login to your new host’s control panel. Find the domain transfer section. Enter the domain name you want to move. The new host will check if the domain is eligible for transfer. Make sure your domain is unlocked at the current registrar. This step allows the new host to begin the transfer request.
Enter Authorization Code
Request an authorization code from your current domain registrar. This code is also called an EPP code. It protects your domain from unauthorized transfers. Enter this code in the new host’s transfer page. Double-check the code for accuracy. Without the correct code, the transfer cannot proceed.
Confirm Transfer Request
After submitting the authorization code, confirm the transfer request. You may get an email to approve the transfer. Follow the instructions in the email carefully. Confirming the request helps speed up the transfer. Your domain will move to the new host once the process completes.
Credit: www.liquidweb.com
Update Dns Settings
Updating your DNS settings is a key step when changing your domain to a new host. This process tells the internet where to find your website and services. Without correct DNS settings, visitors cannot reach your site. The update involves accessing your DNS management area, changing name servers, and checking if the changes take effect.
Access Dns Management
First, log in to your domain registrar’s control panel. Look for a section named “DNS Management,” “Domain Settings,” or “Name Server Settings.” This area controls where your domain points. You may need to verify your identity before access.
Once inside, find the current DNS records. These include A records, CNAME, MX, and name servers. Make sure you understand these basics or keep a backup before making changes.
Change Name Servers
To point your domain to a new host, update the name servers. Your new hosting provider gives you these server addresses. They usually look like ns1.examplehost.com and ns2.examplehost.com.
Replace the old name servers with the new ones in the DNS management panel. Save your changes. This action tells the internet to direct traffic to your new hosting provider.
Verify Dns Propagation
After updating, changes do not take effect immediately. DNS propagation can take from a few minutes to 48 hours. During this time, your website might appear on the old or new host intermittently.
Use online DNS checker tools to monitor the update progress. Enter your domain name to see if the new name servers are active worldwide. Once fully propagated, your domain will work from the new host.
Manage Email And Website
Managing your email and website is key during a domain name transfer to a new host. This step keeps your online presence smooth and avoids downtime. Careful handling prevents loss of emails or website data.
Backup Existing Data
Start by saving all website files and emails. Use your hosting control panel or an FTP client to download website files. Export email data through your email client or hosting tools. Keep backups safe on your computer or cloud storage. This step protects your data from loss during transfer.
Set Up Email Accounts
After moving to the new host, create the same email accounts. Use the new host’s control panel to add email addresses. Match settings like passwords and aliases to your old accounts. This setup ensures your email works without interruptions. Check for any special email forwarding or filters you used before.
Test Website Functionality
Once your website is on the new host, check every part. Open pages and test forms, links, and images. Make sure everything loads quickly and correctly. Confirm your domain points to the new server by checking DNS settings. Fix any errors to keep visitors happy and engaged.

Credit: newhelptech.wordpress.com
Monitor Transfer Status
Monitoring the transfer status is important after starting your domain move. It helps you stay updated and avoid surprises. You can track the progress, fix issues, and know when the transfer finishes. This keeps the process smooth and stress-free.
Track Transfer Progress
Check your domain registrar’s control panel often. You will see the transfer status there. It may show stages like “pending,” “in progress,” or “completed.” This lets you know how far the transfer has gone. Track updates daily to catch any delays fast.
Resolve Transfer Issues
Sometimes, transfers face problems. These can include incorrect authorization codes or locked domains. Your registrar usually sends an email if there is an issue. Follow their instructions quickly to fix problems. Contact support if you do not understand the steps.
Confirm Completion
Wait for a confirmation email from the new host. This tells you the transfer is done. Check your website and email to see if they work correctly. If everything runs smoothly, your domain is fully moved. Keep your old account active a little longer, just in case.
Frequently Asked Questions
How Do I Transfer My Domain To A New Host?
To transfer your domain, unlock it at your current registrar and get the authorization code. Then, initiate the transfer at the new host. Confirm the transfer via email. The process usually takes 5-7 days to complete.
Will My Website Downtime Occur During Domain Transfer?
Properly timed transfers cause minimal downtime. Update your DNS settings before transferring. Ensure your new host is ready to serve your site. This reduces downtime risks during the domain switch.
How Long Does A Domain Name Transfer Take?
Domain transfers typically take 5 to 7 days. This depends on your current registrar and new host’s processing times. You can speed it up by promptly approving transfer emails.
Can I Keep My Email Services After Changing Hosts?
Yes, if you update your DNS records correctly. Ensure MX records point to your email provider. Check with your new host to maintain uninterrupted email services during transfer.
Conclusion
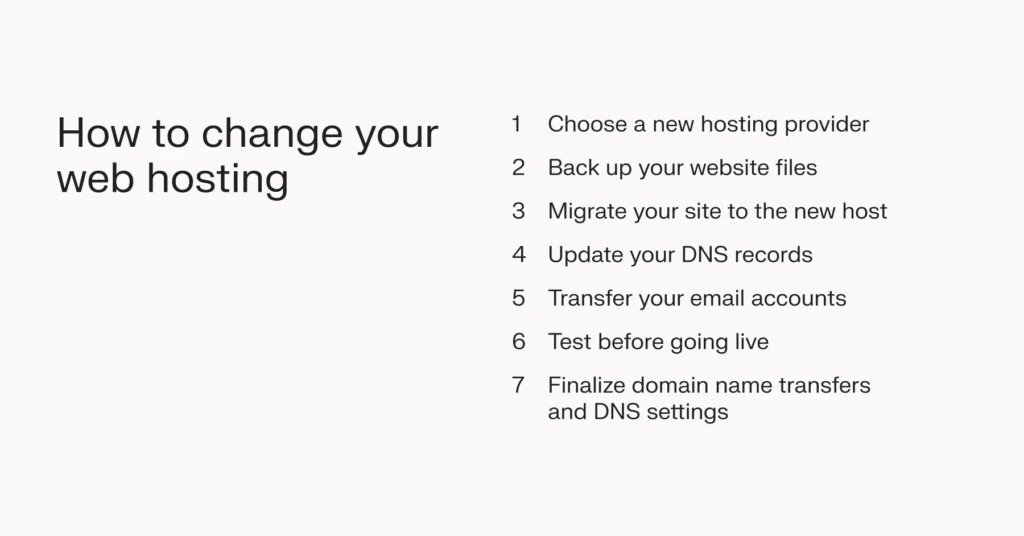
Changing your domain name to a new host is simple with the right steps. Start by backing up your website and domain data. Next, update your domain settings carefully. Keep track of DNS changes to avoid downtime. Test your website after the move to ensure everything works well.
Stay patient, as changes may take time to show. Follow these tips to switch hosts smoothly and keep your site running.


