
Are you feeling stuck with the default header image on your WordPress theme? Maybe you’re craving a fresh look for your site or aiming to reflect your brand more accurately.
Changing the header image is a powerful yet straightforward way to transform your website’s appearance. In this guide, we’ll walk you through the simple steps to switch up the header image in WordPress premade themes. Imagine your website standing out with visuals that truly speak to your audience! With just a few clicks, you can revitalize your site’s first impression, making it more engaging and aligned with your vision.
Ready to dive in and make your website shine? Let’s get started!

Credit: gutenbergtimes.com
Accessing The WordPress Dashboard
First, log in to your WordPress account. Use your username and password. After logging in, you will see the WordPress Dashboard. This is where you can change settings. You can also update your site here.
Find the Appearance tab on the left side. Click on it. A menu will drop down. From this menu, choose Header. This will take you to the header settings page. You can change your header image here.
Navigating To Themes
Start by logging into your WordPress dashboard. Find the Appearance tab on the left menu. Click on it to open the themes section. Here, you can see all your installed themes. Choose the theme you want to edit. Click on Customize. This will open the customization options for your selected theme. Look for Header Image under the customization options. Click on it to change or upload a new image. Make sure your image is the right size. This helps it look good on your site.
Locating The Header Image Option
First, log in to your WordPress dashboard. Look for the Appearance tab on the left menu. Click it to open more options. Select Customize from the list. This opens the theme customizer screen.
Inside the customizer, find the Header Image option. It might be under a section called Header or Site Identity. The exact location depends on your theme. This section lets you change or remove the header image.
If you can’t find it, check the theme’s documentation. Some themes have unique layouts. They might hide the header image option somewhere else. Knowing where to look is key.
Uploading A New Header Image
Pick an image that fits your theme. It should be clear and bright. Make sure it is not blurry. The right image size is also important. Most themes show the best size. Follow these suggestions for the best look. A good image makes your site look nice.
Go to your WordPress dashboard. Click on Appearance, then Header. Click the Add New Image button. A window will open. Select your image from your computer. Click Open to upload. Wait a few seconds for it to load. Now your image is set to your header.
Go to your WordPress dashboard. Click on Appearance, then Header. Choose Add New Image. This time, click Media Library. Select an image you uploaded before. Click Select and Crop. Adjust the image if needed. Save your changes to see your new header.
Adjusting Image Settings
Changing the header image in WordPress premade themes is straightforward. Navigate to the theme customizer and select the “Header Image” section. Upload your desired image and adjust settings for optimal display.
Cropping The Image
Cropping makes images fit better. It helps them look neat. Open the WordPress dashboard. Click on Appearance. Choose Customize. Find Header Image. Pick the image you want. Use the cropping tool. Drag the corners to adjust. Ensure the key parts are visible. Press Save to keep changes.
Adding Alt Text
Alt text describes images. It’s helpful for everyone. Go to the image settings. Find the Alt Text box. Type a short description there. Describe what you see. Make it simple but clear. This helps search engines. It also helps visually impaired users. Alt text improves accessibility.

Credit: www.cloudways.com
Saving And Previewing Changes
First, click the “Save” button to keep your changes. This ensures your new header image is saved. Always save before leaving the page. Forgetting can lose your work. After saving, find the “Preview” button. This lets you see how your website looks. It shows changes without making them public. Previewing helps catch mistakes. It’s a safe way to check. If you like what you see, you can make the changes live. This way, your site always looks great. Remember, save and preview each time you update. It helps keep your site looking fresh and correct.
Troubleshooting Common Issues
Changing the header image in WordPress premade themes can be tricky. First, navigate to the dashboard and select “Appearance” then “Customize. ” From there, locate “Header Image” to upload your desired photo.
Image Not Displaying
Sometimes, the header image does not show up. This can be frustrating. Check your internet connection first. Next, make sure the image file is uploaded. Go to your WordPress dashboard. Look in the media library. Is your image there? If not, upload it again.
Sometimes, the theme settings cause problems. Check the theme’s customization options. Make sure the right image is selected. Also, clear your browser’s cache. This helps display the new image.
Header Size Mismatch
A mismatch in header size can look odd. Always check the theme’s recommended size for images. Resize your image before uploading. Use photo editing software for this. Crop or adjust the image to fit the theme’s size.
Sometimes, image dimensions are too large or too small. This can cause stretching. Use the WordPress image editor. It helps in resizing images. Always save changes after editing. Refresh your page to see the update.
Credit: elementor.com
Exploring Theme-specific Options
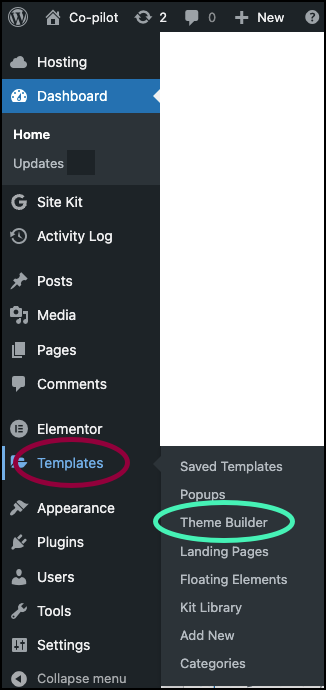
Many themes offer custom header features. These features allow users to change images easily. Some themes have a header section in the customizer. Users can upload new images here. They can also choose from the media library. It’s important to check image dimensions. Proper dimensions ensure the image fits well. Some themes provide header layout options. These can include text and button choices.
Custom Header Features
The custom header feature is simple. Users select their preferred image. They can crop or resize it if needed. Some themes allow color changes. This helps the header match the site’s style. Custom header features are often found in the theme’s settings.
Additional Theme Settings
Many themes have additional settings. These can include font choices and colors. Users can adjust these to fit their style. Some themes offer advanced options. These may include header transparency settings. Users can explore these for a unique look. It’s good to explore all settings for customization.
Frequently Asked Questions
How Do I Change Header Image In WordPress?
To change your header image, go to your WordPress dashboard. Navigate to Appearance > Customize. Click on Header Image. Upload your desired image or choose from the media library. Adjust and crop the image as needed. Save changes to update the header image on your theme.
Can I Use Any Image For Header?
Yes, you can use any image for your header. Ensure the image is high-quality and fits the theme’s dimensions. Use the customize option to adjust the image’s size. This ensures it looks great on your site. Consider the image’s relevance to your site content for better engagement.
Why Is My Header Image Not Showing?
Your header image might not show due to cache issues or incorrect image size. Clear your browser cache and check image dimensions. Ensure the image is uploaded to the media library. Verify that your theme supports header images. Save changes properly after uploading the image.
How Do I Make Header Image Responsive?
To make your header image responsive, use WordPress’s built-in customization tools. Select a theme that supports responsive design. Ensure the image is correctly sized and optimized. Use CSS media queries if needed. Test your site on different devices to confirm responsiveness.
Conclusion
Changing your header image in WordPress themes is simple. Start by accessing the theme settings. Choose a high-quality image that fits your brand. Upload the image following the steps outlined earlier. Preview before you finalize your changes. This ensures your site looks professional.
Regular updates keep your website fresh. Experiment with different images for variety. With practice, you’ll gain confidence in customizing your site. Make your header eye-catching and relevant. This enhances user experience and engagement. Your site’s appearance reflects your brand identity.
A well-chosen header image makes a lasting impression.


