
Want to make your WordPress site truly yours? Changing the font is one of the easiest ways to give your website a fresh, unique look that matches your style and message.
Whether you want a sleek, modern vibe or a playful, creative feel, the right font can instantly grab your visitors’ attention and keep them engaged. In this guide, you’ll learn simple, step-by-step methods to change fonts on your WordPress site—no coding experience needed.
Ready to transform your site’s appearance and stand out from the crowd? Let’s dive in and make your text speak volumes!

Credit: wordpress.com
Font Options In WordPress
WordPress offers several font options to customize your website’s look. Fonts affect readability and the overall feel of your site. Choosing the right font helps your content stand out and connect with visitors.
WordPress includes default fonts that work well for many sites. It also supports custom fonts for more unique styles. Understanding these options lets you pick the best fonts for your needs.
Default Fonts And Typography
WordPress themes come with built-in default fonts. These fonts are safe and compatible across all devices. They include popular choices like Arial, Times New Roman, and Georgia.
Default fonts ensure your site loads quickly and looks consistent. You can adjust font sizes, weights, and styles within the Customizer or Site Editor. This setup is simple and requires no extra tools.
Custom Fonts Availability
WordPress supports many custom fonts through plugins or manual code. Google Fonts is a popular source for free, web-safe fonts. Plugins like Easy Google Fonts make adding these fonts simple.
Custom fonts give your site a unique personality. You can upload your own font files or link to external font libraries. This option suits those who want more design control.
Be careful with custom fonts. Too many can slow down your website. Choose fonts that match your brand and keep readability high.
Changing Fonts With Customizer
Changing fonts with the WordPress Customizer is a simple way to update your site’s look. It lets you see changes in real time. This method works well for beginners and those who want quick results.
The Customizer offers basic font options without needing extra plugins. You can change fonts for your entire site or specific text areas. This keeps your website consistent and easy to read.
Navigating To Typography Settings
Start by logging into your WordPress dashboard. Click on Appearance in the left menu. Then select Customize. This opens the Customizer panel.
Look for a section named Typography or Fonts. Some themes label it differently, but it should be easy to find. Click on this section to open font options.
Selecting And Applying Fonts
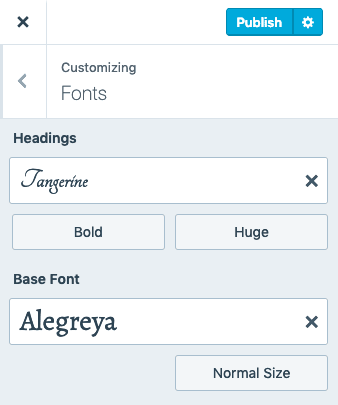
Inside the Typography settings, you will see font options for headings, body text, and menus. Click the font dropdown menu to see available fonts. Choose a font that fits your site style and is easy to read.
After selecting the font, the preview will update instantly. This helps you decide if the font looks good on your site. When satisfied, click the Publish button to save your changes.
Using Site Editor For Fonts
The Site Editor offers a simple way to change fonts across your WordPress site. It provides control over typography for the entire site or individual blocks. This method is useful for users who want quick font updates without coding.
The Site Editor is part of the Full Site Editing feature. It lets you customize styles visually. You can access it directly from your WordPress dashboard.
Accessing Styles And Typography
Open your WordPress dashboard and go to Appearance > Editor. In the editor, find the “Styles” icon on the left menu. Click it to open style settings.
Inside the Styles panel, select “Typography.” This section shows font options for your site. You can adjust the default font family, size, and weight here.
Changing Fonts For Blocks
To change fonts for specific blocks, open the block you want to edit. Click the block settings icon on the right panel. Scroll to find the “Typography” section.
Choose a new font from the dropdown menu. The block font updates immediately to show your change. This lets you style headings, paragraphs, or buttons independently.
Saving Font Changes
After selecting fonts for your site or blocks, save your work. Click the “Save” button at the top right of the Site Editor. Your font changes go live on your website instantly.
Check your site to see the new fonts in action. You can always return to the Site Editor to make more changes anytime.
Credit: kinsta.com
Applying Fonts Via Additional Css
Applying fonts via Additional CSS gives full control over your site’s typography. You can target specific elements or the whole website. This method works well for those who want to customize fonts beyond default options. It requires writing simple CSS code and adding it directly in WordPress.
Locating Additional Css Section
Start by logging into your WordPress dashboard. Navigate to Appearance > Customize. In the Customizer menu, find and click on Additional CSS. This opens a text box where you can write your CSS code. Changes here preview live on your site before saving.
Writing Css For Fonts
To change the font for the entire site, use the body selector. Example:
body { font-family: "Arial", sans-serif; } To change font for headings only, target h1, h2, h3 tags:
h1, h2, h3 { font-family: "Georgia", serif; } Replace font names with your preferred fonts. Use quotes for font names with spaces. Add fallback fonts like sans-serif or serif for safety.
Publishing Css Changes
After adding your CSS code, check the live preview. Make sure fonts appear as expected on the site. Click the Publish button at the top of the Customizer panel. Your font changes now apply site-wide. You can return anytime to edit or remove the CSS code.
Font Plugins For More Choices
Font plugins expand your font choices beyond default options. They add many unique fonts to your WordPress site. Plugins make it simple to customize fonts without coding. This gives your website a fresh, personalized look. Many plugins connect to popular font libraries like Google Fonts. This ensures fonts are fast and reliable. Using plugins saves time and improves site design.
Installing Font Plugins
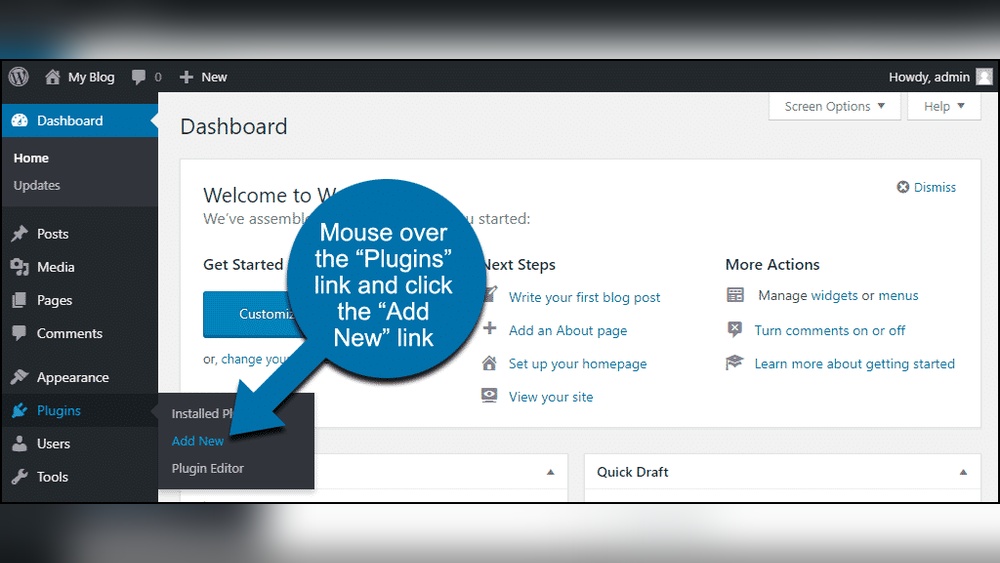
Start by logging into your WordPress dashboard. Go to Plugins > Add New. Type the font plugin name in the search box. Find the plugin and click Install Now. After installation, click Activate to start using the plugin. Most font plugins add a menu in Appearance or Settings. Use this menu to choose and apply new fonts.
Using Easy Google Fonts Plugin
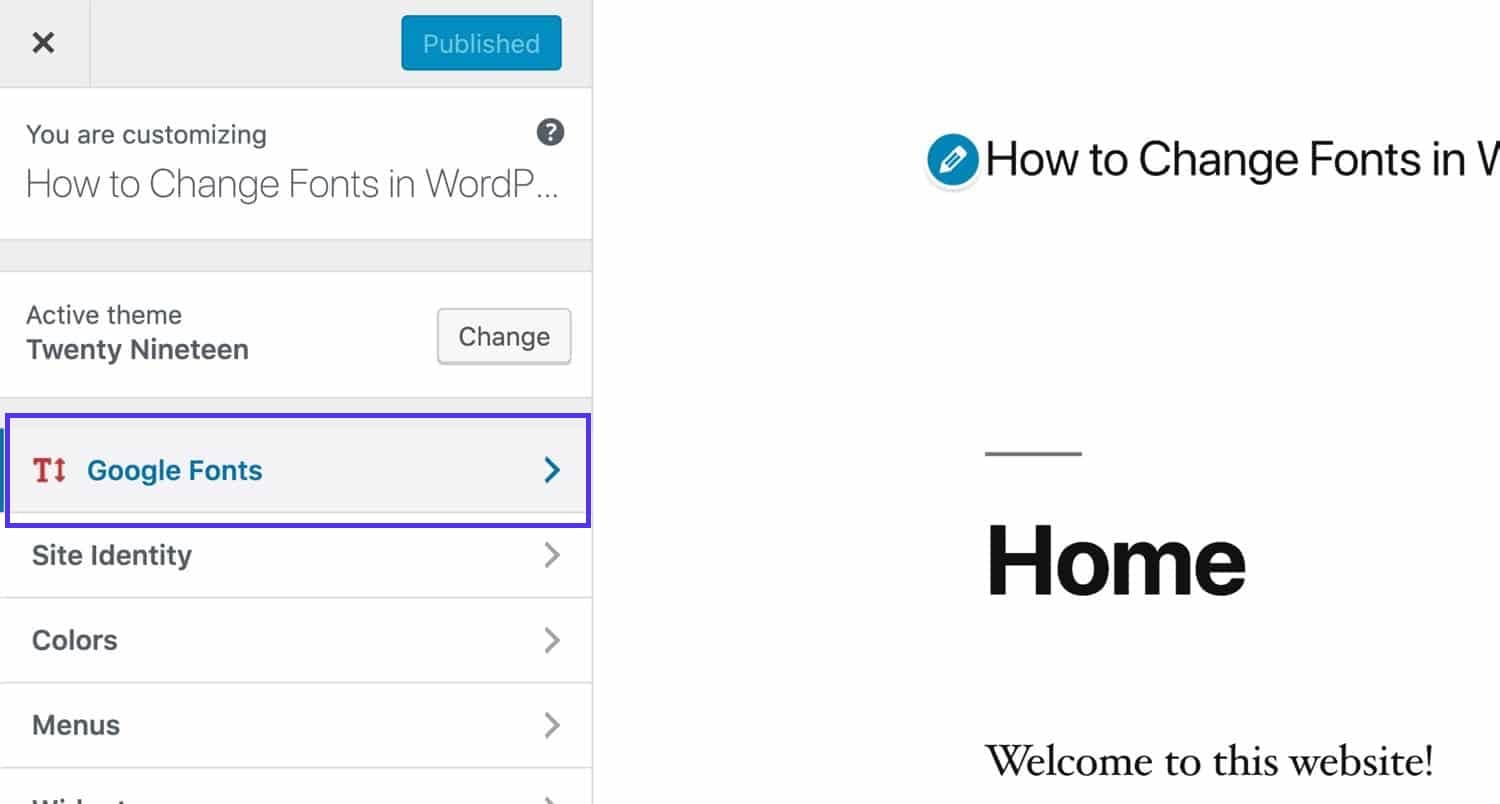
Easy Google Fonts is a popular plugin for adding fonts. It connects your site to the Google Fonts library. After activation, go to Appearance > Customize. Find the Typography section added by the plugin. Select the text elements you want to change. Pick a new font from the Google Fonts list. Adjust font size, weight, and style easily. Save your changes to see new fonts live on your site.
Credit: wordpress.com
Editing Theme Files
Editing theme files in WordPress lets you change fonts directly in your site’s code. This method gives more control over typography styles. It suits users comfortable with coding and understanding file structures. Two main files affect fonts: theme.json and style.css. Each file handles font settings differently. Knowing how to edit these files helps customize font appearance across your website.
Modifying Theme.json
The theme.json file controls global styles for many modern WordPress themes. It manages fonts, colors, spacing, and more. To change fonts, find the settings.typography.fontFamilies section. Add or edit font family names there. For example:
{ "settings": { "typography": { "fontFamilies": [ { "fontFamily": "Arial, sans-serif", "name": "Arial", "slug": "arial" }, { "fontFamily": "Your Custom Font, serif", "name": "Custom Font", "slug": "custom-font" } ] } } }Save the file and clear your cache to see changes. Editing theme.json affects fonts site-wide. It works best for block-based themes using full site editing.
Editing Style.css
The style.css file handles most CSS styles in traditional themes. To change fonts, add CSS rules targeting body text or headings. Example:
body { font-family: "Your Font Name", sans-serif; } h1, h2, h3 { font-family: "Another Font", serif; }Open your theme folder, find style.css, and add or modify font rules. Save the file and refresh your site. This method changes fonts visually but does not add new font files. You may need to load fonts via @font-face or Google Fonts link.
Risks Of Manual Edits
Editing theme files manually can cause problems. Mistakes in code may break your site’s design or cause errors. Updates to your theme can overwrite changes, losing your font settings. Always back up files before editing. Use a child theme to protect your edits from updates. Manual edits require basic coding knowledge and care. Consider safer methods if you are unsure.
Global Font Changes Tips
Changing fonts globally improves your site’s look and feel consistently.
It saves time and keeps all pages uniform in style.
Focus on easy methods to set fonts across the entire website.
Setting Site-wide Fonts
Go to your WordPress dashboard and open Appearance > Customize.
Find the Typography or Fonts section in the menu.
Select a font for headings and body text to apply site-wide.
Use the Site Editor under Appearance > Editor for full site editing.
Click Styles, then Typography to change default fonts for all text.
Save your changes to see the new font appear everywhere on your site.
Handling Updates And Overrides
Theme updates can reset font changes made directly in files.
Avoid editing theme files like style.css or theme.json directly.
Use the Customizer or Additional CSS for safer, update-proof edits.
Keep a backup of custom CSS or font settings before updating.
Plugins like Easy Google Fonts help manage fonts without code.
Check your site after updates to ensure fonts still appear correctly.
Troubleshooting Font Issues
Troubleshooting font issues in WordPress can be frustrating. Fonts may not change as expected. Sometimes, the font does not apply correctly to your text. This section helps you fix common font problems quickly. Follow simple steps to solve these issues and improve your site’s appearance.
Font Size Not Changing
Font size may stay the same despite your changes. This often happens due to theme settings overriding your choices. Check if your theme has fixed font sizes. Some themes limit font size changes to keep design consistency.
Clear your browser cache to see recent changes. Old styles might still load, hiding your updates. Also, check for conflicting CSS in the Additional CSS section. Custom CSS may block size changes.
Try using the block editor to set font size for each block. This ensures your changes apply directly. If problems continue, deactivate plugins one by one. Plugins sometimes interfere with font size settings.
Font Not Applying Correctly
Fonts might not show as selected on your site. This can happen if the font name is incorrect in the CSS. Verify the exact font name in Google Fonts or your font provider.
Ensure the font is properly loaded in your theme or plugin. Missing font files cause fallback fonts to appear instead. Use browser developer tools to check if the font file loads.
Some themes or page builders use their own font settings. These settings can override your custom fonts. Check theme options and page builder settings for font controls.
Lastly, confirm that you saved and published all changes. Unsaved changes will not appear on the live site.
Frequently Asked Questions
How Do I Change The Style In WordPress?
To change style in WordPress, go to Appearance > Customize or Editor. Select Typography or Fonts, pick your desired font, and save changes. For advanced control, add custom CSS under Additional CSS. Use plugins like Easy Google Fonts for more options.
How Do I Change The Font Style Of A Text?
To change a text’s font style, open WordPress dashboard, go to Appearance > Customize or Editor. Select Typography or Fonts, pick your font, then save. For advanced options, add custom CSS or use font plugins like Easy Google Fonts.
How Do I Change The Font In WordPress Menu?
Go to WordPress dashboard, click Appearance > Customize. Find Typography or Fonts, select your menu font, then Save and Publish. Use Additional CSS or plugins for more options.
Why Can’t I Change Font Size In WordPress?
WordPress may restrict font size changes due to theme limitations or missing typography settings. Use the Customizer, Site Editor, or CSS to adjust fonts. Some themes require plugins or custom CSS for font size control. Check your theme’s options or add CSS for precise font size changes.
Conclusion
Changing fonts in WordPress is simple and quick. Use the Customizer or Site Editor for easy updates. For more control, add CSS or try a font plugin. Choose fonts that match your site’s style and keep readability in mind. Regularly check your site after changes to ensure everything looks good.
Experiment with fonts until you find the right fit. This helps create a better experience for your visitors.


