
Are you tired of the same old font on your WordPress site? Changing the font family in your WordPress theme can breathe new life into your website, making it more appealing and easier to read.
Imagine the impact a fresh, unique font could have on your brand’s image! Whether you’re looking to convey a professional tone, add a touch of creativity, or simply make your content stand out, altering your font family is a powerful tool at your disposal.
In this guide, you’ll discover just how simple it is to customize your website’s typography, giving you the control to match your font with your brand’s personality. Don’t let your website blend into the digital crowd; let’s make it memorable, starting with the words themselves. Keep reading to unlock the secrets to transforming your site’s look with just a few clicks.
Credit: wpdatatables.com
Choosing The Right Font
Picking a font is fun. It tells a story. Some fonts look happy. Others look serious. Bold fonts can be strong. Curvy fonts feel friendly. Always think about your message. Is it for kids? Or adults? Choose a font that fits. Check if it’s easy to read. Small letters should be clear. Big letters too. Try different styles. Compare them. Ask friends what they think. Picking the right font makes your site look great. It keeps people reading. They feel happy. They come back.
Credit: cyberchimps.com
Using WordPress Customizer
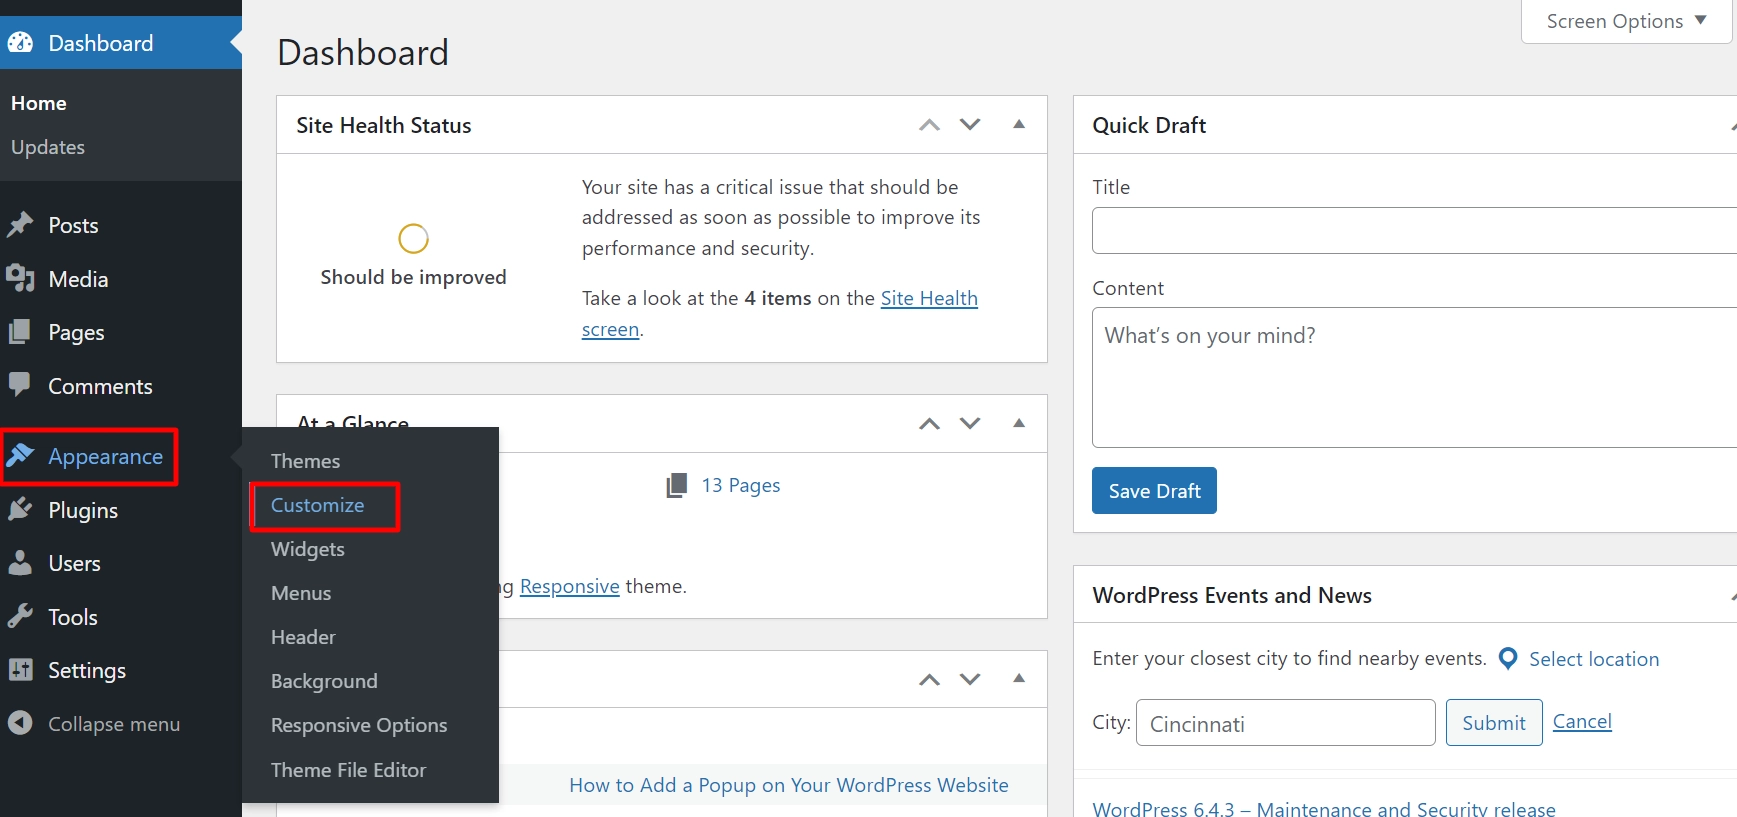
Find your WordPress dashboard. Look for “Appearance.” Click on it. This opens a new menu. Choose “Customize.” Now you are in the Customizer. It’s a powerful tool. You can change many things here. Fonts are one of them. You can make your site look unique. It is easy to use. Just follow the steps.
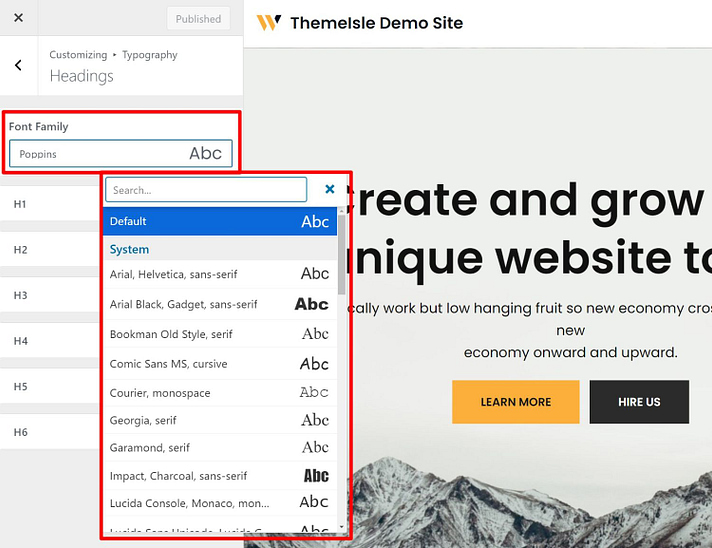
In the Customizer, search for “Fonts” or “Typography.” It’s usually under “Global” settings. Select it. A list of font options appears. Choose the font family you like. You can preview the font. It shows on your site instantly. Like magic. Be creative with your choice. Your site will look better. Save your changes once done.
Editing Theme Settings
Start by logging into your WordPress dashboard. On the left side, find the Appearance menu. Click on it, then select Customize. This will take you to the theme options. Here, you can make changes to your theme.
In the customize menu, look for Typography. Click on it to see font options. You can choose from many font families. To select a new font, click on the dropdown menu. Pick a font you like. Then, click Publish to save changes. Your site will now show the new font.
Credit: thimpress.com
Utilizing Page Builders
Page builders make changing fonts easy. Elementor, Beaver Builder, and Divi are popular options. These tools are user-friendly for beginners. They allow changes without coding. Each builder has unique features. But all help with font changes.
Steps To Change Font Family
Open your page builder. Choose the text you want to change. Look for font settings. These are usually in the style tab. From the font list, pick your new font. Preview to see changes. If happy, click save. Your new font should now show on your website. Repeat for other texts if needed. Always keep your site looking nice and easy to read.
Adding Custom Css
To change the font family in WordPress, first you need to find the Additional CSS section. Go to your WordPress dashboard. Click on “Appearance.” Next, select “Customize.” Here, you will see many options.
Locating Additional Css Option
Scroll down the menu. Find the “Additional CSS” option. Click on it. A box will appear. This is where you can add your custom CSS. Make sure to double-check for errors.
Writing Css For Font Change
Type your CSS code in the box. Use the correct selector for the element you want to change. For example, use body for changing the main text. Write something like: body { font-family: 'Arial'; }. Always save your changes. Check your website to see the new font.
Installing Font Plugins
Start with a plugin like Easy Google Fonts or Use Any Font. These are easy to use. They help change fonts quickly. Choose a plugin from the WordPress plugin store. Look for good reviews and ratings. This ensures the plugin is reliable.
After installing, open the plugin settings. Look for font options. You can pick from many font families. Try different styles until you find one you like. Adjust the size and color if needed. Save your changes before leaving. This makes sure your new font appears on the site.
Integrating Google Fonts
First, visit the Google Fonts website. Choose your desired font. Copy the link tag provided. It should look like this: . Paste this link in the section of your WordPress theme. This connects your site to the font library. Make sure your theme supports external fonts.
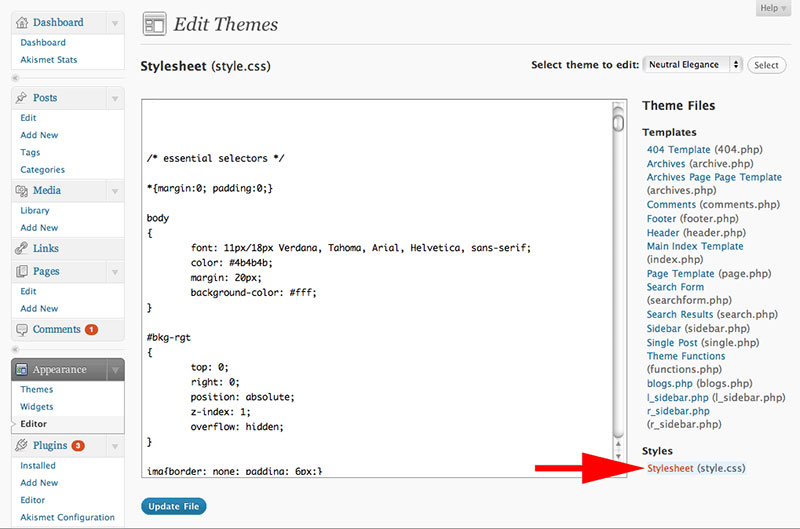
Open the style.css file of your theme. Locate the body tag or any other tag. Add the CSS rule font-family: 'Roboto', sans-serif;. Save the changes. This applies the Google Font to your theme. Check your website to see the new font. Adjust other elements as needed.
Troubleshooting Font Issues
Fonts may not display as expected on your site. Sometimes, fonts appear different on various devices. This can confuse your readers. Another problem is missing fonts. Your theme might not support them. Also, slow loading fonts can be a problem. They make your website slow. This affects user experience. Choose fonts that load fast and are widely supported.
First, check the theme settings. Make sure the right font is chosen. Then, update your theme if needed. It can fix font bugs. Also, use a font plugin. It helps manage fonts better. Another tip is to clear your cache. This can solve display problems. Lastly, seek help from the theme support team if issues continue.
Frequently Asked Questions
How Can I Change Font Family In WordPress?
To change the font family in WordPress, go to Appearance > Customize. Then, navigate to the Typography section. Here, you can select a new font from the available options. If your theme supports it, you can also add custom fonts using a plugin like Google Fonts Typography.
What Plugin Helps Change Fonts In WordPress?
Google Fonts Typography is a popular plugin for changing fonts in WordPress. It allows you to access a vast collection of Google Fonts. With this plugin, you can easily select and apply new fonts to different elements of your theme without any coding.
Can I Use Custom Fonts In WordPress Themes?
Yes, you can use custom fonts in WordPress themes. To do this, you can either manually add the font files and edit your CSS or use a plugin like Use Any Font. These plugins simplify the process, enabling you to upload and apply custom fonts effortlessly.
Is Coding Required To Change WordPress Fonts?
No, coding is not required to change WordPress fonts. Most modern themes and plugins offer an easy-to-use interface for font customization. You can change fonts through the WordPress Customizer or by using font-specific plugins, making the process accessible to non-coders.
Conclusion
Changing the font family in your WordPress theme is simple. With a few steps, you can give your site a fresh look. Customizing fonts enhances readability and personalizes your website. Always preview changes before saving to ensure the best appearance.
Experiment with different fonts to find the one that fits your style. Remember to maintain consistency across your pages. A well-chosen font makes your content more engaging. Keep your audience in mind while selecting fonts. Happy customizing! Your website reflects your unique taste.


