
Are you ready to take your WordPress site to the next level? Changing the content in the header of your X Theme can make a big difference in how your website looks and feels.
Whether you want to update your logo, tweak the navigation menu, or add a catchy slogan, the header is the first thing visitors see. You want it to be perfect, right? Imagine your website standing out from the crowd, capturing attention right from the first glance.
With a few simple steps, you can transform your header into a powerful tool that enhances user experience and boosts engagement. Why settle for ordinary when you can easily customize and make it extraordinary? Keep reading, and you’ll learn exactly how to do it. Your perfect header is just a few clicks away!
Accessing WordPress Dashboard
First, log in to your WordPress account. Use your username and password. Once logged in, you will see the WordPress Dashboard. It is the main control panel. From here, you can manage your website. Look for the menu on the left side. Find the option named “Appearance”. Click on it.
A dropdown menu will appear. Select “Customize”. This is where you can change the header. The Customizer will open. It allows you to edit your site’s look. Look for the “Header” section. Click on it to view header options.

Credit: melapress.com
Navigating To Theme Options
Start by logging into your WordPress dashboard. Look for the Appearance tab. Click it to find the Theme Options. This is where you can change settings. Explore the tabs within Theme Options. Find the one labeled Header. Here, you can change the content shown in your header. Use the fields provided. Enter new text or choose different settings. Save changes by clicking the Save button. Refresh your website to see the updated header. This process is simple and quick. Ensure you have the necessary permissions. Without these, changes might not apply.
Understanding Header Structure
The header is the top part of your website. It often includes a logo and navigation menu. Many sites also have a search bar. The WordPress X Theme makes header changes simple. A special tool, the Theme Options, helps you. This tool is in your WordPress dashboard.
Inside Theme Options, look for Header. Here, you can edit the header’s look. You can change colors, fonts, and layouts. If you want more control, try the Header Builder. It lets you add or remove sections. You can also adjust their sizes. Each change you make updates the website header. Practice these steps to get the perfect header.
Using Cornerstone Page Builder
Cornerstone makes editing easy. First, open the WordPress dashboard. Find the page you want to edit. Click on “Edit with Cornerstone”. This action will launch the builder. You will see the page elements.
After launching, look for the header section. Headers often include logos, menus, and titles. Spotting these is key to editing.
In the header area, click on the element you wish to change. A sidebar appears with options. This sidebar helps in making changes.
To change text, simply click and type. For images, use the “replace” option. Don’t forget to save changes. Your new header is now visible!
Utilizing Customizer For Header Changes
To change the header, first find the WordPress dashboard. Look at the left menu. Click on Appearance. Then, choose Customizer. This is where you can make header changes. It’s easy and fun!
In Customizer, find the Header section. You can change the text. Or change the colors. Even add a logo. Each change shows right away. This helps you see what you did. Be creative!
Like your changes? Click the Save button. It’s at the top. This keeps your new header look. Now, everyone will see it. Easy, right? Enjoy your new header!
Incorporating Custom Css
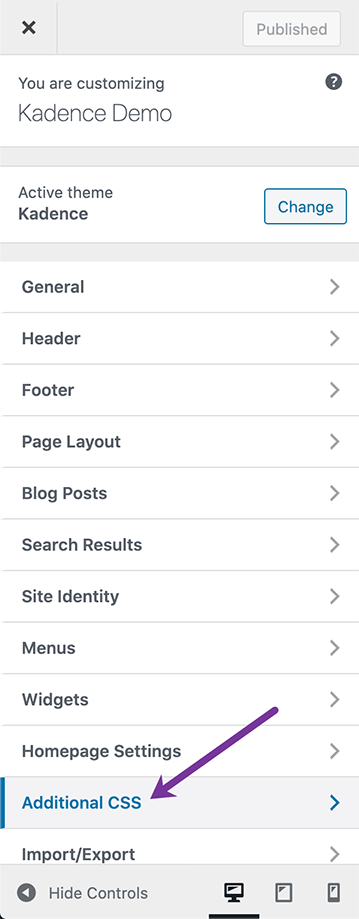
Custom CSS helps make your site unique. To add it, go to the WordPress dashboard. Find the Appearance tab. Click on Customize. Then select Additional CSS. Here, you can type your CSS code. It changes the header style.
Check changes on different devices. Use preview mode to see results. Make sure the header looks good. Change sizes and colors if needed. Refresh the page to apply changes. Keep testing until satisfied.
Implementing Header Widgets
Change content in the WordPress X Theme header with ease using header widgets. Access the WordPress dashboard, navigate to Appearance, and select Customize. Locate the Header section to add or modify widgets for a personalized touch.
Activating Widgets
Widgets are small tools for your site. They add extra features. To start, go to your WordPress dashboard. Find the “Appearance” tab. Click on “Widgets.” A list of available widgets will appear. Drag the widget you want to the header area. Release to place it there. Ensure your theme supports header widgets. Some themes may not allow this.
Configuring Widget Content
Each widget has settings. Click the widget in the header area. Options for customization will show. Change the title and content as needed. Some widgets might have extra settings. Always save changes after configuring. Check your site to see the updates. Adjust again if needed.

Credit: theme.co
Troubleshooting Common Issues
Updating the header content in WordPress X Theme involves navigating to the theme options. Access the header settings and modify the text or images as needed. Save changes to see the updated header on your site.
Identifying Common Errors
Many users face problems with their WordPress X Theme header. The header might not display properly. Sometimes it doesn’t show updates. Errors can arise due to plugin conflicts. Other times, settings might be wrong. Incorrect coding is also a common error. Some users forget to clear their cache. This leads to old content showing up.
Solutions For Header Problems
First, check for plugin conflicts. Disable all plugins one by one. See if the header updates. Clear your browser cache regularly. Update your theme to the latest version. Ensure custom coding is correct. Use a code editor to find mistakes. Check your settings in the theme options. Reset them to default if needed.
Credit: www.kadencewp.com
Frequently Asked Questions
How Do I Edit The Header In X Theme?
To edit the header in X Theme, navigate to the WordPress dashboard. Click on “Appearance,” then “Header. ” Use the header builder to customize content. You can add elements, change styles, and adjust settings to personalize your header design easily.
Can I Add A Logo To The Header?
Yes, you can add a logo to your X Theme header. In the header builder, select the logo element. Upload your logo image and adjust its size and position. This allows you to create a branded and cohesive header appearance effectively.
How Do I Change Header Font Styles?
To change header font styles in X Theme, access the header builder. Select the text element you wish to modify. Use typography settings to adjust font type, size, and color. This helps you enhance the visual appeal of your header content.
Is It Possible To Add A Navigation Menu?
Yes, adding a navigation menu to your header is possible. In the header builder, choose the menu element. Assign your desired menu and customize its layout. This enables visitors to navigate your website seamlessly, improving user experience.
Conclusion
Changing header content in the WordPress X Theme is simple. Follow the steps mentioned earlier. Customize your website to reflect your style. Make sure you save your changes. Check how it looks on different devices. Practice makes perfect, so don’t worry if it takes time.
Keep exploring and learning more about WordPress. This helps improve your website’s appearance. Remember to keep your content clear and concise. Happy editing!


