
Have you ever wanted to give your WordPress site a fresh look but felt overwhelmed by the technical steps involved? Changing the header photo of your WordPress theme can seem daunting, but it’s actually a straightforward process that can transform your site’s appearance in minutes.
Picture this: a vibrant, eye-catching header that captures your brand’s essence and draws your visitors in from the moment they land on your page. The right header photo can make all the difference, setting the tone and enhancing the overall aesthetic of your site.
But where do you start? How can you ensure the change is seamless and effective? In this guide, you’ll discover simple, step-by-step instructions to confidently update your WordPress header photo. Whether you’re a seasoned blogger or a small business owner, you’ll be equipped to make your site stand out. Ready to dive in and elevate your online presence? Let’s get started!
Choosing The Right Header Photo
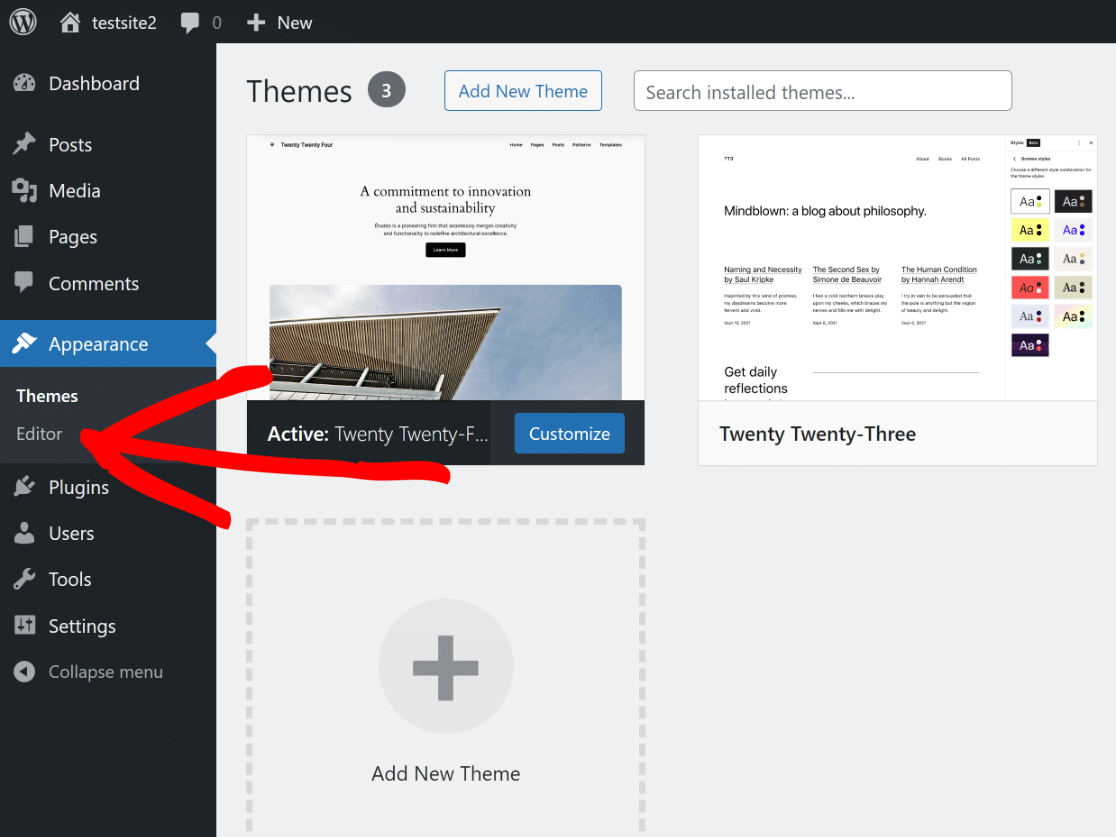
Theme compatibility is crucial. Some themes need specific photo sizes. Always check the theme’s guidelines. High-quality images make a big difference. Blurry photos look unprofessional. Use sharp and clear pictures. It’s important to match brand aesthetics. The header photo should fit the brand’s style. Is your brand modern or classic? Choose a photo that reflects that. Consistency is key. The website should have a unified look. This builds trust with visitors.
Credit: wpforms.com
Preparing Your Image
Your image should be lightweight. Large images slow down your site. Resize your image with tools like Photoshop. Aim for a file size under 500KB. Smaller images load faster. This improves user experience.
Your image should fit your theme. Check your theme’s header size. Match your image to these dimensions. This prevents distortion. Use tools to crop or resize. Properly sized images look better.
Choose the right format for your image. Common formats are JPEG, PNG, and GIF. JPEGs are great for photos. PNGs work well for graphics. GIFs are for simple animations. Use a format that suits your image best. This ensures it displays correctly.
Accessing The WordPress Dashboard
Start by opening your web browser. Type your WordPress site URL. Add “/wp-admin” at the end. You will see a login page. Enter your username and password. Then, click the “Log In” button.
Once logged in, look at the left sidebar. Find the “Appearance” tab. Click on it. This will open more options. Choose “Customize”. This will take you to a new page. You can see many settings here. Find the Header section. Now, you are ready to change your header photo.
Locating The Header Section
Open your WordPress dashboard. Look for the Appearance menu on the left. Click on it. A dropdown will appear. Select Customize. This opens the Theme Customizer. It lets you change your site’s look.
Inside the Theme Customizer, find the Header section. Click on it. You will see options to change the header. Look for the Header Image setting. Click to upload a new photo. Make sure the photo fits well. Preview the changes before saving. This ensures the header looks good.
Uploading The New Header Photo
Click on the customize option in your WordPress dashboard. Find the header section. Press the upload button. Select your new photo from your computer. Make sure the image is clear. It should fit the theme nicely.
Choose the image you want. Click on select and then insert. The photo will show up in the preview. Check if it looks good. Adjust the size if needed. Save changes to update your site.
Adjusting Header Settings
To change a header photo, start by opening the WordPress dashboard. Click on “Appearance” then select “Customize”. Look for the “Header” section. Here, you can upload a new image. Choose one that fits well. Ensure it’s clear and eye-catching. Once uploaded, preview it. Check how it looks on different devices. If it fits, click “Publish”. Now, your header has a fresh look.
Position And Align Image
Positioning the image is important. Go to the “Header Image” settings. Use the alignment options. Align the image to the left, center, or right. Choose what looks best. Sometimes, centering works well. It makes the header look balanced. Adjust the height and width if needed. Ensure it doesn’t stretch or squish. Save the changes.
Apply Customization Features
WordPress offers customization features. Add a text overlay if needed. It can be a title or slogan. Choose a font that’s easy to read. Adjust its color to contrast with the image. This makes the text stand out. Don’t forget to save your changes. Check the final look. Make sure everything is readable and attractive.
Saving And Previewing Changes
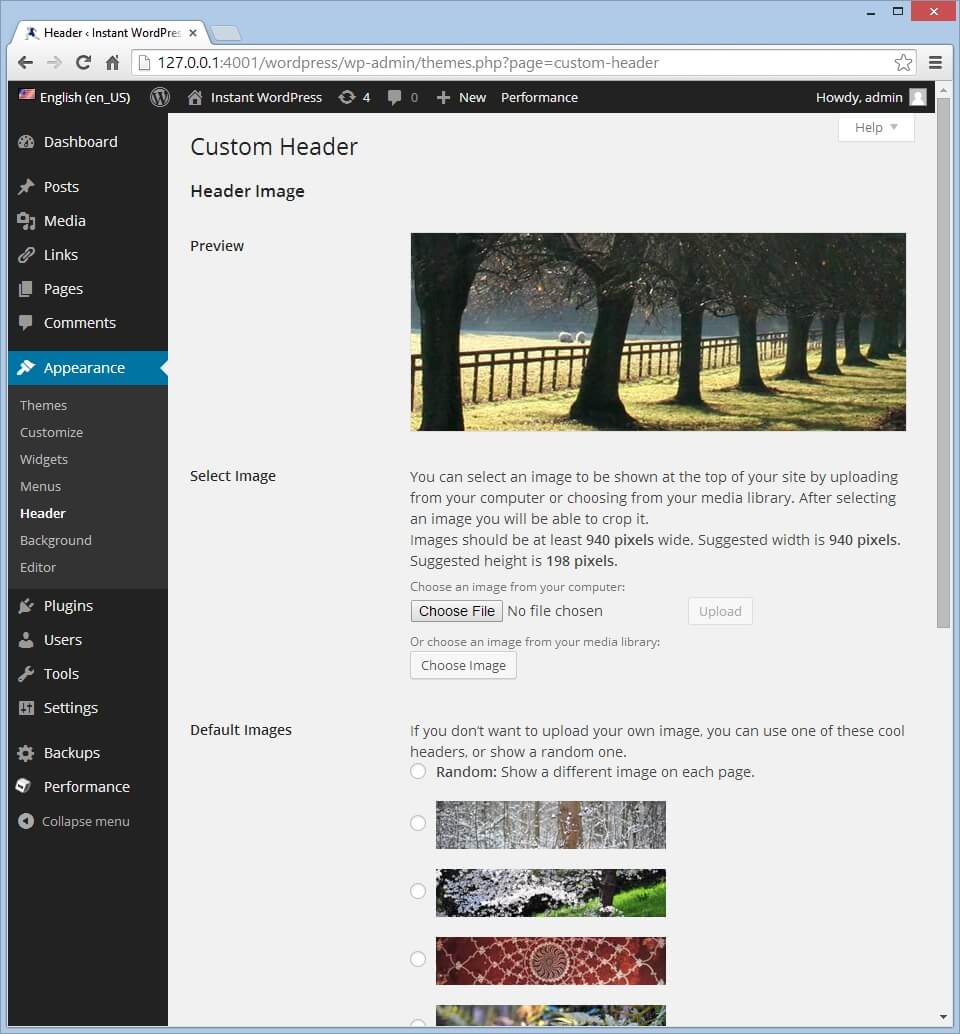
Save Customizer Settings easily by finding the “Save” button. Clicking this button stores your new header photo. It’s important to save your work. This prevents losing changes if the browser closes. Always save before leaving the page. Your changes are safe and ready for the next step.
Preview Live Changes to see how the new header looks. Find the “Preview” button in the customizer. Click it to view your site with the new photo. This lets you check the design before going live. Make sure everything looks good on the website. Adjust if needed, and preview again. This helps catch mistakes early.
Credit: www.theblogstarter.com
Troubleshooting Common Issues
Changing a header photo in a WordPress theme may seem tricky. Start by accessing the WordPress dashboard. Navigate to “Appearance,” then “Customize,” to find the header settings. Follow prompts to upload your new image, ensuring it fits the recommended dimensions for a polished look.
Resolve Upload Errors
Upload errors can be frustrating. Check your file size. Large files may fail. Make sure your file format is compatible. Common formats are JPEG and PNG. Ensure your internet connection is stable. Slow connections can cause upload failures. Clear your browser cache to fix minor bugs. Use an updated browser. Older versions may not support uploads. Try disabling plugins. Some plugins interfere with uploads.
Fix Display Problems
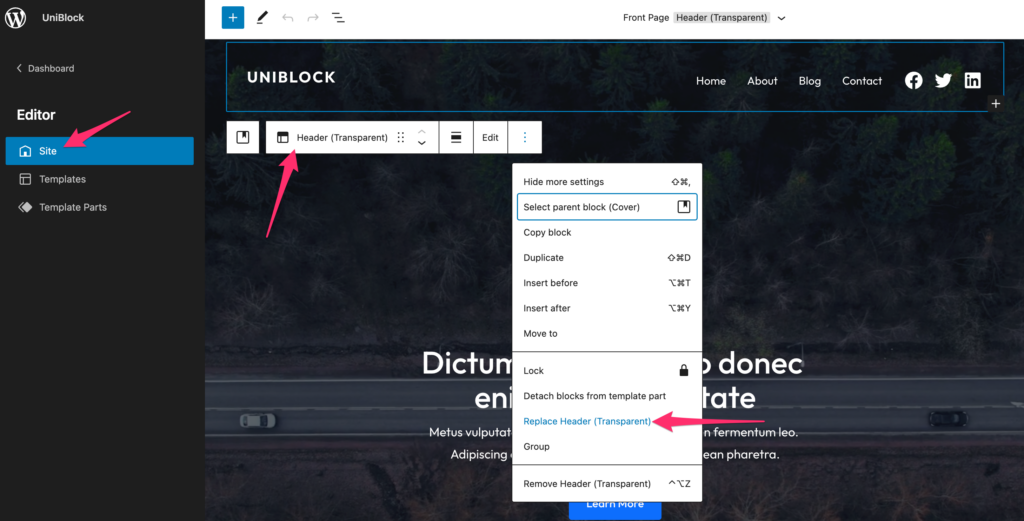
Sometimes, photos display incorrectly. Check your theme settings. Each theme is different. Adjust the photo dimensions to fit the header area. Ensure the image’s aspect ratio matches your theme. Clear your cache to refresh the display. Use responsive images. They adjust to screen size. Verify your theme compatibility. Some themes have specific requirements.
Credit: www.wpzoom.com
Frequently Asked Questions
How Do I Change The Header Photo In WordPress?
To change the header photo, navigate to your WordPress dashboard. Select ‘Appearance’, then ‘Customize’. Click ‘Header Image’ and upload your desired photo. Save changes. Your new header photo will appear instantly. Ensure the image fits your theme’s dimensions for best results.
Can I Use Any Image As A Header?
Yes, you can use any image as a header, but ensure it’s high-quality. Check your theme’s recommended dimensions for the best fit. Optimized images improve page load times and enhance user experience. Avoid using copyrighted images without permission to prevent legal issues.
Why Is My Header Image Not Displaying?
If your header image isn’t displaying, verify the upload process was successful. Check your theme settings and ensure compatibility. Clear browser cache and refresh your page. Contact theme support if the issue persists. Sometimes, plugins can interfere with image display.
How Do I Resize My Header Image?
To resize your header image, use an image editing tool like Photoshop or Canva. Adjust dimensions to fit your theme’s recommended size. Optimize the file for web use to reduce load time. Upload the resized image in the WordPress ‘Header Image’ section.
Conclusion
Changing a header photo on WordPress is simple. Follow the steps above. You can easily update your site’s look. New images make your site fresh. Always choose high-quality photos. They improve your site’s appearance. A good header photo attracts visitors.
It sets the tone for your site. Experiment with different images. Find what works best. Remember, your header photo is your site’s first impression. Keep it relevant and engaging. Happy blogging!


