
Are you tired of your website looking just like everyone else’s? The font you choose can dramatically change how your site feels to visitors.
Imagine capturing your reader’s attention with a unique, eye-catching font that perfectly reflects your brand. Changing a font in WordPress themes might sound complicated, but it’s easier than you think. By the end of this article, you’ll know exactly how to transform your website’s typography, giving it a fresh, professional look that stands out.
Ready to learn how to give your site a stylish makeover? Let’s dive in and make your WordPress theme truly yours.
Choosing The Right Font
Typography is very important. It affects how people read your website. A good font makes reading easy and fun. A bad font can be hard to read. Choose a font that fits your message. Your font should match your brand. People should feel comfortable reading your site.
A clear font helps with understanding. It guides the reader’s eyes. It also sets the mood of your content. Fonts can be serious or fun. Use fonts to show what your site is about. Simple fonts are often best. They work well on different screens.
Free fonts are easy to find. Many websites offer them. They are good for beginners. Premium fonts cost money. They often look unique. Premium fonts can make your site stand out.
Free fonts may have limits. They might not support all languages. Some free fonts look cheap. Premium fonts offer more choices. They can be worth the cost. Think about your needs. Choose what fits your budget.
Accessing Theme Customizer
Start by opening your WordPress dashboard. Look for Appearance in the menu. Click on it. You will see an option called Customizer. This is where you can change the look of your site. It’s easy to find. Just look for the word “Customize” under Appearance. Click it to enter the customizer.
Inside the customizer, find Typography settings. These settings let you change your site’s fonts. Click on Typography. You might see options for Headings and Body Text. Choose the section you want to change. Select a new font from the list. Your site will update automatically. It’s simple and quick. Experiment with different fonts to find one you like.
Using Additional Css
Start by opening your WordPress dashboard. Click on Appearance and then Customize. Look for the Additional CSS option. Here, you can add your own CSS code. This section lets you change how your site looks. Find it on the left side menu. It might be under other settings. Keep searching until you find it. This is where you will make font changes. Make sure you are in the right place.
Use CSS to change fonts easily. Start by typing body { in the CSS box. Then add font-family: "Your Font Name";. Replace “Your Font Name” with your choice. Always end with a closing bracket, }. This changes the font for all text. You can also change specific parts. Use h1, h2, or p tags. Add font-size or color for more style. Test your changes to see results.
Credit: wpdatatables.com
Utilizing WordPress Plugins
Changing fonts in WordPress can be easy with plugins. Many font plugins are available. They help you change font styles quickly. No coding is needed. Just pick a plugin and you’re ready to go.
Some plugins are very popular. Easy Google Fonts is one of them. This plugin lets you use fonts from Google. FontPress is another great choice. It offers many font options. Both plugins are user-friendly. They make font changes simple.
Start by logging into your WordPress dashboard. Go to the “Plugins” section. Click on “Add New.” Type the plugin name in the search bar. Hit “Install Now” to add the plugin. After installing, click “Activate” to start using it. Now, you can change fonts easily. Follow the plugin instructions for best results.
Editing Theme Files
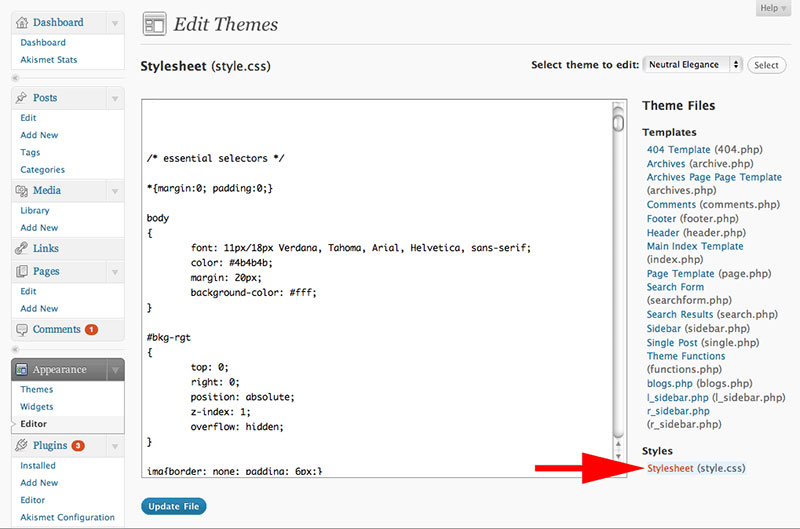
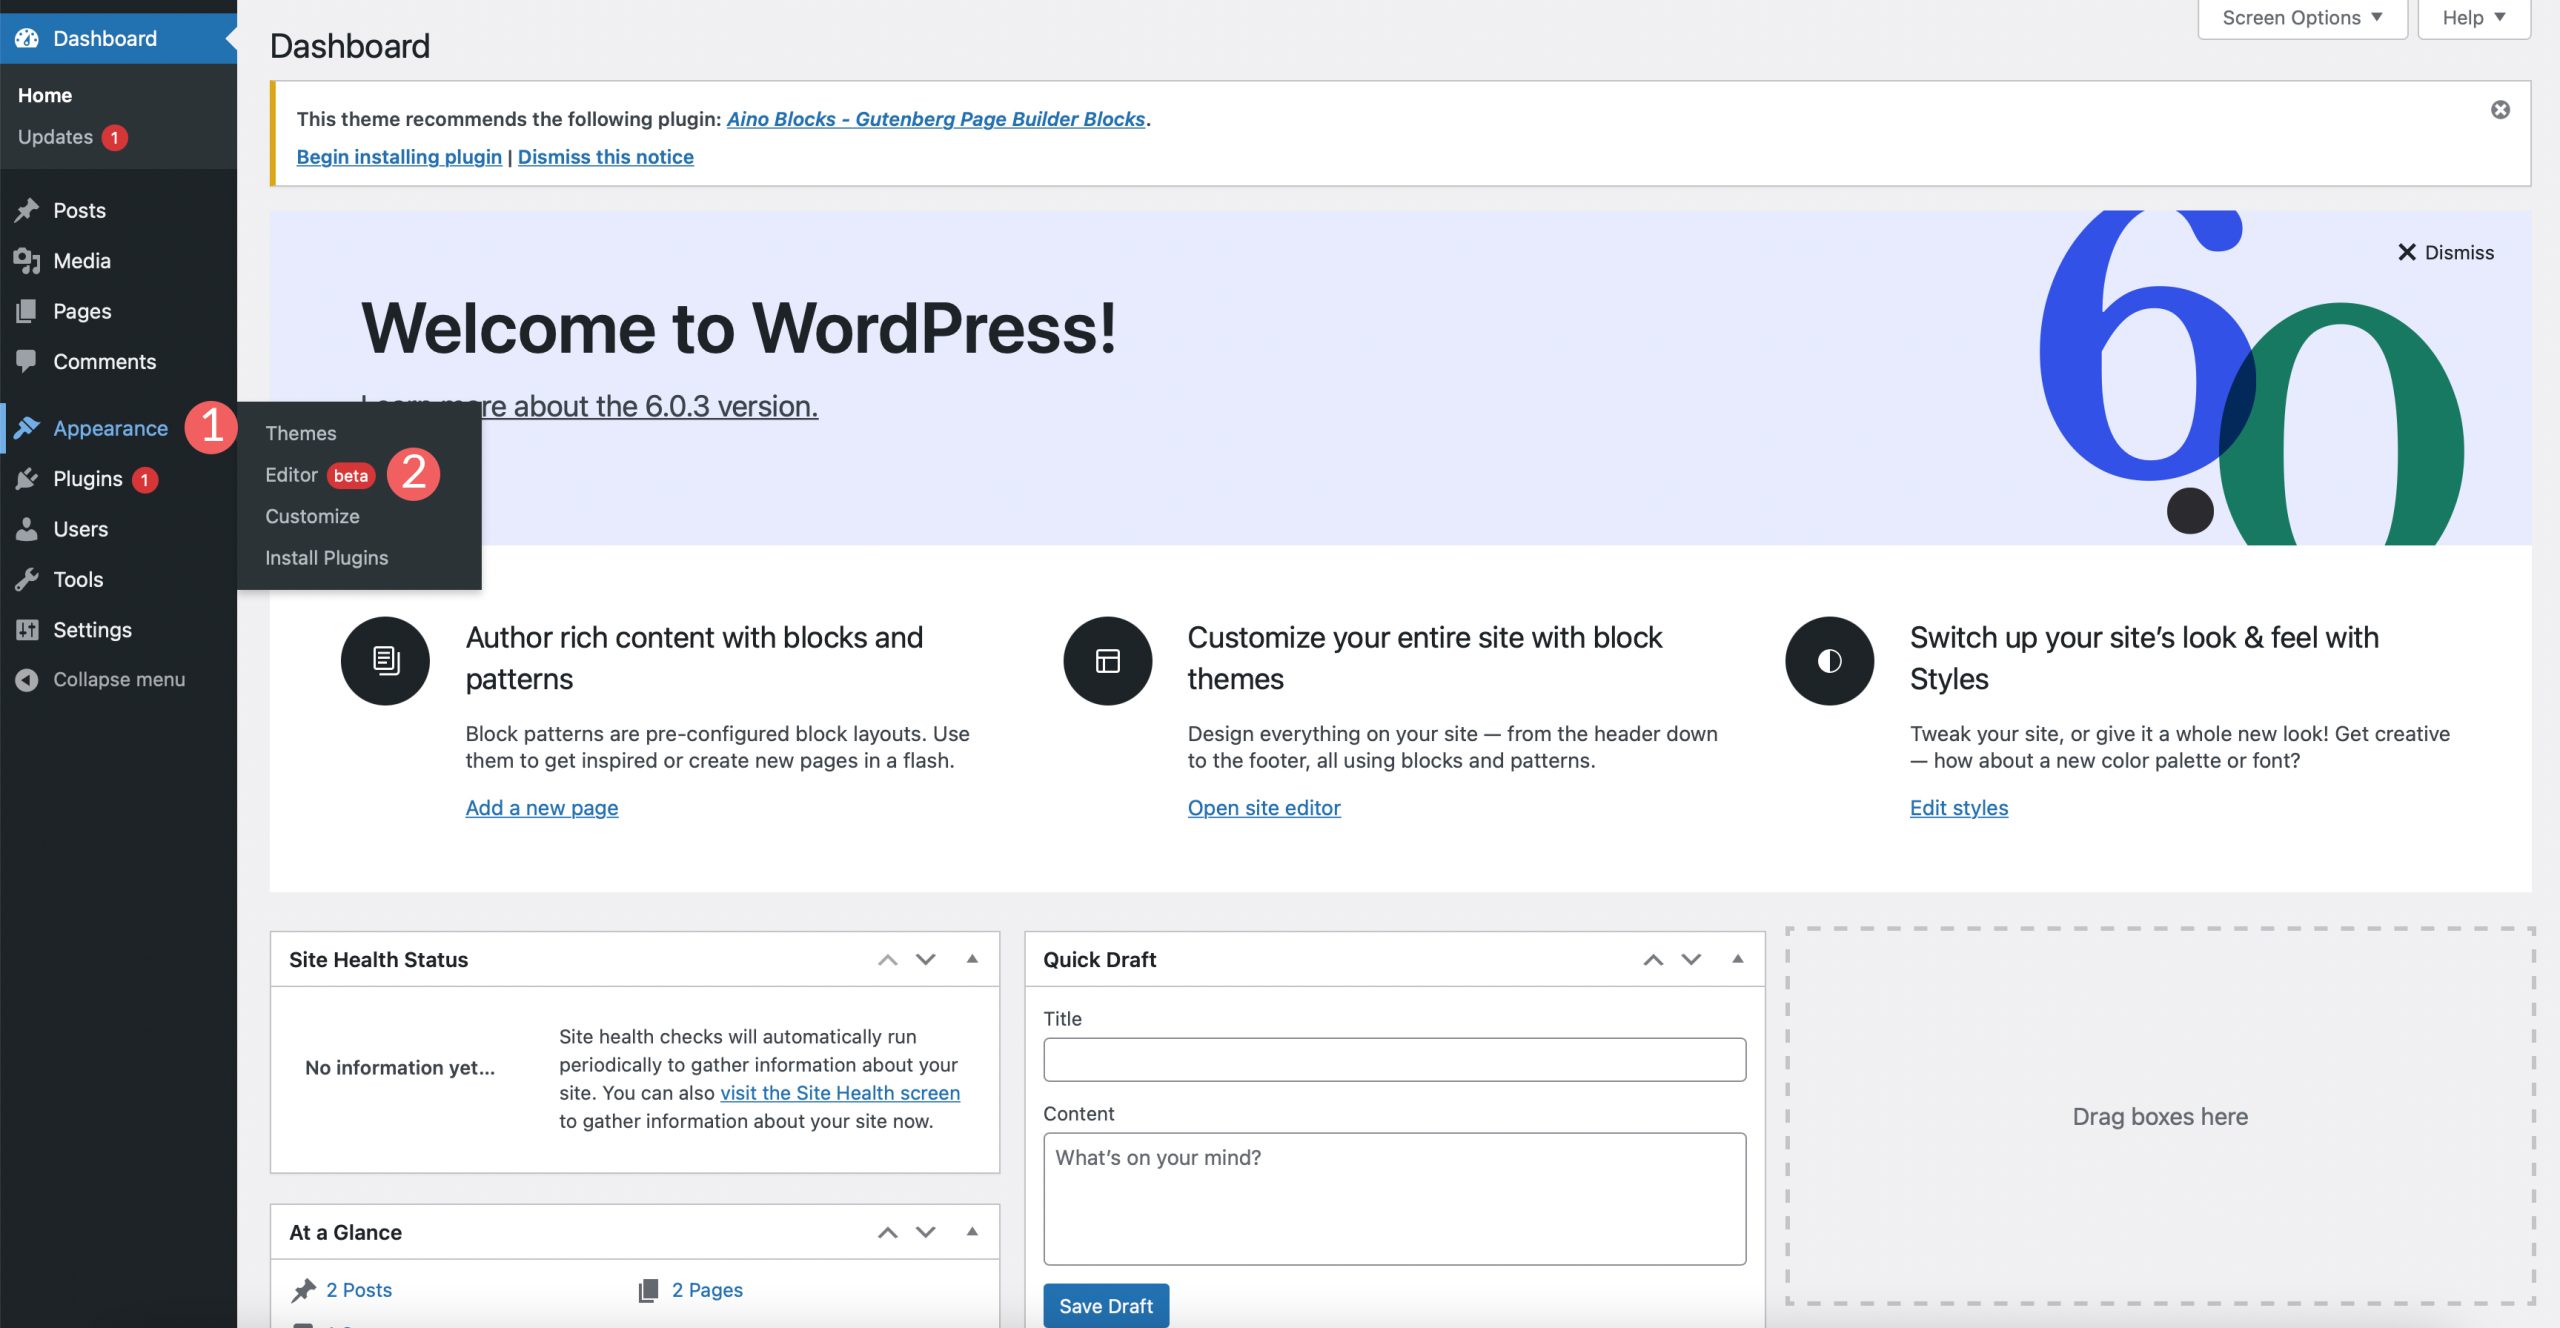
Find your WordPress dashboard. Look for Appearance and click it. Then select Theme Editor. You will see theme files here. Be careful while changing these files. They affect your site’s look. Always make a backup first. Mistakes can break your site.
The stylesheet file is named style.css. This file controls fonts and colors. You can change font family and size here. Find the body tag. Change font-family to your desired font. Save changes to apply them. Refresh your site to see updates.
Google Fonts Integration
To add a Google Font, first register it in your theme. Use the functions.php file. This file is where you add code. Locate the file in your theme folder.
Next, enqueue the font. Use the wp_enqueue_style function. This function helps load the font. Remember to specify the font URL. You can find this URL on Google Fonts.
Add your font to the theme’s style. Use the style.css file for this. Find the element you want to change. Add the font-family property to it. Use the font name from Google Fonts.
Check your site to see the new font. Refresh the page if needed. Make sure the font loads correctly. If not, check your code again.
Testing And Previewing Changes
Previewing on Desktop: It’s important to check font changes on a computer. First, go to the WordPress dashboard. Then, click on “Customize” under “Appearance”. Now, choose “Typography” to see font options. After selecting a font, use the “Preview” button. This shows how the font looks on the site. Make sure the text is clear and easy to read. Fonts should match the website style. Try different fonts if needed. Always save changes if satisfied. This keeps the new font.
Mobile Responsiveness: Fonts should look good on phones too. Use the “Responsive View” tool in the WordPress customizer. This shows how the font appears on small screens. Check for any issues, like cut-off words. Adjust font size if text looks too big or small. A good font works on all devices. This improves user experience. Happy visitors stay longer on the site. Remember to save changes once everything looks good. This helps keep the new look.
Troubleshooting Common Issues
Sometimes, the font does not show up as expected. First, make sure the font files are uploaded correctly. Check the theme settings for any missing font paths. Ensure that the font family name matches in all settings. Also, clear the browser cache to see changes. If the font is still not displaying, try using a different font format like TTF or WOFF.
Fonts may not change due to other settings. Check if another CSS rule is overriding your font choice. Use Inspect Element in the browser to see which style is applied. Make sure your new font setting is more specific. Add !important to the CSS rule if needed. This can help your font style take priority.
Best Practices For Font Selection
Fonts should be clear and easy to read. Small letters need special care. Choose fonts with simple shapes. Avoid fonts with many curves. They can confuse readers. Look at the letter spacing. Letters should not be too close. Space makes words easier to read. Think about the font size. It should not be too small. Bigger fonts are friendlier for eyes.
Fonts must match your brand style. They tell your story. Choose a font that feels right. Your brand may have a fun tone. Then choose a fun font. Stay with the same font on all pages. This makes your brand look strong. Never mix too many fonts. Two fonts are enough. One for headings, one for text.
Credit: www.elegantthemes.com
Credit: themeisle.com
Frequently Asked Questions
How Do I Change Fonts In WordPress Themes?
To change fonts in WordPress, access the theme customizer from the dashboard. Navigate to ‘Typography’ settings and select your preferred font. If your theme doesn’t support this, consider adding custom CSS or using a plugin like Easy Google Fonts for more options.
Can I Use Google Fonts In WordPress?
Yes, you can use Google Fonts in WordPress by installing a plugin like Easy Google Fonts. This plugin allows seamless integration of Google Fonts into your theme. You can then choose and customize fonts directly from the WordPress customizer.
Are Font Changes Mobile Responsive?
Most WordPress themes with font customization options ensure mobile responsiveness. Always check the changes on different devices. If adjustments are needed, custom CSS can help achieve a responsive design without affecting readability.
Do All Themes Support Font Customization?
Not all WordPress themes support direct font customization. While premium themes often offer extensive options, free themes might require additional plugins or custom CSS. Always check the theme documentation for specific customization capabilities.
Conclusion
Changing fonts in WordPress themes is straightforward. Start by exploring your theme’s customization options. Use the built-in editor for quick adjustments. Plugins offer more font choices if needed. Backup your website before making changes. This avoids any mishaps. Fonts influence your site’s look and feel.
Choose fonts that match your content and audience. Keep readability in mind. Consistency is key in branding. Test your changes on different devices. This ensures your fonts look good everywhere. Enjoy creating a visually appealing WordPress site with the right fonts.
Your website will engage visitors and reflect your style.


