
Building a WordPress theme might seem like a daunting task, especially if you’re not a seasoned developer. But what if you could simplify the process using a tool you’re already familiar with?
Enter Dreamweaver—your secret weapon for creating custom WordPress themes with ease. Imagine having the power to craft your website’s look and feel exactly the way you want it, without the hassle of starting from scratch or relying on generic templates.
In this guide, you’ll discover the step-by-step process to build a WordPress theme in Dreamweaver, unlocking the potential to personalize your site and stand out in the digital crowd. Whether you’re looking to enhance your creative control or simply streamline your workflow, this article is your gateway to mastering theme development with confidence. Ready to transform your website into a unique masterpiece? Let’s dive in and explore how you can turn your vision into reality.
Setting Up Dreamweaver
First, download Dreamweaver from the official website. Make sure your computer meets the system requirements. Open the downloaded file to start the installation. Follow the steps shown on your screen. Wait for the installation to finish. Once done, open Dreamweaver from your desktop or start menu.
Open Dreamweaver and go to Preferences. Adjust the settings to fit your needs. Set your default folder for projects. This helps in organizing files. Choose a color theme for your workspace. It makes coding easy. Save your settings before you exit. Now, your workspace is ready to use.
WordPress Theme Basics
Theme Structure in WordPress is very important. It helps organize your site. Every theme has files that make it work. These files are called template files. They decide how parts of your site look.
Each template file has a special job. Some files show the header. Others show the footer. Many files create the page content. These files work together. They make your site look great.
Understanding template files helps you build themes. Knowing what each file does is key. You can change how your site looks. You can make it unique. With Dreamweaver, you can edit these files easily. This tool lets you change code quickly. It makes building themes fun and simple.
Creating A New Theme
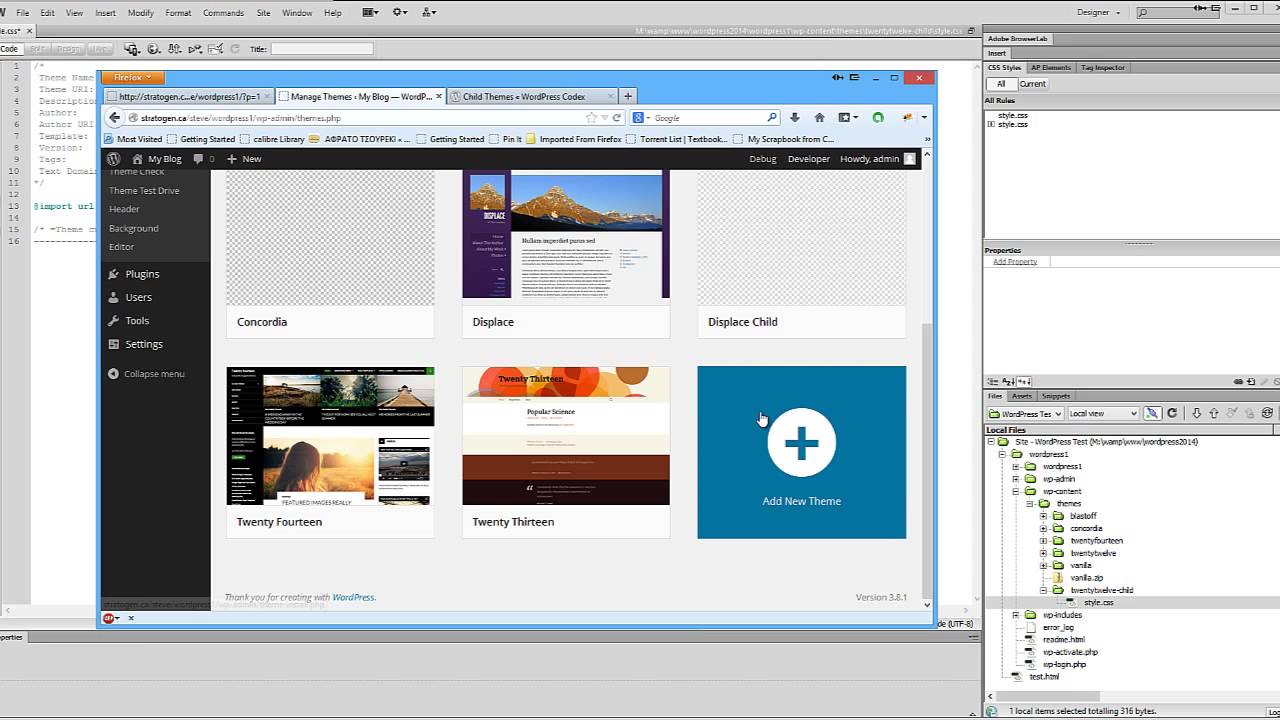
First, create a new folder for your theme. Name it something unique. This folder holds all your files. It’s like a home for your theme. Keep it organized. Inside, create subfolders for CSS, JavaScript, and images. This keeps everything tidy. Dreamweaver will help you manage these files. Always save your work here.
Every theme needs some basic files. Start with style.css. This file controls how your site looks. Add a comments header at the top. Next, create index.php. This is the main file. It’s where your content shows. Also, add functions.php. This file is for extra features. These files are the heart of your theme.
Credit: profiletree.com
Designing The Layout
Start by creating a simple layout. Use CSS to make it look nice. CSS helps in changing colors, fonts, and sizes easily. Add a background color or an image to your page. Ensure that the text is easy to read. Use CSS classes for different sections.
CSS makes pages look pretty. Choose colors that match your theme. Use different font styles for headings and text. Make sure buttons are big enough to click. Add padding to make spaces between items. Use borders to separate sections. Practice using CSS to get better.
HTML templates help in building pages fast. They have basic code ready to use. Copy the template and paste it into Dreamweaver. Change the text and images to fit your theme. Use different templates for different pages. Check each page to ensure it looks nice.
Integrating WordPress Functions
The WordPress Loop helps show blog posts. It repeats content easily. Each post shows in order. Use PHP tags to start the loop. Place them in the theme files. They connect to the WordPress database. This helps to fetch the posts. The loop is simple to use. It makes dynamic content visible. The loop is flexible. It can handle many posts. It is important in WordPress themes. It helps display post titles, dates, and content. The loop runs until no posts are left. It ends with a closing PHP tag.
Dynamic content is special. It changes automatically. WordPress uses PHP for this. PHP connects with the database. It fetches data on demand. Headers, footers, and sidebars can be dynamic. This content updates without coding. Themes need dynamic content for freshness. It makes websites lively. Users see new posts and comments. Dynamic content keeps websites engaging. It helps show recent updates. It is important for interactive sites. It enhances user experience.
Credit: www.youtube.com
Customizing With Php
Crafting a WordPress theme in Dreamweaver involves customizing with PHP. Seamlessly integrate design elements and functionalities using PHP scripts. Create dynamic themes that enhance user experience and maintain site performance.
Creating Custom Functions
Making custom functions in WordPress is fun. Use PHP to change things. Functions help manage tasks easily. Write simple code for your theme. Each function does a specific job. This keeps your theme organized. Functions can add special features. They make your theme unique. Use comments to explain your code. This helps others understand. Keep your code clean and neat. Proper coding avoids errors.
Utilizing WordPress Hooks
Hooks are powerful tools in WordPress. They let you add or change actions. Use them to modify your theme. There are two main types: action hooks and filter hooks. Action hooks let you add features. Filter hooks let you change data. Hooks make your theme flexible. They help you control your site. Use hooks wisely. Proper use enhances your theme. Always test your hooks. This ensures everything works well.
Testing The Theme
Creating a WordPress theme in Dreamweaver involves testing to ensure everything works smoothly. Check the layout, navigation, and responsiveness. Verify that all features and plugins function correctly.
Previewing In WordPress
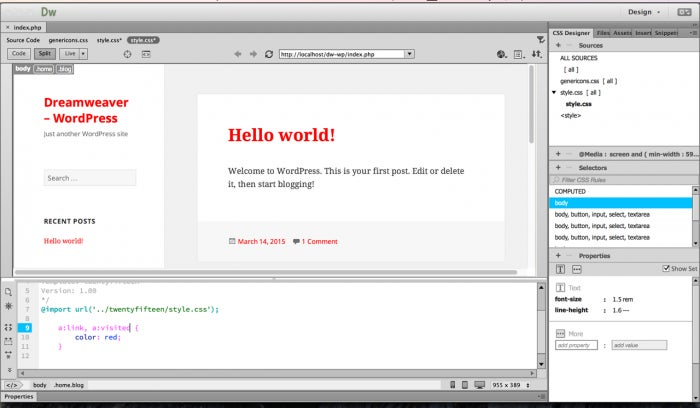
Dreamweaver lets you see your theme before sharing it. Use the preview feature to check how it looks in WordPress. This helps find problems early. Make sure colors and fonts appear as planned. Also, check images and layouts. This step ensures everything matches your design.
Debugging Common Issues
Sometimes, themes don’t work perfectly right away. Errors can happen with code or design. Use Dreamweaver’s tools to find these issues. Look at your code closely. Check for missing tags or wrong links. Fixing these problems improves your theme. Also, test your theme on different devices. This helps ensure your theme works everywhere. Make adjustments if needed.
Optimizing For Performance
Create a WordPress theme in Dreamweaver with focus on performance. Optimize images, scripts, and styles for faster load times. Use clean code to enhance user experience and improve SEO.
Minifying Css And Js
Minifying CSS and JS makes files smaller. Smaller files load faster. Remove extra spaces and comments in code. This makes the code cleaner. Clean code helps browsers read it quickly. Use tools like CSSNano or UglifyJS. These tools make the minifying process easy. They compress files effectively. Faster loading improves user experience. Users like quick websites. Minifying is a simple way to boost speed.
Improving Load Speed
Fast websites keep visitors happy. Slow sites can lose visitors. Optimize images to make them smaller. Use formats like JPEG or PNG. Compress images without losing quality. This saves space and speeds up loading. Use caching plugins in WordPress. Caching stores data for faster access. Set up lazy loading for images. Images load only when needed. This reduces initial load time. Every second counts for users.
Finalizing And Launching
Crafting a WordPress theme in Dreamweaver culminates in finalizing and launching. Ensure all elements are optimized, responsive, and aligned with your design vision. Test thoroughly to guarantee compatibility and functionality across different devices and browsers before making it live.
Preparing For Deployment
Make sure your WordPress theme is ready. Check for errors. Test every feature. Fix any bugs. Double-check all links. Ensure your theme works well on mobile. Optimize images for speed. Make sure your code is clean. Use tools to check for mistakes. Validate your HTML and CSS. Make it fast and smooth.
Save your theme files. Get them all together. Put them in a folder. Name it after your theme. Compress the folder into a ZIP file. This is your deployment package. Keep a backup, just in case.
Submitting To WordPress Repository
WordPress has rules. Read their guidelines. Follow them closely. Check your theme meets requirements. Ensure it is secure. Prepare documentation. Explain your theme. Describe features clearly. Be ready for feedback. Improve your theme if needed. Submit your ZIP file to the repository. Wait for approval. Once approved, your theme is live. Everyone can use it now.
Credit: blog.adobe.com
Frequently Asked Questions
How Do I Start Building A WordPress Theme In Dreamweaver?
To start, ensure you have Dreamweaver installed and a basic understanding of HTML, CSS, and PHP. Set up a local development environment and create a new WordPress theme folder. Use Dreamweaver to edit theme files, ensuring proper WordPress theme structure and file hierarchy.
Can I Use Dreamweaver For WordPress Themes?
Yes, Dreamweaver is a versatile tool for designing WordPress themes. It offers a visual interface and code editor, making it suitable for both beginners and advanced users. With Dreamweaver, you can efficiently manage files, preview changes, and utilize its powerful design and coding features for WordPress development.
What Files Are Essential For A WordPress Theme?
A WordPress theme requires several essential files, including style. css, index. php, and functions. php. These files define the theme’s appearance, layout, and functionality. Additionally, template files like header. php, footer. php, and sidebar. php are crucial for structuring the theme’s different sections.
How Can I Test My WordPress Theme?
To test your WordPress theme, use a local development environment like XAMPP or WAMP. Install WordPress locally and activate your theme to see how it functions. Check for responsiveness, browser compatibility, and ensure all features work as intended before deploying it to a live site.
Conclusion
Creating a WordPress theme in Dreamweaver offers great flexibility. You can customize the design to fit your needs. Dreamweaver supports coding and visual editing. This helps beginners and experts alike. Follow the steps carefully for best results. Test your theme before launching.
Ensure everything works smoothly. Don’t forget mobile responsiveness. It’s crucial for user experience. Keep learning and improving your skills. The more you practice, the better you get. Enjoy the process of creating and designing. Building themes in Dreamweaver can be rewarding and fun.
Happy coding!


