
Are you looking to make changes to your WordPress site without the risk of affecting your live website? Building a staging WordPress site using a web host can be your perfect solution.
Imagine having a safe playground where you can test new themes, plugins, or updates without any fear. It’s like having a magic wand that allows you to experiment freely, ensuring your main site remains flawless and uninterrupted. Sounds appealing, right?
In this guide, you’ll discover a step-by-step approach to creating your very own staging environment. You’ll learn how to safeguard your site’s performance while exploring new possibilities. With easy-to-follow instructions, you’ll feel confident in your ability to manage your WordPress site efficiently. Dive in and unlock the secrets to a seamless staging setup that can transform your web management experience.
Choosing The Right Web Host
Picking a good web host is very important. Speed matters for your site. A slow site can be bad. Security is also key. Look for hosts with strong protection. Customer support should be helpful and quick. Price is important too. Some hosts cost more, but offer less. Ease of use is vital. The platform should be simple to navigate. Storage space is another factor. You need enough space for your files. Bandwidth should be enough for all visitors. Check if the host has backups. Regular backups keep your data safe.
Bluehost is well-known and reliable. It offers good service and fair prices. SiteGround provides strong security. It’s good for small sites. HostGator is user-friendly. It has many options. DreamHost is known for its speed and uptime. A2 Hosting is very fast. It’s great for busy sites. InMotion Hosting gives strong support. It’s great for business sites. WP Engine is best for WordPress. It’s fast and secure.
Credit: www.wpzoom.com
Setting Up Your Domain
A domain is your website’s address. To get a new domain, you need to register it. Many web hosts offer domain registration services. Choose a name that is easy to remember. Make sure it is not already taken. Most domains end with .com, .net, or .org. Check availability before buying. You might need to try a few names. Prices for domains can vary. Look for deals or discounts.
A subdomain is part of your main domain. It can be used for staging. If your main domain is example.com, a subdomain might be staging.example.com. Setting up a subdomain is easy. Most web hosts have this feature. You can create it in your hosting control panel. No need to buy a new domain. It helps to keep staging and live sites separate. This way, you can test changes safely.
Installing WordPress On The Server
Many web hosts offer one-click installers for WordPress. These tools make setup easy. Just find the installer in your control panel. Click it and follow the steps. No need to download files. It saves time and effort. Perfect for beginners.
Manual installation is a bit more work. First, download the WordPress package from the official site. Then, upload the files to your server. Use an FTP client for this task. After uploading, create a MySQL database. Remember to keep your database name and password safe. Open your browser and go to your site. Follow the on-screen instructions to finish.
Creating The Staging Environment
Set up a staging WordPress site effortlessly using your web host. Duplicate your live site with one click. Test updates safely without affecting your main site.
Duplicating Your Live Site
Start by making a copy of your current site. Use a plugin like Duplicator or UpdraftPlus. They help in cloning your website easily. Install the plugin, then create a backup of your site. This includes all files and the database. Download this backup to your computer.
Next, go to your web host’s control panel. Create a new subdomain for your staging site. Use a name like “staging.yoursite.com”. Upload the backup to this new location. Use the plugin to restore the site here. Now, you have a copy of your live site ready for testing.
Configuring Site Settings
Visit the WordPress dashboard of your staging site. Check the general settings. Make sure the site title and URL are correct. Go to the reading settings. Ensure search engines can’t index your staging site. This keeps it hidden from public search.
Review permalink settings to match your live site. Check your theme and plugins. Ensure all are active and working properly. Make any changes needed for testing new features. This helps in keeping your live site safe.
Testing Changes Safely
Plugins can help test new features. They make changes easy and safe. Use them to try new designs. They can check if your site looks good. See if everything works well. Plugins help keep your site secure. They stop unwanted errors. They keep your site stable.
Check how your site performs. Ensure everything is compatible. Run tests regularly. Make sure your site loads fast. Look for errors. Fix them quickly. Plugins can help with this. They show what works and what does not. Keep your site running smoothly. Always check compatibility. It is important for a good user experience.
Credit: www.hostinger.com
Deploying Changes To Live Site
Creating a staging WordPress site on your web host helps test changes before going live. Set up a duplicate environment for safe updates. This process ensures smooth transitions and minimizes risks to your active site.
Ensuring A Smooth Transition
Always ensure a smooth transition when deploying changes. Test all new features on the staging site. This helps prevent unexpected issues. Keep a checklist of tasks to complete. This includes reviewing all changes. Also, verify that plugins work correctly. Double-check your theme settings. This will help catch any potential errors.
Backing Up Before Deployment
Create a backup of your live site. This is very important. Use a reliable backup tool. Save the backup in a secure location. This ensures you can restore your site if needed. Back up databases and files separately. This makes restoration easier. Regular backups keep your data safe. Always verify that the backup is complete. Incomplete backups can cause problems later.
Maintaining Your Staging Site
Keep your staging site safe with regular updates. Check for new plugins and themes. Install them to keep everything fresh. Don’t forget to update WordPress itself. Regular updates stop bugs and keep your site secure.
Make sure to do backups. Save all your data often. If something breaks, you can easily fix it. Use backup plugins to automate this task. This way, you save time and effort.
Protect your site with strong security settings. Use a firewall to stop bad traffic. Limit login attempts to keep hackers out. Choose a strong password. Change it often. Use security plugins for added safety.
Keep an eye on your site. Check for strange activity. Remove any suspicious files. This helps keep your site healthy and secure.
Credit: themeisle.com
Frequently Asked Questions
How To Create A Staging Site In WordPress Bluehost?
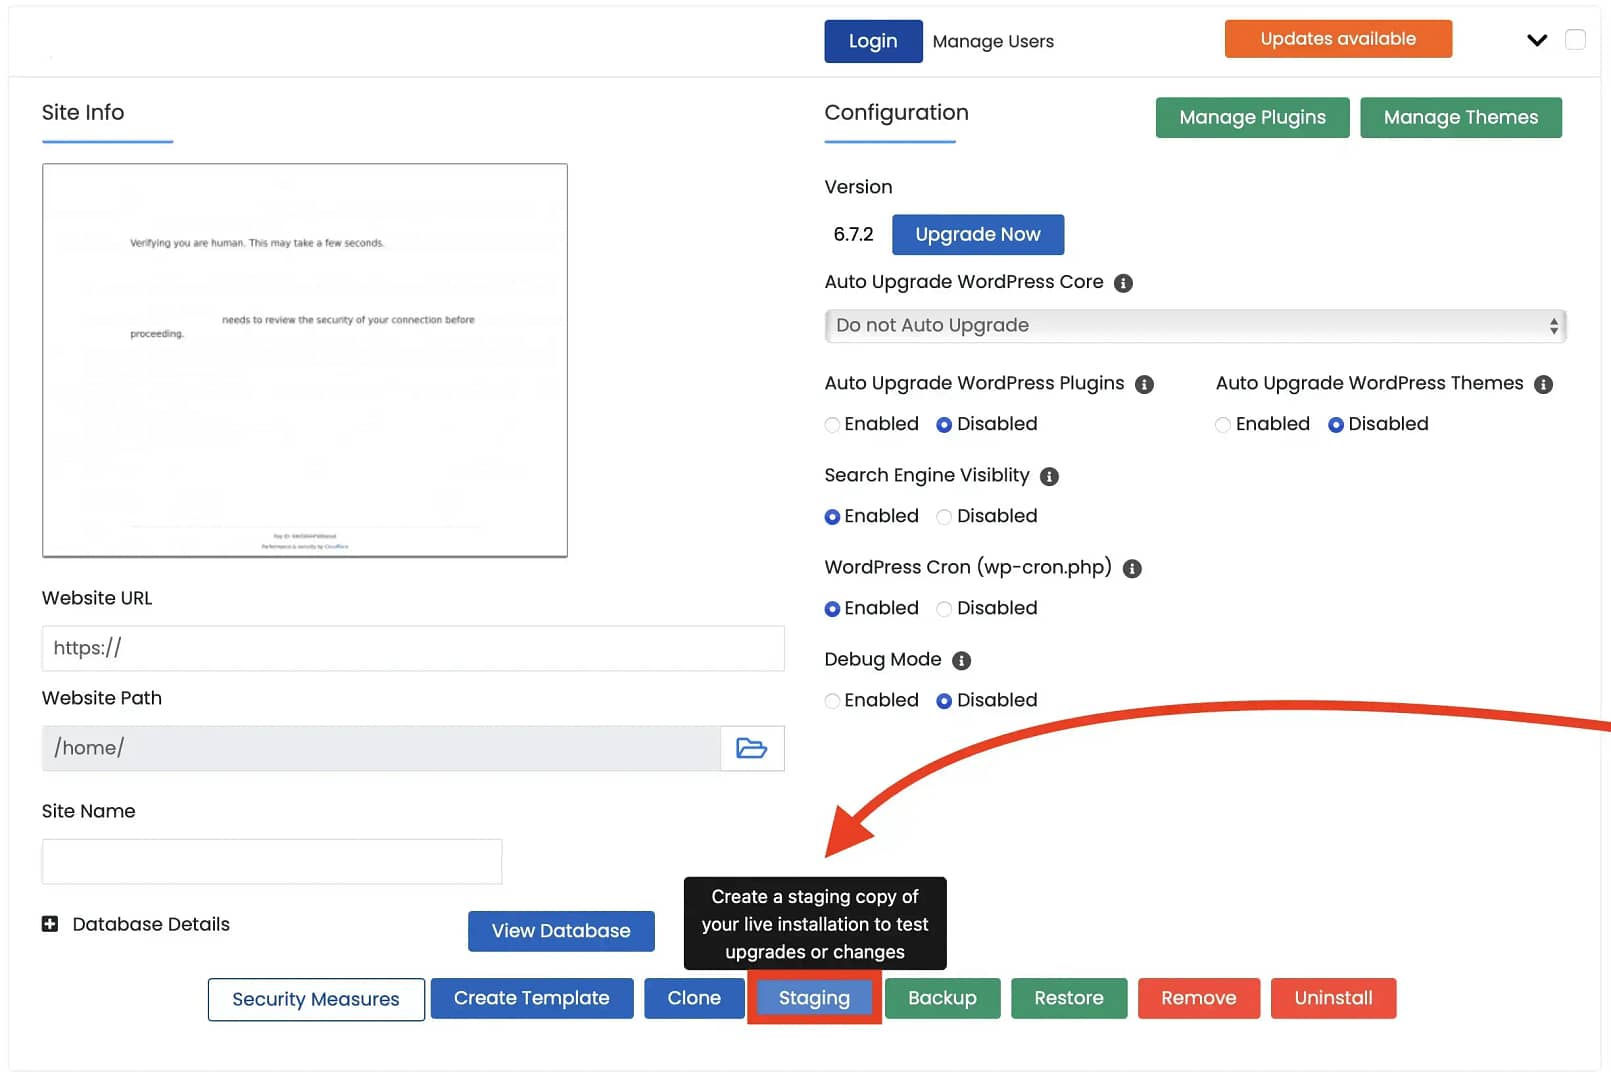
Log in to Bluehost and go to “My Sites”. Click “Manage Site” and select “Staging”. Follow the prompts to create.
How To Create A Staging Site For WordPress In Cpanel?
Access cPanel and go to “Subdomains” to create a subdomain. Copy WordPress files to the subdomain directory using “File Manager”. Create a new database in “MySQL Databases”. Edit “wp-config. php” to connect to the new database. Use a plugin like Duplicator to migrate content.
How Do I Redesign A WordPress Site Without Going Live?
Redesign your WordPress site using a staging environment or plugin like WP Staging. Make changes without affecting the live site. Test thoroughly before deploying updates to the live version. Use a reliable backup solution to prevent data loss during the redesign process.
What Is The Difference Between Staging Site And Live Site?
A staging site is a testing environment for changes before they go live. A live site is the public-facing version accessible to users. Staging allows safe experimentation without affecting users, while the live site is for actual user interaction and engagement.
Conclusion
Creating a staging WordPress site is a smart move. It keeps your main site safe. You can test changes without risks. Web Host services make this easy. Follow the steps above to set it up. Your site will be more secure and reliable.
You gain confidence in your updates. No more fear of breaking things. Keep your site running smoothly. Regular testing helps catch problems early. This improves the user experience. Your visitors stay happy. Plus, you stay stress-free. A staging site is a valuable tool for every WordPress user.


