
Are you ready to transform your WordPress site with a fresh, new look? Applying a purchased theme can be a game-changer, giving your website the professional touch it deserves.
But if you’re worried about the process, don’t be. It’s simpler than you think, and we’re here to guide you through each step. Imagine the satisfaction of seeing your website come to life with a theme that perfectly matches your vision.
By the end of this guide, you’ll not only know how to install your theme but also feel confident in customizing it to suit your unique style. So, let’s dive in and make your website stand out from the crowd!
Choosing The Right Theme
It’s important to check a theme’s features before buying. Make sure it has what you need. Some themes offer customizable layouts. Others may have built-in SEO tools. Think about your site’s purpose. Choose a theme that fits your goals. A good theme helps your site look professional and engaging.
A responsive theme works on all devices. This means it looks good on phones, tablets, and computers. Many people use mobile devices. Your site must be easy to navigate. A responsive theme ensures a smooth user experience. Check the theme demo. See how it looks on different screens.
Compatibility is crucial for any theme. It should work with the latest WordPress version. Also, ensure it supports popular plugins. This includes SEO, security, and social media plugins. An incompatible theme can cause errors. Always check for updates from the theme developer. Regular updates keep your site secure and fast.

Credit: wptheming.com
Downloading The Theme Files
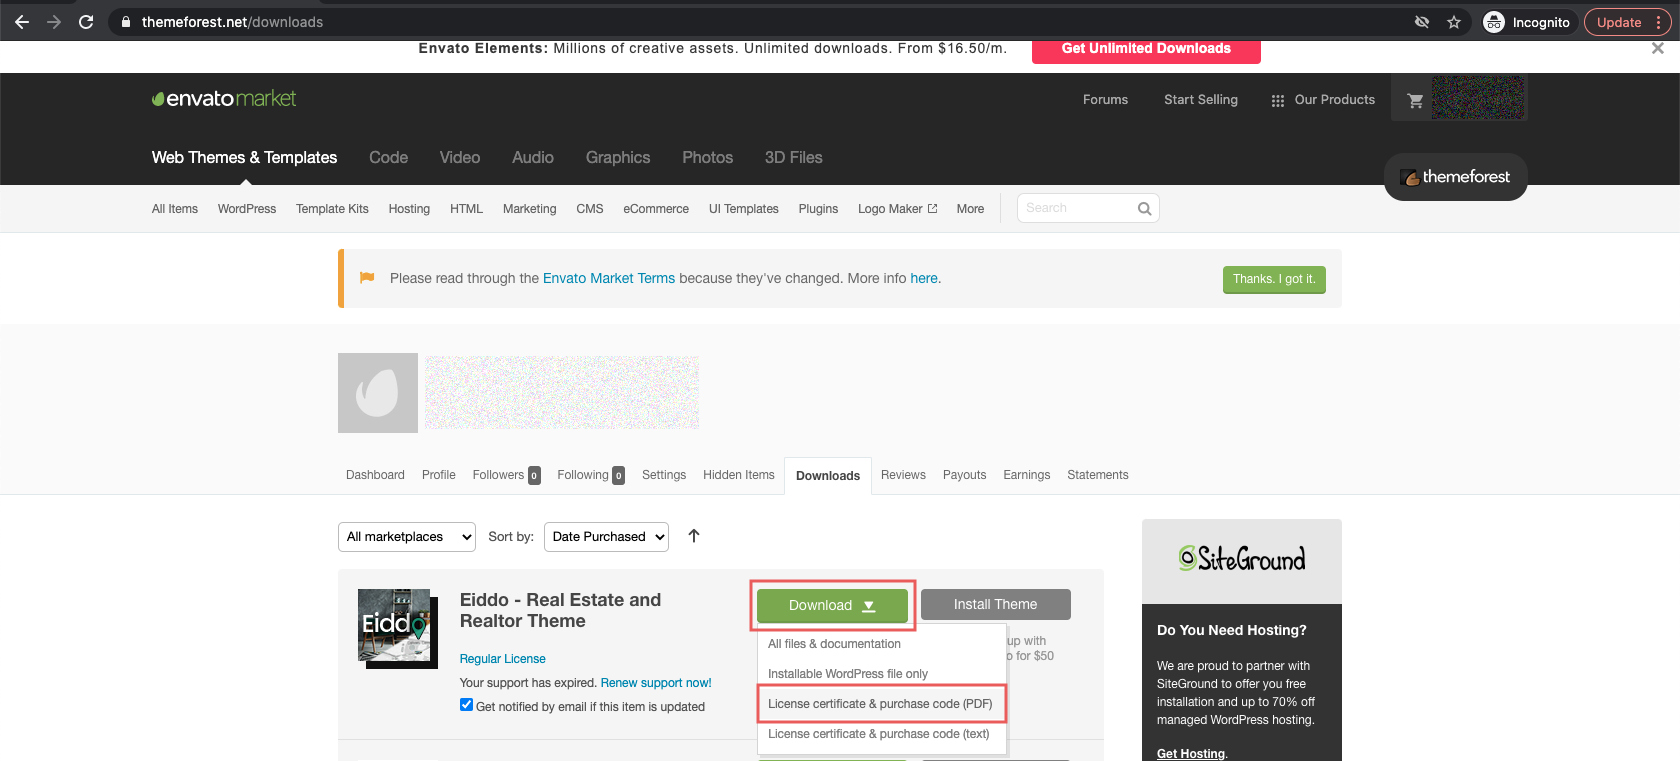
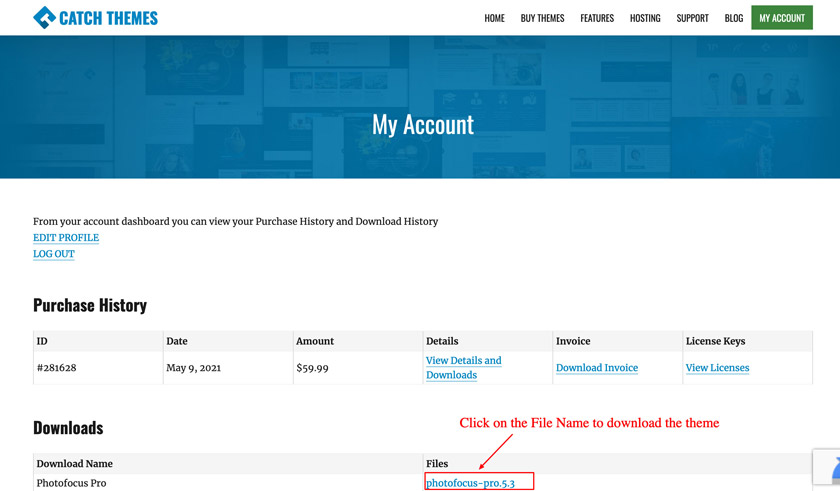
Find the email with theme purchase details. Look for a link or button to download. Click to start downloading. Save the file to your computer.
Theme files are often in .zip format. Zip files contain many files bundled together. Extract the zip file to see contents. You may find .php, .css, and .js files. These are important for theme setup. Organize the extracted files for easy access.
Installing The Theme Via WordPress Dashboard
First, log in to your WordPress dashboard. Then, locate the Appearance section on the left sidebar. Click on it to find the Themes option. You will see a button named Add New. Click on it to proceed to the Theme Upload Section.
Now, click on the Upload Theme button at the top. Choose the theme file you purchased. The file should be in .zip format. Click on the Install Now button. Wait for the theme to upload.
After the upload, you will see an option to Activate the theme. Click on Activate. Your new theme is now live on your site.
Credit: helpcenter.qodeinteractive.com
Installing The Theme Via Ftp
Start by using an FTP client like FileZilla. Enter your server credentials. These details include the hostname, username, and password. Click Connect to access your server. Your server files will appear on the right side.
Navigate to the wp-content folder on your server. Inside, find the themes folder. This is where you upload your theme files. Locate your theme’s .zip file on your computer. Unzip it. Drag and drop the unzipped theme folder into the themes directory. Wait until the upload completes. Your theme is now on your server. It’s ready to be activated in WordPress.
Customizing The Theme Settings
Easily apply your purchased theme to WordPress by accessing the dashboard. Navigate to “Appearance,” then “Themes. ” Upload your theme file and activate it with a simple click. Enjoy your new site look.
Using The WordPress Customizer
Open your WordPress dashboard. Find the Appearance tab and click Customize. This opens the WordPress Customizer. Here, you can change colors, fonts, and more. It’s easy to see changes in real-time. You can try different looks without any risk.
Adjusting Theme Options
Each theme has unique options. Look for the Theme Options or Settings tab. You might find options for the header, footer, and layout. Adjust these to match your style. Save changes often to keep your work safe. Explore these settings to make your site special.
Credit: catchthemes.com
Importing Demo Content
Easily apply your purchased theme to WordPress by importing demo content. This process sets up your site with pre-designed layouts and features. Follow simple steps to give your website a professional look without complex configurations.
Locating Demo Content Files
First, find the demo content files. These are usually in a folder. The folder comes with the theme. Check the documentation. It guides you to these files. They may be labeled as XML files. Sometimes, they come as a zip file. Unzip it to see the files. These files help in setting up your theme.
Importing And Configuring Content
Use the WordPress Importer tool. Go to your WordPress dashboard. Find ‘Tools’ and click ‘Import’. Choose the XML file to upload. This file contains demo content. Follow the steps on the screen. You might need to assign authors. Check the content after import. You might need to tweak settings. Ensure everything looks right.
Troubleshooting Common Issues
Applying a purchased theme to WordPress can be straightforward. Upload the theme via the WordPress dashboard under Appearance > Themes. Activate it to see your new design. Ensure all necessary plugins are installed for full functionality.
Resolving Installation Errors
Sometimes themes don’t install correctly. Check your file format. It should be a .zip file. Ensure the file isn’t too large for your server. Try reinstalling the theme. This often fixes many issues. Contact the theme’s support if problems persist. They can offer specific solutions. Check your server settings too. Make sure they meet the theme requirements.
Addressing Compatibility Problems
Themes can sometimes clash with plugins. Check if any plugin is causing issues. Disable all plugins. Activate them one by one. This helps identify the problematic plugin. Look for theme updates. Updates often fix compatibility issues. Consider changing the theme if problems remain. Not all themes work well with every plugin. Sometimes, it’s best to choose a different theme.
Updating The Theme
Applying a purchased theme to WordPress transforms your site’s appearance effortlessly. First, navigate to your WordPress dashboard and find the “Appearance” section. Upload and activate your theme for a fresh, customized look.
Checking For Updates
Keep your theme fresh. Visit the theme provider’s website often. Look for any new updates. New updates fix bugs. They also add new features. Updating keeps your site secure.
Safely Updating The Theme
Backup your site first. This saves your current settings. Use a plugin for backups. After backing up, go to your WordPress dashboard. Click on “Themes.” Find your theme. Click “Update” if an update is available. Wait for the update to complete. Check your site after updating. Make sure everything works smoothly.
Frequently Asked Questions
How Do I Install A WordPress Theme?
To install a WordPress theme, go to your admin dashboard. Navigate to “Appearance” then “Themes”. Click “Add New” to upload your purchased theme. Select the theme file from your computer, and click “Install Now”. Once installed, activate the theme to apply it to your site.
Can I Customize A Purchased WordPress Theme?
Yes, you can customize a purchased WordPress theme. Use the WordPress Customizer by navigating to “Appearance” then “Customize”. Here, you can modify colors, fonts, and layout. Some themes also offer advanced customization options. Check your theme’s documentation for specific features and customization options.
What Should I Do If My Theme Doesn’t Work?
If your theme doesn’t work, first check compatibility with your WordPress version. Ensure all plugins are up-to-date. If issues persist, contact your theme provider for support. They often offer troubleshooting guidance. You can also check forums for similar issues or hire a developer for assistance.
How Can I Update My WordPress Theme?
To update your WordPress theme, go to “Appearance” then “Themes” in your dashboard. Find your theme and check for an “Update” button. Click it to update. Always backup your site before updating. Some themes may require manual updates; check your theme’s documentation for details.
Conclusion
Applying a purchased theme to WordPress is simple with these steps. First, ensure your theme files are ready. Upload them through the WordPress dashboard. Activate the theme to see changes. Customize settings to fit your website’s style. Test responsiveness across devices.
Ensure your content aligns with the new design. Regular updates keep your site secure and fresh. Explore theme documentation for detailed guidance. Enjoy the new look and feel of your WordPress site. Keep experimenting with settings for the best appearance.
Your theme is now ready to impress visitors.


