
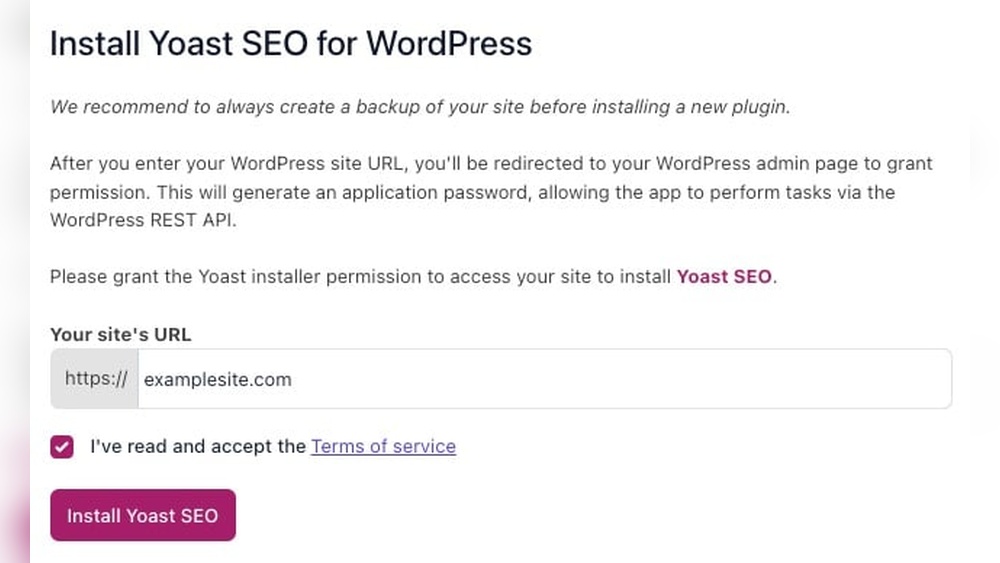
If you want your website to rank higher on Google, adding Yoast SEO to your WordPress site is a smart move. But how do you do it without getting lost in complicated steps?
This guide will walk you through the process in simple, clear steps you can follow right now. By the end, you’ll have the powerful Yoast SEO tool set up and ready to boost your site’s visibility. Ready to make your website work harder for you?
Let’s dive in!
Why Choose Yoast Seo
Choosing the right SEO tool is important for your WordPress site. Yoast SEO stands out because it is simple and powerful. It helps improve your website’s search rankings with clear guidance. Many site owners trust it for better online visibility.
Benefits For WordPress Sites
Yoast SEO fits perfectly with WordPress. It offers easy setup and works without slowing your site. The plugin guides you to write better content that ranks well on Google. It helps with meta tags, sitemaps, and social sharing. Users see better traffic and more visitors over time.
Key Features To Know
Yoast SEO checks your content for keywords and readability. It shows simple tips to improve your posts. The plugin creates XML sitemaps automatically. It also helps you manage titles and descriptions for pages. Breadcrumbs and social previews are included. The plugin updates regularly to stay current with search engines.
Preparing Your WordPress Site
Preparing your WordPress site before installing Yoast SEO is important. It helps avoid problems during installation. Taking a few steps ensures smooth setup and better performance.
Start by checking your WordPress version and plugins. Next, back up your entire site. These steps protect your data and keep your site safe.
Checking WordPress Compatibility
Make sure your WordPress version supports Yoast SEO. Yoast usually works with recent WordPress versions. Using an old version can cause errors or slow your site.
Update WordPress if needed. Also, check if your theme and plugins work well with Yoast. Some themes or plugins may conflict with SEO features. Testing helps avoid problems later.
Backing Up Your Site
Back up your whole WordPress site before installing new plugins. This includes your database and files. A backup keeps your site safe if something goes wrong.
You can use backup plugins or your hosting control panel. Save the backup in a secure place. Having a copy means you can restore your site anytime without loss.
Installing Yoast Seo Plugin
Installing the Yoast SEO plugin on your WordPress site is simple. This plugin helps improve your site’s SEO and makes it easier to manage your content’s search engine rankings. Follow these steps to get Yoast SEO up and running quickly.
Finding The Plugin In WordPress
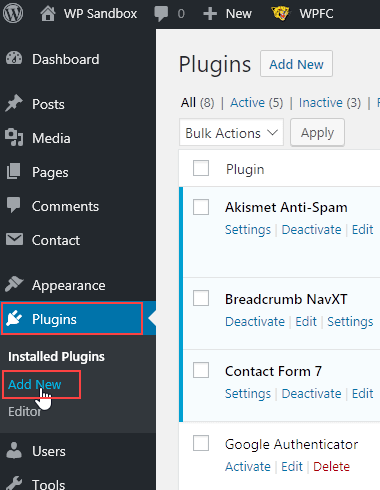
Log in to your WordPress dashboard. On the left sidebar, find the “Plugins” menu. Click on “Add New” to open the plugin search page.
Type “Yoast SEO” in the search bar at the top right. The plugin should appear as the first result. Look for the official Yoast SEO plugin by Team Yoast.
Step-by-step Installation Process
Click the “Install Now” button next to the Yoast SEO plugin. Wait a few moments while WordPress downloads and installs the plugin files.
After installation, click the “Activate” button. This will enable Yoast SEO on your website. You can now start using the plugin to improve your site’s SEO.
Check the new “SEO” menu in your dashboard sidebar. This confirms the plugin is ready for setup and configuration.
Credit: www.hostpapa.com
Configuring Basic Settings
Configuring the basic settings in Yoast SEO is the first step to improve your website’s search engine visibility. This setup helps search engines understand your site better. It also guides how your content appears in search results. Let’s explore how to set up these important options.
Setting Up Site Information
Start by entering your site’s name and description. This information appears in search results. It helps users recognize your website.
Next, choose the type of site you run. Options include blog, online store, or portfolio. This helps Yoast SEO tailor settings for your site.
You can also add your social media profiles here. This links your website to your social accounts. It improves brand presence across the web.
Choosing Your Seo Preferences
Select your website’s visibility settings. Decide if search engines can index your pages or posts. This controls what content shows in search results.
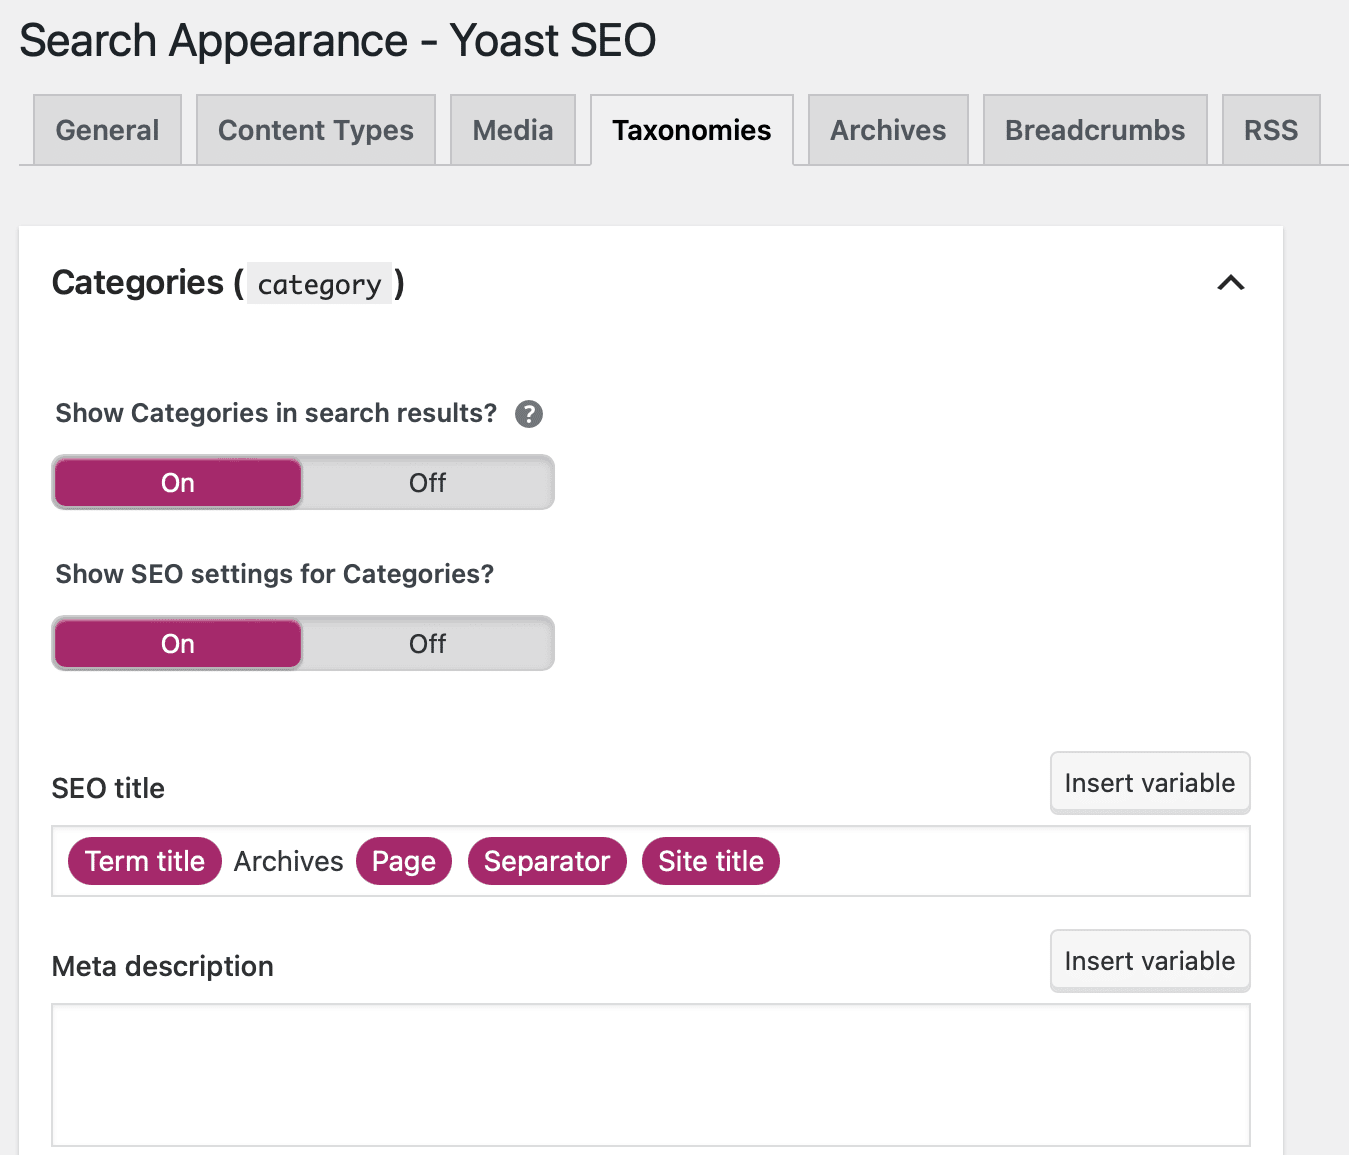
Set up your preferred title and meta description templates. These templates create consistent, clear search snippets. They guide search engines on how to display your pages.
Enable or disable advanced features like readability analysis. This tool helps improve content clarity for visitors. It suggests ways to make writing easier to read.
Using Yoast Seo For Content
Using Yoast SEO for content helps improve your website’s visibility. It guides you to write clear and focused posts. Yoast SEO checks your content and suggests changes.
This tool makes sure your pages and posts are easy to read. It also helps search engines understand your content better. Follow these tips to use Yoast SEO effectively.
Optimizing Posts And Pages
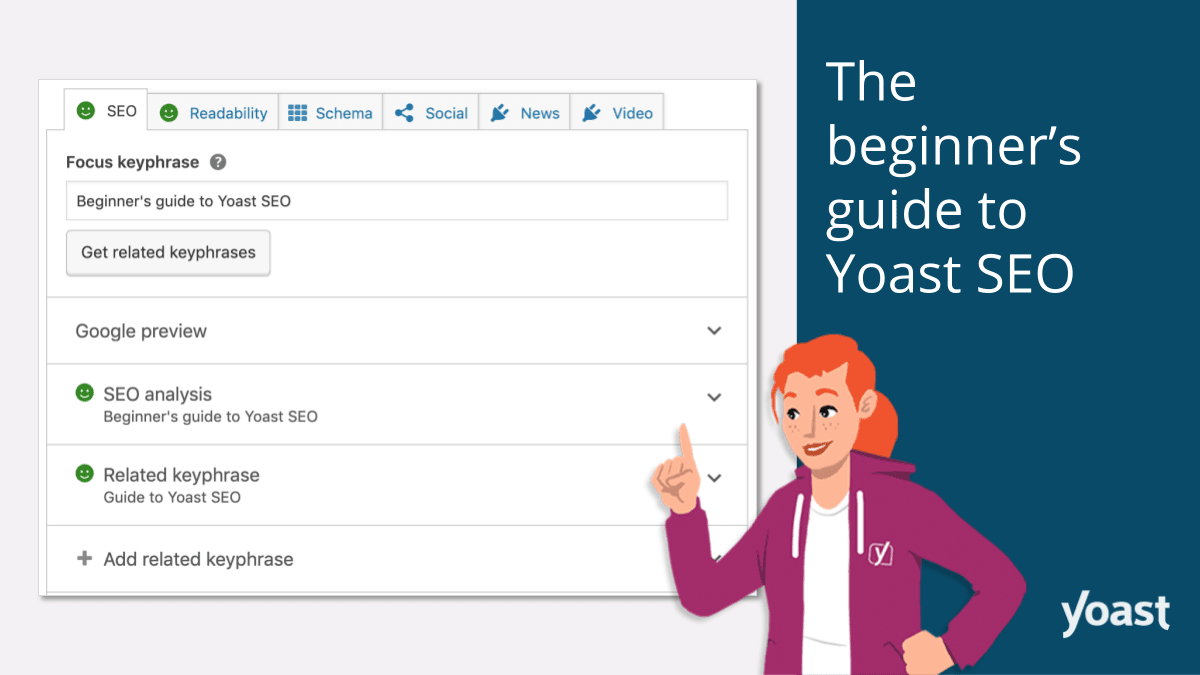
Start by opening the Yoast SEO box below your post or page editor. Enter a clear and catchy title. Make sure your title includes important words related to your topic.
Write a short and engaging meta description. This description shows in search results. Keep it under 160 characters and include your main keywords. Use Yoast’s readability analysis to keep sentences short and easy.
Add headings and subheadings to break the content into parts. Use simple words and avoid long paragraphs. Yoast SEO will give you a green light when your content is well optimized.
Using Focus Keywords Effectively
Choose one main focus keyword for each post or page. This keyword should match what people search for. Type it into the focus keyword box in Yoast SEO.
Use the focus keyword naturally in your title, first paragraph, and subheadings. Avoid overusing it, as this can hurt your ranking. Spread the keyword evenly throughout the content.
Yoast SEO checks keyword density and placement. Follow its advice to balance your use of keywords. This helps your content rank higher without sounding forced or spammy.
Credit: yoast.com
Advanced Features Setup
After installing Yoast SEO, setting up advanced features improves your website’s SEO power. These features help search engines find and show your content better. They also control how your site looks on social media.
Focus on two key areas: XML sitemaps and social media integration. Both are easy to set up and boost your site’s visibility.
Xml Sitemaps Configuration
XML sitemaps tell search engines about your website pages. Yoast SEO creates these sitemaps automatically. To check or change settings, go to the SEO menu, then click on “General” and select “Features.”
Make sure the “XML sitemaps” option is on. You can click the question mark icon and then the sitemap link to see your sitemap. It helps search engines find new and updated pages quickly.
You can exclude certain pages from the sitemap if needed. This stops search engines from indexing low-value pages. Use this to keep your sitemap clean and focused on important content.
Managing Social Media Integration
Yoast SEO allows you to connect your website to social media platforms. This controls how your pages look when shared on Facebook, Twitter, and others. Go to SEO, then “Social” to start.
Enter your social media profile links in the Accounts tab. This helps search engines verify your social presence. Next, configure the Facebook and Twitter tabs. Enable Open Graph and Twitter Cards for better sharing previews.
Add default images and titles for your posts. These appear if a post does not have its own social media image. This keeps your shared links attractive and consistent.
Troubleshooting Common Issues
Using Yoast SEO on WordPress usually works smoothly. Sometimes, small problems can stop it from working right. Knowing how to fix common issues helps keep your site optimized and running well.
Fixing Plugin Conflicts
Other plugins may clash with Yoast SEO. This can cause errors or stop features from working. To fix this, deactivate all plugins except Yoast SEO. Check if the problem goes away. Reactivate plugins one by one to find the conflict. Once found, decide to replace or update the conflicting plugin. Keeping plugins updated reduces chances of conflicts.
Resolving Seo Errors
Yoast SEO may show errors in your content or settings. These include missing focus keywords or no meta description. Review the error details inside the plugin. Edit your posts to add the needed SEO elements. Use simple words and clear phrases for better SEO. Save changes and check if the errors clear. Repeat for all flagged pages to improve SEO health.
Credit: kinsta.com
Maintaining Seo With Yoast
Maintaining SEO with Yoast keeps your website visible and ranks high. The plugin helps with optimization but requires regular care. Staying consistent ensures your content stays relevant and easy to find.
Regular Updates And Backups
Keep Yoast SEO updated to access new features and fixes. Updates improve plugin performance and security. Regular backups protect your SEO settings and website data. Backup before each update to avoid losing important information.
Tracking Seo Performance
Monitor your SEO results using Yoast’s built-in tools. Check focus keywords and readability scores for each post. Use Google Search Console to track website traffic and ranking. Adjust your content based on performance data to improve results continuously.
Frequently Asked Questions
How Do I Install Yoast Seo On WordPress?
To install Yoast SEO, go to your WordPress dashboard. Navigate to Plugins > Add New. Search for “Yoast SEO,” then click “Install Now” and “Activate. ” This plugin helps optimize your site’s SEO easily.
Can Yoast Seo Improve My WordPress Site Ranking?
Yes, Yoast SEO improves rankings by optimizing your content for search engines. It offers keyword analysis, readability checks, and meta tag management to boost visibility and attract more organic traffic.
Is Yoast Seo Free To Use On WordPress?
Yoast SEO offers a free version with essential SEO features. A premium version with advanced tools is available for purchase, providing additional support, internal linking suggestions, and multiple keyword optimization.
How Do I Configure Yoast Seo Settings Initially?
After activation, use the Yoast SEO wizard for setup. It guides you through site type, organization info, and SEO preferences. Proper configuration ensures your website is optimized for search engines from the start.
Conclusion
Adding Yoast SEO to WordPress helps improve your website’s visibility. It guides you to create better content for search engines. The plugin is easy to install and set up. You can optimize titles, descriptions, and keywords with simple steps. Regular use of Yoast SEO can boost your site’s traffic over time.
Keep updating your content and settings for best results. Start using Yoast SEO today to make your site more search-friendly. Small changes can lead to big improvements in your ranking.


