
Are you ready to build your website but not sure how to get WordPress set up on Hostinger? You’re in the right place.
Adding WordPress to Hostinger might sound tricky, but it’s actually simpler than you think. By the time you finish reading, you’ll have a clear, step-by-step guide that makes the process smooth and stress-free. Imagine having your website live and running, attracting visitors, and growing your online presence—all because you took the right steps today.
Let’s dive in and get your WordPress site up and running on Hostinger quickly and easily.
Choosing The Right Hostinger Plan
Choosing the right Hostinger plan is important for a smooth WordPress setup. The plan you select affects your website’s speed, storage, and support. Hostinger offers different plans to fit various needs and budgets. Understanding each option helps you pick the best one for your WordPress site.
Shared Hosting Options
Shared hosting is the most affordable way to start. Your website shares server space with other users. This keeps costs low and is perfect for small sites or blogs. Hostinger’s shared plans come with easy WordPress installation. You get enough resources to run a basic website smoothly. These plans include free SSL and a user-friendly control panel.
WordPress-specific Plans
Hostinger also offers plans made just for WordPress. These plans include tools tailored for WordPress users. The server is optimized for faster WordPress loading times. Automatic updates and backups keep your site secure. You also get better support for WordPress issues. These plans suit growing websites or online stores.
Comparing Features And Pricing
Hostinger’s shared plans cost less but have fewer features. WordPress-specific plans cost more but offer extra tools and speed. Storage, bandwidth, and email accounts vary by plan. Check the limits to match your website needs. Consider future growth when choosing your plan. Pick a plan that balances price and features well.
Registering A Domain Name
Registering a domain name is the first step to create your website on Hostinger. A domain name is your website’s address on the internet. It helps visitors find your site easily. Choosing the right domain name is important for your brand and online presence.
Selecting A Domain
Choose a domain name that is short and easy to remember. Use simple words related to your website’s topic. Avoid numbers and special characters. Check if the name is unique and not used by others. Think about your audience and what they will search for.
Domain Registration Process
Go to Hostinger’s domain search tool. Type your chosen domain name to see if it is available. If it is free, add it to your cart. Fill out your contact details for the registration. Complete the payment to secure your domain. You will receive a confirmation email with details.
Connecting Domain To Hostinger
After registration, link your domain to your Hostinger hosting account. Login to your Hostinger control panel. Find the domain management section. Change the domain’s nameservers to Hostinger’s nameservers. Save the changes and wait for them to update. This process can take a few hours. Once done, your domain points to your Hostinger website.
Setting Up Hostinger Account
Setting up a Hostinger account is the first step to creating your WordPress website. This process is simple and quick. It lets you access tools to manage your hosting and website easily.
Understanding how to create your account, navigate the control panel, and manage billing will save time. It also helps avoid confusion as you build your site.
Creating Your Account
Go to Hostinger’s homepage and click the “Sign Up” button. Enter your email and create a strong password. You can also sign up using Google or Facebook for faster access. Confirm your email by clicking the link sent to your inbox. Your account is ready in minutes.
Navigating The Control Panel
The control panel is where you manage your hosting services. It has a clean layout with clear icons. You can find options to set up WordPress, manage files, and check website statistics. Explore the dashboard to get familiar with all tools. This makes future tasks much easier.
Managing Billing And Support
Billing information is stored securely in your account settings. You can view invoices and update payment methods anytime. Hostinger offers support through live chat and a knowledge base. Use these resources to solve problems quickly. Keeping billing and support details handy keeps your website running smoothly.

Credit: www.youtube.com
Installing WordPress On Hostinger
Installing WordPress on Hostinger is simple and quick. Hostinger offers tools that make the process smooth. You can choose automatic or manual methods to set up WordPress. Both ways lead to a fully functional website ready to go live.
Using Auto-installer
Hostinger’s auto-installer saves time and effort. Log in to your Hostinger account. Go to the control panel and find the auto-installer tool. Select WordPress from the list of apps. Enter your website details like site name and admin username. Click the install button and wait a few moments. The system will set up WordPress for you. No technical knowledge needed.
Manual Installation Steps
Manual installation is helpful for advanced users. First, download the latest WordPress package from wordpress.org. Upload the files to your Hostinger server using the file manager or an FTP client. Create a new MySQL database in Hostinger’s control panel. Note down the database name, username, and password. Open your website URL to start the WordPress setup wizard. Enter the database details and site info as requested. Finish the setup to complete installation.
Configuring Basic Settings
After installation, log in to your WordPress dashboard. Navigate to Settings to adjust site title and tagline. Set your preferred timezone and language. Check the permalink structure under Permalinks settings. Choose a clean URL format for better SEO. Install essential plugins for security and speed. Configure reading settings to control homepage display. Save changes to apply new settings immediately.
Customizing Your WordPress Site
Customizing your WordPress site shapes how visitors see your brand. This step lets you control the look and functionality. A well-customized site helps keep visitors interested and makes navigation easy. Small changes can create a big impact on user experience.
Choosing Themes
The theme sets the overall design and style of your website. WordPress offers thousands of themes to choose from. Pick a theme that fits your site’s purpose and audience. Look for themes that are mobile-friendly and load fast. You can preview themes before activating them. Changing themes is simple and does not affect your content.
Installing Essential Plugins
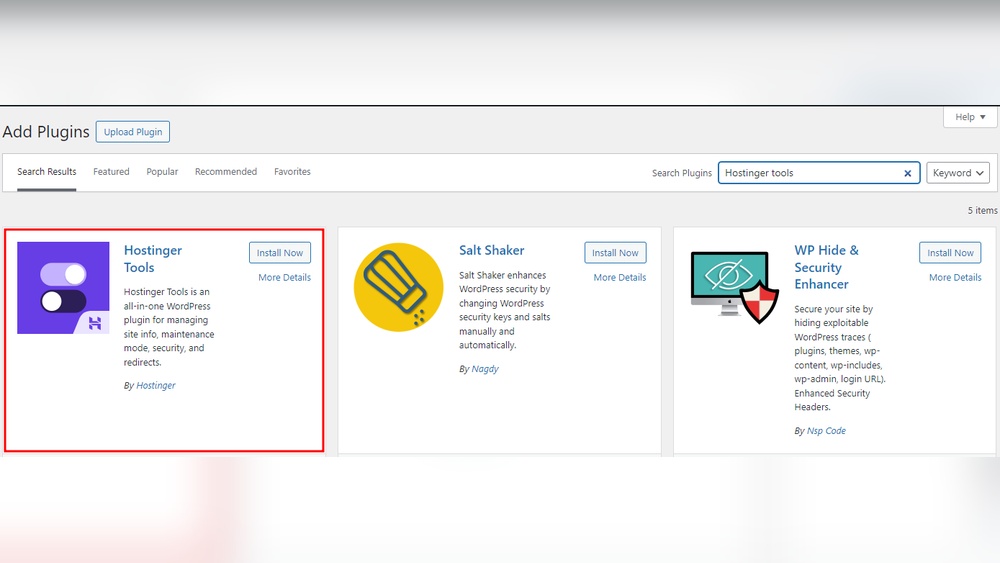
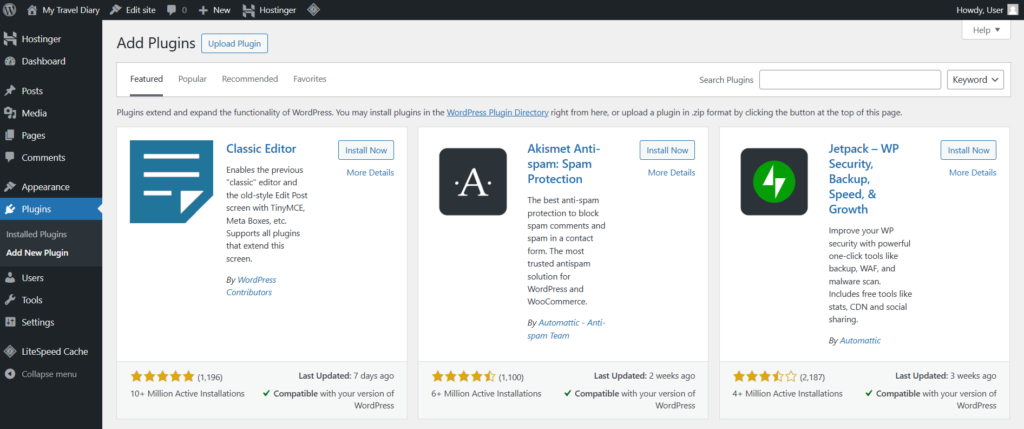
Plugins add extra features to your WordPress site. Some common plugins improve security, SEO, and site speed. Others help with contact forms and social media sharing. Install only the plugins you need to avoid slowing down your site. Always update plugins regularly for better performance and safety.
Setting Up Menus And Widgets
Menus guide visitors through your website. Create clear and simple menus with important pages. WordPress lets you drag and drop menu items easily. Widgets add useful tools in sidebars or footers. Common widgets include search bars, recent posts, and calendars. Organize widgets to enhance site navigation and user engagement.

Credit: zsquarestudio.com
Securing Your WordPress Website
Keeping your WordPress website safe is very important. A secure site protects your data and visitors. It also improves your site’s trust and ranking on search engines. Simple steps help you build strong security.
Enabling Ssl Certificate
SSL protects your website by encrypting data between the server and users. Hostinger offers free SSL certificates for all hosting plans. Activate SSL from your Hostinger control panel quickly. Once enabled, your site URL changes from “http” to “https”. This change shows visitors that your site is safe. Always use SSL to protect login information and user data.
Implementing Security Plugins
Security plugins add extra layers of protection. Plugins like Wordfence or Sucuri help block hackers and malware. They scan your site regularly to find threats. Set up firewalls and limit login attempts with these tools. Choose plugins that update often and have good reviews. Keep plugins active and configure their settings for best security.
Regular Backups And Updates
Backups save your website data in case of problems. Hostinger provides easy backup options in the control panel. Schedule backups to happen automatically every week. Updates fix security holes in WordPress core and plugins. Always update WordPress, themes, and plugins as soon as updates appear. This practice prevents hackers from exploiting old software.
Optimizing Performance On Hostinger
Optimizing your WordPress site on Hostinger improves speed and user experience. Fast websites keep visitors engaged and reduce bounce rates. Hostinger offers tools and settings to help your site perform better. Focus on key areas like caching, images, and content delivery networks.
Caching Techniques
Caching saves a copy of your website pages. This reduces server load and speeds up page loading. Use Hostinger’s built-in caching or plugins like W3 Total Cache. Clear cache regularly to avoid showing old content. Proper caching makes your site much faster for visitors.
Image Optimization
Large images slow down your website. Compress images before uploading to Hostinger. Use formats like JPEG or WebP for smaller file sizes. Resize images to fit the display area. Optimized images load quickly and improve site speed.
Using Content Delivery Networks
A Content Delivery Network (CDN) stores your site files on servers worldwide. This helps visitors load your site from a nearby server. Hostinger supports popular CDNs like Cloudflare. Using a CDN reduces loading time and improves site reliability.
Troubleshooting Common Issues
Setting up WordPress on Hostinger is usually smooth, but issues can arise. Troubleshooting helps solve these problems fast. Clear steps make fixing errors easier. This section guides you through common troubles. Follow simple tips to get back on track quickly.
Fixing Installation Errors
Installation errors often happen due to server limits or wrong settings. Check if your hosting plan meets WordPress requirements. Ensure PHP version and database details are correct. Clear your browser cache and retry the install. Use Hostinger’s auto-installer for a smoother process. If errors show up, note the message for precise fixes.
Resolving Login Problems
Login issues can block access to your WordPress dashboard. First, verify your username and password are correct. Reset the password using the “Lost your password?” link if needed. Clear cookies and cache from your browser. Disable plugins via FTP if login still fails. Check if your site URL matches your WordPress settings.
Contacting Hostinger Support
Hostinger support is ready to help with tricky issues. Use live chat for quick answers. Provide clear details like error messages and steps tried. Support can check server status and fix configuration errors. Keep your account info handy to speed up the process. Support is available 24/7 for your convenience.
Credit: www.hostinger.com
Frequently Asked Questions
How Do I Install WordPress On Hostinger?
To install WordPress on Hostinger, log in to your control panel. Use the Auto Installer tool, select WordPress, fill in site details, and click install. The process is quick and beginner-friendly.
Can I Use Hostinger’s WordPress Hosting Plan?
Yes, Hostinger offers optimized WordPress hosting with enhanced speed and security. It includes one-click WordPress installation and automatic updates, making it ideal for beginners and professionals.
How To Connect A Domain To WordPress On Hostinger?
In Hostinger’s control panel, go to the Domains section. Point your domain’s DNS to Hostinger’s servers. Then, link the domain to your WordPress site via the WordPress settings.
Is WordPress Free With Hostinger Hosting?
WordPress itself is free and open source. Hostinger provides affordable hosting plans to run your WordPress site smoothly. You only pay for hosting and domain registration, not WordPress software.
Conclusion
Adding WordPress to Hostinger is simple and quick. Just follow the steps carefully. Your website will be ready to use in no time. You can easily manage and update your site anytime. This method helps you build your online presence smoothly.
Start creating content that connects with your visitors now. Keep learning and improving your website regularly. Enjoy the process and watch your site grow steadily.


