
Are you worried that your WordPress site isn’t fully secure? Adding an SSL certificate is one of the easiest and smartest ways to protect your website and build trust with your visitors.
But if you’re not sure how to add SSL in WordPress, don’t worry—you’re in the right place. In this post, you’ll discover simple steps that anyone can follow to get that little green padlock showing up next to your site’s URL.
Keep reading, and you’ll learn how to boost your site’s security and improve your search rankings without any complicated tech skills. Your website—and your visitors—will thank you for it.
Credit: sectigostore.com
Why Ssl Matters
SSL is a key part of website security today. It protects data sent between your site and its visitors. Without SSL, sensitive information can be exposed to hackers. This makes SSL essential for every WordPress site.
Beyond security, SSL affects how your site performs and how visitors see it. It impacts search rankings and visitor trust. Understanding why SSL matters helps you make smart choices for your site.
Boosting Site Security
SSL encrypts the data transferred on your site. This stops hackers from stealing passwords, credit card numbers, or personal details. It creates a secure connection between the server and the user’s browser. Without SSL, data travels as plain text, easy to intercept.
WordPress sites with SSL are less likely to face attacks like man-in-the-middle or data breaches. This keeps your content and your visitors safe. Security builds a strong foundation for your website’s success.
Improving Seo Rankings
Google uses SSL as a ranking signal. Sites with SSL appear higher in search results. This means your WordPress site can get more visitors from search engines. Search engines prefer safe websites to protect their users.
SSL also helps your site load faster and reduces bounce rates. Visitors trust secure sites more, so they stay longer. These factors improve your SEO and site visibility.
Building Visitor Trust
Visitors notice the padlock icon in their browser’s address bar. It shows the site is secure with SSL. This small icon creates confidence and encourages users to engage more.
Without SSL, browsers warn visitors that the site is not secure. This scares people away and lowers your site’s credibility. Adding SSL helps build trust and keeps visitors coming back.
Types Of Ssl Certificates
SSL certificates protect your website by encrypting data. They build trust with visitors. Different types of SSL certificates offer various levels of security and validation. Understanding these types helps you choose the right one for your WordPress site.
Free Vs Paid Ssl
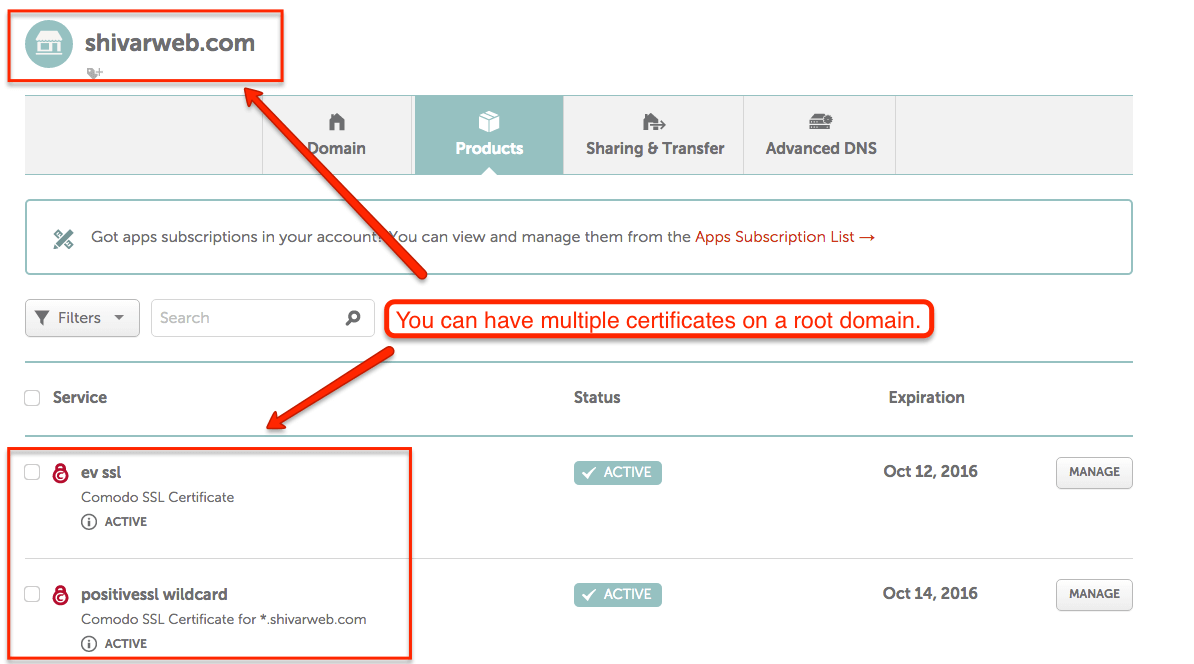
Free SSL certificates are available from providers like Let’s Encrypt. They offer basic encryption and are easy to install. Paid SSL certificates come with extra features. These include warranty, support, and stronger validation. Paid options may boost user confidence more.
Domain Validation
Domain Validation (DV) SSL verifies domain ownership only. It’s the quickest to get and usually free or low cost. DV SSL shows a padlock icon in the browser. It suits small blogs or personal websites well.
Organization Validation
Organization Validation (OV) SSL confirms the business identity. The certificate authority checks your organization details. It adds a higher trust level than DV certificates. OV SSL suits company websites and online stores.
Extended Validation
Extended Validation (EV) SSL offers the highest trust level. It requires a thorough background check of your business. EV SSL displays a green address bar in some browsers. It’s ideal for large businesses and sites handling sensitive data.
Getting An Ssl Certificate
Getting an SSL certificate is the first step to secure your WordPress website. It helps protect user data and builds trust. Without SSL, browsers may show warnings to visitors. This can affect your site’s reputation and traffic.
You can obtain an SSL certificate in several ways. Some options are free, while others require payment. Choose the method that best fits your needs and budget.
Using Let’s Encrypt
Let’s Encrypt offers free SSL certificates. It is a popular choice for many website owners. The certificates renew automatically every 90 days. Many hosting providers support Let’s Encrypt integration. It is a simple way to secure your site without extra cost.
Purchasing From Providers
You can buy SSL certificates from trusted providers. Paid certificates often come with extra features. These include higher warranty and extended validation. Purchase from well-known companies to ensure quality. The setup process may require manual steps.
Checking Hosting Options
Many web hosts include SSL certificates in their plans. Some offer free SSL through Let’s Encrypt or other services. Others sell premium SSL certificates as an add-on. Check your hosting dashboard to find SSL options. Activating SSL here is often straightforward and quick.
Installing Ssl On WordPress
Installing SSL on WordPress secures your website by encrypting data between the server and visitors. It protects sensitive information like passwords and credit card details. SSL also helps improve your search engine ranking and builds trust with your audience.
This process might seem technical, but it can be done with simple steps. Choose the method that fits your skills and hosting setup. Below are three common ways to install SSL on your WordPress site.
Accessing Hosting Control Panel
Start by logging into your hosting control panel. This is where you manage your website files and settings. Look for the SSL or Security section. Many hosts offer free SSL certificates here, such as Let’s Encrypt.
Once found, activate the free SSL certificate for your domain. The system will handle the installation. After activation, update your WordPress settings to use HTTPS URLs.
Installing Certificate Manually
Manual installation requires you to get an SSL certificate from a provider. Purchase or use a free certificate from a trusted source. Download the certificate files to your computer.
Access your hosting control panel’s SSL settings. Upload the certificate files as instructed. This often includes the certificate, private key, and CA bundle.
After uploading, enable SSL for your domain. Check if the certificate works by visiting your site with https://. Fix any mixed content errors in your WordPress content.
Using Ssl Plugins
SSL plugins simplify the process by handling technical steps. Install a popular plugin like Really Simple SSL from the WordPress plugin directory. Activate the plugin and follow its setup guide.
The plugin detects your SSL certificate and configures your site automatically. It updates URLs and redirects HTTP traffic to HTTPS. This method suits beginners and saves time.
Configuring WordPress For Ssl
Configuring WordPress for SSL ensures your website runs securely with HTTPS. This step is essential after installing your SSL certificate. It helps protect your visitors and improve your site’s trust. Follow these simple steps to set up SSL correctly in WordPress.
Updating Site Url
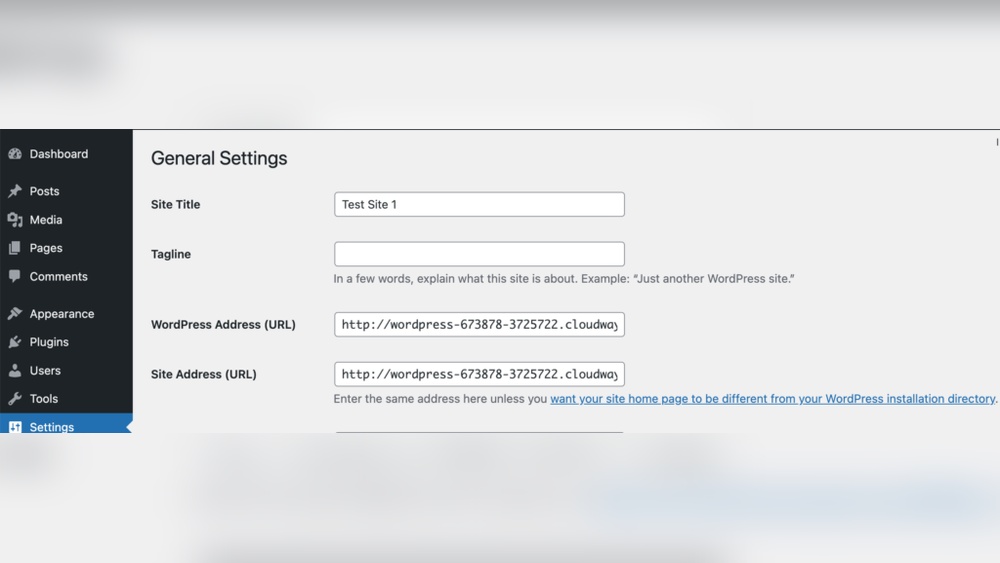
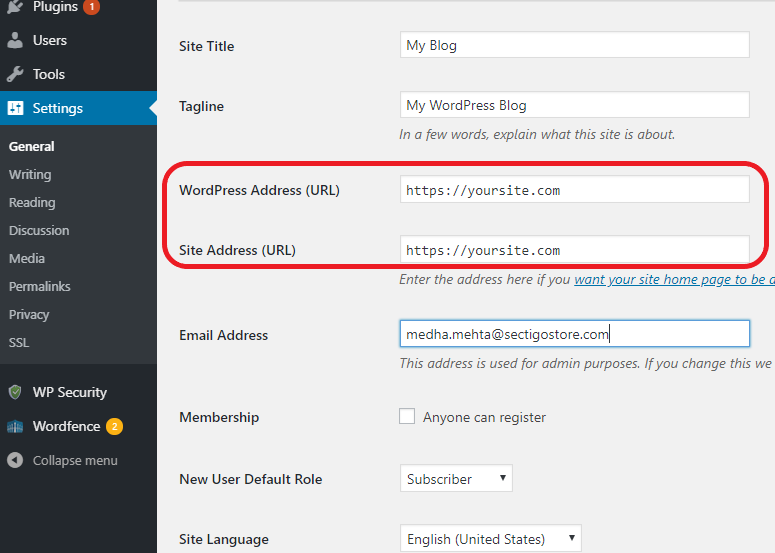
Start by changing your WordPress and site URLs to use HTTPS. Go to your WordPress dashboard, then navigate to Settings > General. Update both the “WordPress Address (URL)” and “Site Address (URL)” fields to start with https:// instead of http://. Save the changes. This update tells WordPress to use secure links for your site.
Forcing Https With .htaccess
Use the .htaccess file to force all visitors to use HTTPS. Access your site’s root folder via FTP or your hosting file manager. Add the following code at the top of your .htaccess file:
RewriteEngine On RewriteCond %{HTTPS} off RewriteRule ^(.)$ https://%{HTTP_HOST}%{REQUEST_URI} [L,R=301] This code redirects all traffic to the secure HTTPS version. It ensures visitors always connect safely.
Fixing Mixed Content Issues
Mixed content happens when some resources load over HTTP on an HTTPS site. This can cause security warnings in browsers. Check your site for any images, scripts, or stylesheets still using HTTP. Use a plugin like “Better Search Replace” to update URLs in your database. Replace http:// with https:// for all your content links. This step secures every part of your site and avoids warnings.
Credit: www.seedprod.com
Testing Your Ssl Setup
After installing SSL on your WordPress site, testing the setup is crucial. This step confirms the secure connection works properly. It also helps find and fix any issues before visitors see them. Testing ensures your website builds trust and keeps data safe.
Using Online Ssl Checkers
Online SSL checkers scan your website for SSL certificate details. These tools show if the certificate is valid and properly installed. They also report any issues like expiration or weak encryption. Use free tools like SSL Labs or Why No Padlock to test your site quickly.
Verifying Browser Padlock
Open your website in a browser to see the padlock icon near the address bar. A closed padlock means the SSL connection is active and secure. Clicking the padlock shows certificate details and site information. If the padlock is missing or open, the SSL setup needs fixing.
Troubleshooting Common Errors
Some errors can appear after adding SSL. Mixed content warnings happen when some site elements load over HTTP. Fix this by updating URLs to HTTPS in your content and settings. Expired or invalid certificates require renewing or reinstalling the SSL. Clear browser cache to see changes after fixes.
Maintaining Ssl Security
Maintaining SSL security is key to keep your WordPress site safe. SSL protects data between your site and visitors. It builds trust and improves search rankings. Regular care helps prevent security issues and errors. Here is how to keep your SSL working well.
Renewing Certificates
SSL certificates expire after some time. Renew them before they expire. Many hosts offer automatic renewal. Check your certificate’s expiry date often. A valid certificate keeps your site secure. Without renewal, browsers show warnings to visitors.
Keeping Plugins Updated
SSL often works with security plugins. Update these plugins regularly. Updates fix bugs and add new features. Old plugins can cause conflicts with SSL. Use trusted plugins from reliable sources. Updated plugins help maintain strong security.
Monitoring Site Security
Watch your site for security alerts. Use tools to scan for malware and vulnerabilities. Check your SSL status regularly. Fix issues quickly to avoid damage. Monitoring keeps your SSL protection effective and your site safe.
Credit: njkingpalace.com
Frequently Asked Questions
What Is Ssl And Why Is It Important For WordPress?
SSL encrypts data between a user and your website. It secures sensitive information and builds visitor trust. Using SSL also improves your WordPress site’s Google ranking and prevents security warnings in browsers.
How Do I Get An Ssl Certificate For WordPress?
You can get an SSL certificate from your hosting provider or use free options like Let’s Encrypt. Many hosts offer easy SSL installation directly from their control panel for WordPress users.
How To Install Ssl On A WordPress Site?
Install SSL via your hosting dashboard or manually upload the certificate files. Then, update your WordPress URL to HTTPS and use plugins like Really Simple SSL to handle redirects.
How To Fix Mixed Content Errors After Adding Ssl?
Mixed content errors occur when some resources load over HTTP. Use plugins or update URLs in your WordPress database to HTTPS. This ensures all content is securely delivered.
Conclusion
Adding SSL to your WordPress site protects your visitors and data. It builds trust and improves search rankings. The process is simple with the right steps. Choose a reliable SSL certificate and follow installation instructions carefully. Check your site for secure connection after setup.
Keep your SSL updated to avoid security risks. Secure websites create a better user experience. Start securing your WordPress site today for safer browsing.


