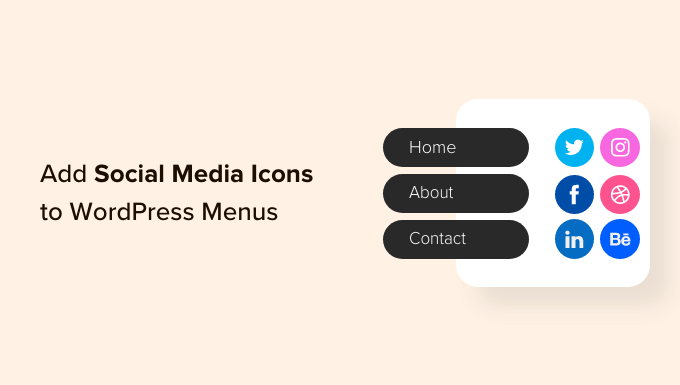
Want to make your WordPress site more connected and engaging? Adding social media icons to your menu is a simple way to do just that.
Imagine your visitors clicking directly to your Facebook, Instagram, or Twitter from your main navigation—boosting your reach without extra effort. In this guide, you’ll learn exactly how to add those icons step-by-step, even if you’re new to WordPress. Keep reading, and by the end, your website will not only look more professional but also help you grow your online presence effortlessly.
Credit: www.wpbeginner.com
Choose Social Media Icons
Choosing the right social media icons is an important step. Icons must match your website’s style and audience. They should look clear and be easy to click. Good icons make your menu look clean and professional.
Think about your website’s colors and theme. Icons that fit these will blend nicely. You want visitors to find your social profiles quickly. This helps increase your followers and engagement.
Select Icon Style
Icon style sets the tone for your site. You can choose between flat, outline, or filled icons. Flat icons are simple and modern. Outline icons look light and minimal. Filled icons are bold and eye-catching.
Pick a style that matches your brand personality. Use colors that match your site or your social media brand colors. Consistency keeps your site looking neat and trustworthy.
Pick Platforms To Include
Select only the social media platforms you use. Too many icons can confuse visitors. Focus on platforms where you are active and engage your audience.
Common choices are Facebook, Twitter, Instagram, and LinkedIn. Add YouTube or Pinterest if they fit your niche. Keep the list short and relevant. This helps visitors find you easily and follow your updates.
Prepare Icon Images
Preparing icon images is the first step to add social media icons to your WordPress menu. The icons must look clean and clear. Good icons help visitors recognize your social media links quickly. Icons should fit well with your website’s style. This means choosing the right size and color. Ready icons make the next steps easier.
Find Free Icon Sets
Many websites offer free social media icons. These icons come in different styles and formats. You can download sets that include all popular social media platforms. Choose icons that match your website’s design. PNG and SVG formats work best for websites. SVG icons are sharp and scale well on all screens. Use trusted sources to avoid copyright issues.
Customize Icon Size And Color
Icons should not be too big or too small. A good size fits nicely in your menu without crowding. Most menus work well with icons between 20 and 40 pixels. You can resize icons using simple image editors or online tools. Match icon colors with your site’s theme. Use your brand colors for a consistent look. Keep colors simple to maintain clear visibility.
Upload Icons To WordPress
Uploading social media icons to WordPress is the first step to customize your menu. These icons help visitors find your social profiles quickly. The process is simple and requires only a few steps. You need to upload the icon images to your WordPress site. After that, you can add them to your menu with ease.
Use Media Library
Start by opening your WordPress dashboard. Go to the Media section and click on Add New. Choose the icon files saved on your computer. Upload them one by one or all at once. After uploading, each icon will have its own URL. This URL is important for adding icons to your menu later.
Organize Icon Files
Keeping your icons organized makes managing your website easier. Create a folder on your computer for all social media icons. Name each file clearly, like “facebook-icon.png” or “twitter-icon.png”. Upload icons with consistent names to the Media Library. This helps you find them quickly when needed. Good organization saves time and prevents confusion.
Credit: www.8theme.com
Create Custom Links For Menu
Creating custom links for your WordPress menu lets you add social media icons easily. You can link directly to your social profiles. This method is simple and does not require extra plugins. It helps visitors find your social pages quickly. Custom links appear just like regular menu items.
Add Social Media Urls
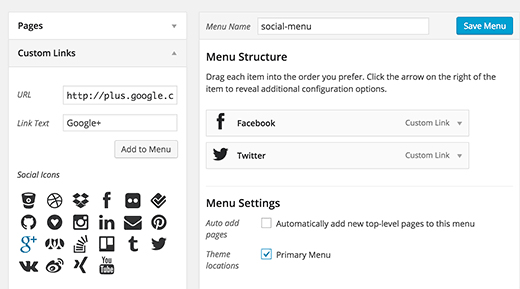
First, find the URLs of your social media pages. For example, your Facebook page might be facebook.com/yourname. Copy each URL carefully. Go to your WordPress dashboard and open the menu editor. Select “Custom Links” from the menu options. Paste the URL into the URL field. This step connects the menu item to your social media account.
Label Links Properly
Labels tell visitors what the link is. Use simple names like “Facebook,” “Twitter,” or “Instagram.” Keep labels short and clear. Avoid long or confusing text. The label will show next to the icon or as the menu text. Clear labels improve user experience and navigation. Check each label before saving the menu.
Add Icons To Menu Items
Adding icons to your WordPress menu makes navigation easier and more attractive. Icons help visitors recognize social media links quickly. This section explains how to add social media icons to your menu items simply and clearly.
Enable Menu Icon Plugin
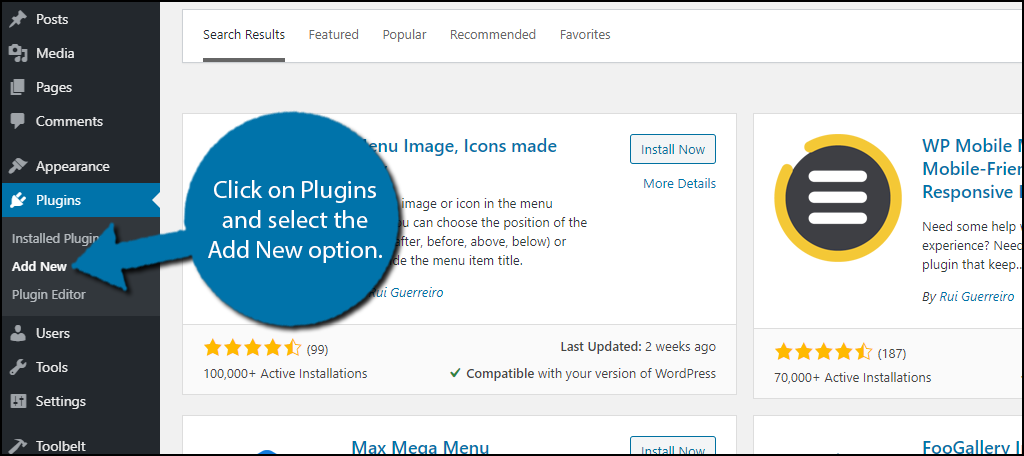
First, install a menu icon plugin from the WordPress plugin library. Popular choices include “Menu Icons by ThemeIsle.” Activate the plugin after installation. This plugin lets you add icons next to menu items without coding.
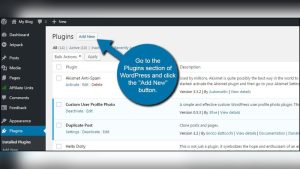
Go to your WordPress dashboard, then to Plugins > Add New. Search for the menu icon plugin and click “Install Now.” After activation, the plugin adds an icon option in the menu settings.
Assign Icons To Menu Links
Next, open Appearance > Menus in your dashboard. Choose the menu where you want to add social media icons. Click on a menu item to expand its settings.
Look for the “Icon” or “Menu Icon” option. Click it and select the social media icon you want, such as Facebook or Twitter. Save the menu after adding icons to each social media link.
Refresh your website to see the icons next to your menu items. Icons improve user experience by making social links clear and easy to find.
Style Icons With Css
Styling social media icons with CSS makes your WordPress menu look clean and professional. Simple CSS changes can improve icon size, spacing, and interactions. This helps visitors notice and use your social links easily. Below are easy steps to style your icons using CSS.
Adjust Icon Size And Spacing
Control icon size by changing the width and height in CSS. Use consistent sizes for all icons to keep the menu balanced. Adjust the margin or padding to add space between icons. This prevents icons from looking crowded or too far apart.
.menu-social-icons a { width: 30px; / Set icon width / height: 30px; / Set icon height / margin-right: 15px; / Space between icons / display: inline-block; } Add Hover Effects
Hover effects make icons interactive and engaging. Change color or add a small scale effect on hover. This signals to users that icons are clickable. Keep hover effects simple and smooth for a better user experience.
.menu-social-icons a:hover { color: 0073e6; / Change icon color / transform: scale(1.1); / Slightly enlarge icon / transition: all 0.3s ease; / Smooth effect / } Test Icon Functionality
Testing icon functionality is key after adding social media icons to your WordPress menu. It ensures each icon links correctly. This step avoids broken links or user confusion. Testing also guarantees a smooth experience across devices.
Check Links On Different Devices
Open your website on a desktop, tablet, and smartphone. Click each social media icon to verify the link works. Make sure icons lead to the right social media pages. Check that icons load quickly and look clear on all screen sizes.
Fix Common Issues
If an icon does not work, check the URL you entered. Correct any typos or missing parts in the link. Ensure you used the proper icon size for your menu. Clear your browser cache to see recent changes. Use a plugin or theme update if icons still do not show properly.
Credit: www.greengeeks.com
Frequently Asked Questions
How Do I Add Social Media Icons To WordPress Menu?
To add social media icons to your WordPress menu, use a plugin or custom menu links with icon fonts. Plugins like “Menu Icons” simplify the process by allowing easy icon selection and placement directly in the menu editor.
Can I Customize Social Media Icons In WordPress Menus?
Yes, you can customize icons by changing their size, color, and style. Many plugins offer built-in customization options or you can add custom CSS to match your website’s design and branding.
Are Social Media Icons Mobile-friendly In WordPress Menus?
Most WordPress social media icon plugins are mobile responsive. They adjust icon size and alignment automatically, ensuring icons look great and remain clickable on any device, enhancing user experience.
Do I Need Coding Skills To Add Social Media Icons?
No coding skills are required if you use WordPress plugins. They offer user-friendly interfaces to add and customize icons easily. For advanced customization, basic CSS knowledge can be helpful.
Conclusion
Adding social media icons to your WordPress menu is simple and effective. It helps visitors find your profiles quickly. Choose the right icons that match your site’s style. Use plugins or custom links to add them easily. Test your menu on different devices to ensure it looks good.
Keep your social media links updated for best results. Small changes can boost your site’s interaction and reach. Now you can connect better with your audience through your menu.