
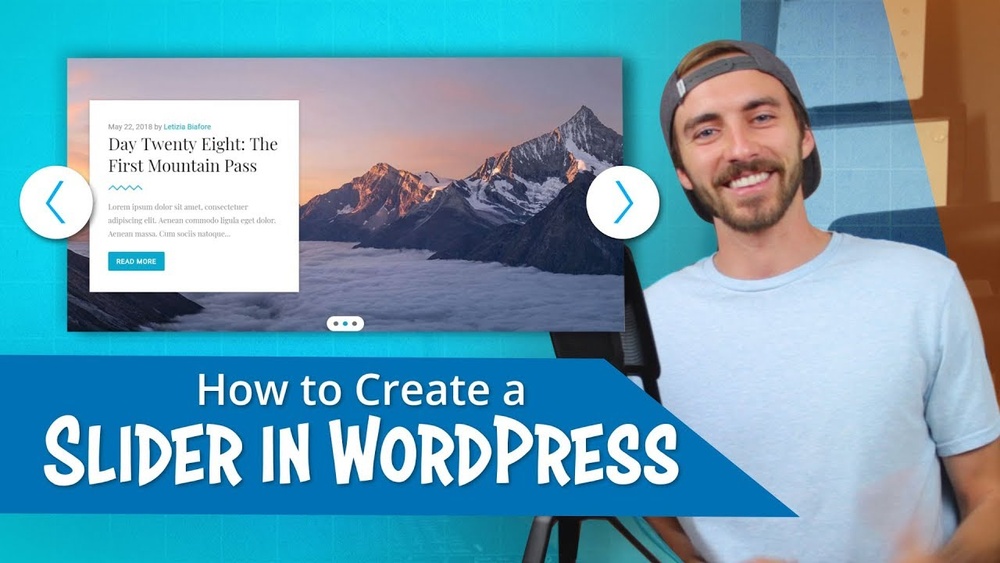
Want to make your WordPress site more engaging and visually appealing? Adding a slideshow is one of the best ways to grab your visitors’ attention instantly.
Imagine your most important images or messages rotating smoothly, keeping your audience hooked and encouraging them to explore more. If you’ve ever wondered how to add a slideshow in WordPress without hassle, you’re in the right place. This guide will walk you through simple steps that anyone can follow, no matter your tech skill level.
Ready to transform your website and boost your visitor experience? Let’s dive in!
Credit: www.godaddy.com
Choosing The Right Slideshow Plugin
Choosing the right slideshow plugin is important for your WordPress site. It affects how your slideshow looks and works. The right plugin makes your site faster and easier to use. It also fits well with your theme and design. Take time to compare options carefully. This helps avoid future problems and saves effort.
Free Vs Premium Options
Free plugins are a good start. They offer basic features and simple slideshows. Great for small sites or beginners. Premium plugins have more tools and styles. They support more media types and effects. Also, premium plugins often include better support. Choose based on your site’s needs and budget.
Compatibility With WordPress Themes
Check if the plugin works well with your theme. Some plugins may not display slideshows correctly. Others can slow down your site. Test the plugin on a staging site first. Make sure it does not break your design. A compatible plugin keeps your site smooth and neat.
User Ratings And Reviews
Read what other users say about the plugin. Ratings show general satisfaction levels. Reviews provide real experiences and tips. Look for recent feedback to see current issues. Avoid plugins with many unresolved complaints. Good ratings and reviews mean reliable performance.
Preparing Images For Your Slideshow
Preparing images for your slideshow is a key step. Clear, well-sized pictures make your slideshow look professional. Proper preparation also helps your website load faster. It improves user experience and keeps visitors engaged.
Image Size And Resolution
Choose the right size for your slideshow images. Large images slow down your site. Small images may look blurry or pixelated. Aim for a width between 800 and 1200 pixels. Keep the resolution at 72 dpi for the web. This balance keeps images sharp without making files too big.
Optimizing For Fast Loading
Compress images to reduce file size without losing quality. Use tools like TinyPNG or ImageOptim. Smaller files load faster and save bandwidth. Avoid using heavy formats like BMP or TIFF. Stick to JPEG or PNG formats for best results.
Organizing Images In Folders
Create separate folders for your slideshow images. Name folders clearly, such as “slideshow” or “homepage_slider.” This helps you find images quickly. Well-organized folders simplify updates and maintenance. Keep your workspace tidy and efficient.
Installing And Activating The Plugin
Installing and activating a slideshow plugin is the first step to display beautiful image sliders on your WordPress site. This process is simple and does not need any coding skills. You can do it directly from your WordPress dashboard or by uploading a plugin file manually.
Searching In WordPress Plugin Directory
Open your WordPress dashboard and go to “Plugins” > “Add New.” Use the search bar to type “slideshow” or the plugin name. WordPress will show many slideshow plugins available for free. Check the reviews and ratings to pick a trusted one. Click “Install Now” next to your chosen plugin. Wait a few seconds while WordPress downloads and installs the plugin.
Manual Upload Method
If you downloaded a plugin from a third-party site, use the manual upload method. Go to “Plugins” > “Add New” and click the “Upload Plugin” button at the top. Choose the plugin’s ZIP file from your computer. Click “Install Now” and wait for WordPress to upload and install the plugin. This method helps when the plugin is not in the WordPress directory.
Activating And Initial Setup
After installation, click “Activate” to enable the plugin. Most slideshow plugins add a new menu or settings page in your dashboard. Follow the plugin’s setup wizard or instructions to create your first slideshow. Upload your images, choose styles, and save your slideshow. Your slider is ready to be added to posts or pages with a shortcode or block.

Credit: rankmath.com
Creating Your First Slideshow
Creating your first slideshow in WordPress is a simple task. It can make your website more lively and interesting. A slideshow shows multiple images in one place. Visitors can see your pictures one by one without clicking too much. This guide helps you build your slideshow step-by-step.
Adding Images To The Slideshow
Start by opening your WordPress dashboard. Go to the page or post where you want the slideshow. Click on the plus (+) icon to add a new block. Search for “Slideshow” or use a plugin that supports slideshows. Click to add it.
Next, upload your images or choose from the media library. Select all the pictures you want in your slideshow. You can add captions if needed. Keep the images related and clear for best results.
Customizing Slide Transitions
Slide transitions control how one image changes to the next. Choose a transition style like fade, slide, or zoom. Pick a style that matches your website’s look. Avoid too many flashy effects. It can distract visitors.
Set the transition speed. A slower speed gives visitors more time to see each image. A faster speed keeps the slideshow moving smoothly. Test different speeds to find the best option.
Setting Slide Duration And Order
Slide duration is how long each image shows on screen. Set a time that is not too fast or slow. Around 3 to 5 seconds works well for most slideshows. Visitors have enough time to view each image.
Arrange the images in the order you want them to appear. Drag and drop slides to reorder if your plugin allows it. Place your best images first to grab attention. Check the slideshow to make sure it flows nicely.
Embedding Slideshow Into Pages Or Posts
Embedding a slideshow into your WordPress pages or posts makes your content more dynamic. It helps grab visitors’ attention and showcase images beautifully. WordPress offers several easy ways to add slideshows without coding skills. Each method fits different needs and editing styles.
Using Shortcodes
Shortcodes are simple codes that add features like slideshows. Most slideshow plugins provide shortcodes after creating a slideshow. Copy the shortcode and paste it into the page or post editor where the slideshow should appear. This method works well with classic editors and is fast to use. Shortcodes keep your content clean and organized.
Integrating With Gutenberg Editor
The Gutenberg editor uses blocks to add content. Many slideshow plugins offer a custom slideshow block. Find the block by clicking the plus icon in the editor. Select the slideshow block and choose your slideshow from the list. This method shows a live preview inside the editor. It is user-friendly and perfect for beginners.
Adding To Widgets Or Sidebars
Slideshow widgets allow showing slideshows in sidebars or footers. Go to Appearance > Widgets in your dashboard. Drag the slideshow widget to the desired area. Select the slideshow you want to display and save. This approach works well for showing slideshows site-wide or on multiple pages. It adds visual interest outside main content areas.
Credit: enviragallery.com
Enhancing Slideshow Appearance
Enhancing the appearance of your slideshow makes it more attractive and user-friendly. A well-designed slideshow keeps visitors engaged and highlights your content effectively. Small changes can create a big impact on how your slideshow looks and works on your WordPress site.
Choosing Layout And Themes
Select a layout that fits your website style. Some slideshows show one image at a time, while others display multiple images side by side. Pick a theme that matches your site colors and fonts. This creates a smooth, professional look. Most WordPress slideshow plugins offer several layout and theme options. Test different styles to see what looks best.
Adding Captions And Descriptions
Captions add context to your images. They explain what the picture shows or share important details. Descriptions give more information and help visitors understand your message. Use short, clear sentences for captions. Keep descriptions simple and relevant. Captions and descriptions improve SEO by adding keywords. They also make your slideshow more informative and engaging.
Enabling Navigation Controls
Navigation controls help visitors move through slides easily. Common controls include arrows, dots, or thumbnails. Arrows let users go forward or backward. Dots show how many slides there are and which one is active. Thumbnails display small previews of each slide. Enable these controls to improve user experience. Visitors can browse slides at their own pace.
Optimizing Slideshow Performance
Optimizing slideshow performance is key for a fast and smooth website. Slow slideshows can hurt user experience and affect search rankings. Proper optimization helps images load quickly and keeps your site responsive. Focus on techniques that reduce load times and improve compatibility.
Lazy Loading Images
Lazy loading delays image loading until they are visible on screen. This reduces initial page load time. Your slideshow will load faster and use less bandwidth. Most WordPress slideshow plugins support lazy loading. Enable this feature to improve performance and save resources.
Caching Plugins Compatibility
Caching plugins store copies of your pages to speed up loading. Ensure your slideshow works well with popular caching plugins. Clear caches after adding or updating slides. Test your slideshow to avoid conflicts or display errors. Proper compatibility keeps your slideshow smooth and fast.
Mobile Responsiveness
Many visitors use phones to browse your site. Your slideshow must adapt to different screen sizes. Use responsive slideshow plugins that adjust images and controls. Check that text and buttons remain clear and easy to use on small screens. Mobile-friendly slideshows improve engagement and reduce bounce rates.
Troubleshooting Common Issues
Troubleshooting common issues can save time and frustration. Slideshow problems often block your site’s visual appeal. Knowing simple fixes helps keep your site smooth and attractive.
Many slideshow issues come from common sources. Identifying them quickly lets you fix your slideshow fast. Here are the main problems and easy ways to solve them.
Slideshow Not Displaying
Check if the slideshow plugin is active. Sometimes, a plugin update can disable it. Clear your browser cache to see recent changes. Also, verify that your theme supports slideshows. Incorrect shortcode usage may cause display issues. Use the exact shortcode given by the plugin. Disable other plugins temporarily to test for conflicts.
Image Quality Problems
Low-quality images hurt your slideshow’s look. Upload high-resolution images for better results. Avoid using images that are too small or stretched. Check if your site compresses images automatically. Disable compression if it lowers quality too much. Use plugins that support retina display for sharp pictures.
Plugin Conflicts
Conflicts between plugins often cause slideshow errors. Disable all other plugins except the slideshow plugin. If the slideshow works, enable plugins one by one. This helps find the plugin causing the problem. Keep all plugins updated to reduce conflicts. Choose slideshow plugins that are compatible with your WordPress version.
Alternative Methods For Slideshows
There are several ways to create slideshows in WordPress beyond plugins. These alternative methods offer flexibility and control over how your images display.
Some methods use built-in WordPress features. Others rely on popular page builders or custom code. Each option suits different skill levels and needs.
Using WordPress Built-in Gallery
WordPress has a basic gallery feature that can create simple slideshows. You can select multiple images and insert them into a post or page.
Choose the “Gallery” block in the editor. Then, upload or pick images from your media library. Set the gallery to display as a slideshow or carousel using block settings.
This method requires no extra tools. It is best for simple slideshows without advanced effects.
Third-party Page Builders
Page builders like Elementor, Beaver Builder, or Divi often include slideshow widgets. These tools let you drag and drop slideshow modules easily.
They offer more design options such as animation, navigation arrows, and auto-play. You can customize the look without coding skills.
Page builders work well for those who want creative control and smooth integration with their site design.
Custom Coding Options
For advanced users, custom code can create fully tailored slideshows. This involves writing HTML, CSS, and JavaScript or using libraries like Slick or Swiper.
Custom coding allows total control over slideshow behavior and style. You can add unique transitions and interactive features.
This approach requires coding knowledge but delivers the most flexible and unique slideshow experience.
Frequently Asked Questions
How Do I Add A Slideshow In WordPress?
To add a slideshow, install a slideshow plugin or use the built-in block editor. Upload images, configure settings, then embed the slideshow on your page or post.
Which WordPress Plugins Are Best For Slideshows?
Top slideshow plugins include MetaSlider, Smart Slider 3, and Soliloquy. These plugins offer easy setup, responsive design, and customization options.
Can I Create A Slideshow Without A Plugin?
Yes, use the WordPress block editor’s Gallery or Cover blocks to create basic slideshows. However, plugins provide advanced features and effects.
How To Optimize Slideshow Images For Faster Loading?
Compress images before uploading to reduce file size. Use JPEG for photos and PNG for graphics. Enable lazy loading for better performance.
Conclusion
Adding a slideshow to your WordPress site can enhance visitor engagement. Slideshows display images or content in a clean, organized way. Choose a plugin that fits your needs and install it easily. Customize settings to match your website’s style and goals.
Test the slideshow to ensure it works well on all devices. Keep your slides simple and clear for the best effect. Regular updates keep your slideshow running smoothly. This small addition can make your website more dynamic and attractive. Start creating slideshows today and improve your site’s look.


