
Imagine transforming your WordPress site from a basic design to a visually stunning masterpiece with just a few clicks. You’ve purchased a new theme, and you’re eager to see it live on your website.
But how do you add it seamlessly without any hiccups? This guide will walk you through every step of the process, ensuring a smooth transition to your new look. You’ll discover how easy it is to upload and activate your theme, optimizing it to fit your brand perfectly.
Don’t let technical barriers stand in your way; unlock the potential of your site and captivate your audience with an eye-catching design. Ready to elevate your WordPress site? Let’s dive in!

Credit: wptheming.com
Choosing The Right Theme
Picking the right theme is crucial. Ensure the theme is responsive. This means it looks good on all devices. Check for speed. A fast theme helps your site load quickly. Look for a theme that is easy to customize. You want to make changes without hassle. Think about SEO-friendly options. This will help your site rank better. Lastly, make sure it has good support. If you need help, they should be there.
Many places offer themes. Some popular ones are ThemeForest and TemplateMonster. They have many choices. Elegant Themes is another good option. It’s known for its Divi theme. StudioPress offers themes built on Genesis Framework. This is a strong choice. Mojo Marketplace also has a variety of themes. All these places are trusted and have quality themes.
Credit: www.bluehost.com
Downloading The Theme
Locating your theme files is the first step. After buying a theme, check your email. You should find a download link. Click it to start downloading. Save the file to your computer. It will help to find it later.
Theme files often come in a compressed format. Look for a .zip file. This format is common for themes. Inside the .zip, there are many files. These files make your theme work.
Check for other important files. Some themes have extra documents. These might be instructions or a license. Keep these files safe. They could be useful later. Always have a backup of your downloaded files.
File types and formats can vary. The main file is usually a .zip. Sometimes, there are .xml or .txt files. These may include demo data or setup guides. You might also see .jpg or .png files. These are usually images for the theme.
Preparing Your WordPress Site
Enhance your WordPress site by adding a purchased theme effortlessly. Access your WordPress dashboard, navigate to “Appearance,” then click “Themes. ” Upload your theme file and activate it to transform your site’s look instantly.
Backing Up Your Website
Keeping your website safe is important. Back up your site regularly. Use plugins like UpdraftPlus for easy backups. Save files on cloud storage. This protects your site from loss. If something goes wrong, you can restore it quickly.
Updating WordPress
Ensure your WordPress is up-to-date. Update your plugins and themes. This keeps your site secure. Check for updates in the dashboard. Install them promptly. New updates fix bugs and improve features. Keeping your site updated helps it run smoothly.

Credit: www.youtube.com
Uploading The Theme
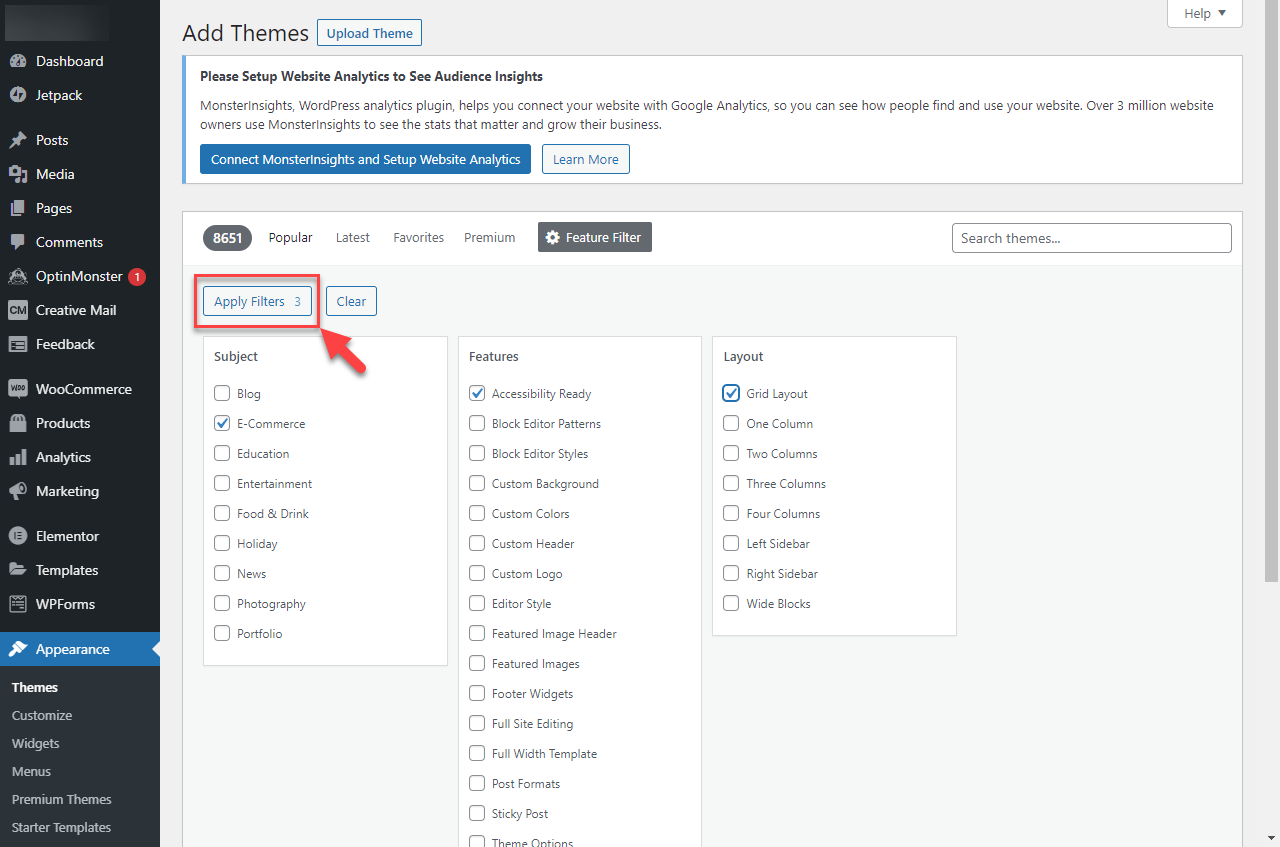
First, login to your WordPress account. Find the Appearance option in the menu. Click on Themes. Choose Add New to start. Select Upload Theme and find your theme file. Press Install Now. Wait for it to install. Click Activate to make it live. Simple steps. Easy process.
Connect to your site with FTP software. Go to the wp-content folder. Find themes inside it. Upload your theme folder here. Wait for the upload to finish. Return to the WordPress dashboard. Visit Appearance and then Themes. Your theme will show up. Click Activate to use it. Step-by-step method. No rush.
Activating The Theme
Adding a purchased theme to WordPress enhances your site’s look effortlessly. Navigate to the Appearance menu, click Themes, and upload your theme file. Activate it to instantly refresh your website’s design.
Theme Activation Steps
Start by logging into your WordPress dashboard. Find the Appearance tab on the left side. Click on it. Choose Themes from the dropdown. You will see a list of available themes. Click on Add New at the top.
Upload your purchased theme by clicking on the Upload Theme button. Select the theme file from your computer. Hit Install Now. Once installed, click Activate to enable your new theme.
Checking For Errors
Check the website for errors. Open your site in a browser. Check each page. Make sure everything looks right. Look for missing images and broken links. If you find errors, revisit the theme settings. Adjust as needed.
Customizing Your Theme
The WordPress Customizer is a fun tool. It helps you make your site special. You can change colors and fonts. Add your own images too. See changes live as you make them. This makes it easy to try new looks. Save your work often to keep your changes. This way, your site stays just how you like it.
Some themes need extra tools. These are called plugins. Plugins help your theme work better. Install them from your dashboard. Go to the plugins section. Click “Add New”. Find the plugin you need. Then click “Install Now”. After installing, click “Activate”. This makes the plugin start working. Always check for plugin updates. Updated plugins keep your site safe and smooth.
Troubleshooting Common Issues
Installing a purchased theme on WordPress often faces common issues. Upload the theme via the dashboard or FTP. Ensure the theme file is in. zip format for smooth installation.
Dealing With Upload Errors
Sometimes, you may see errors while uploading a theme. First, check the theme file size. If it’s too big, it won’t upload. Go to your hosting settings. Increase the upload limit. Also, ensure the file is in .zip format. Other formats won’t work. Make sure your internet is stable. Slow internet can cause upload errors.
Fixing Compatibility Problems
Compatibility issues can cause the theme to break. Check your WordPress version. It should match the theme’s requirements. Update WordPress if needed. Also, check your plugins. Some plugins may not work with your theme. Disable them one by one. See if the problem goes away. This helps find the troublesome plugin. Contact theme support if issues persist. They can offer solutions.
Maintaining Your Theme
Keeping your theme updated is very important. Updates fix bugs and add new features. They make your website run better. Check for updates often. Many themes send alerts for updates. Always update to the latest version. This keeps your theme in top shape. It also helps your site stay secure.
Protect your site by using the latest theme. Older themes can have security holes. Hackers might break into your site through these holes. Update your theme to block these threats. Use a strong password for your site. Always back up your website. This keeps your data safe. You can restore it if needed.
Frequently Asked Questions
How To Install A Purchased Theme On WordPress?
To install a purchased WordPress theme, go to the dashboard. Click “Appearance,” then “Themes,” and select “Add New. ” Choose “Upload Theme” and upload the theme file. Click “Install Now” and activate it afterward. Ensure the theme’s compatibility with your WordPress version for optimal performance.
How Do I Add My Own Theme To WordPress?
To add your own theme to WordPress, go to your dashboard, select “Appearance,” then “Themes,” and click “Add New. ” Upload your theme file, then click “Install Now. ” Finally, activate your theme to apply it to your site.
How Do I Activate A New Theme In WordPress?
Go to your WordPress dashboard, click “Appearance,” then “Themes. ” Choose your desired theme and click “Activate. ” Your new theme will be live instantly. Make sure to customize it to match your site’s branding and style.
How Do I Apply A Downloaded Theme?
To apply a downloaded theme, first extract the files. Then, upload them via your site’s theme management section. Activate the theme from your dashboard. Ensure compatibility with your site’s version and customize settings as needed. Check the theme’s documentation for detailed instructions.
Conclusion
Adding a purchased theme to WordPress enhances your site’s look. It is a straightforward process. First, download your theme file. Then, navigate to your WordPress dashboard. Select “Appearance” and click “Themes. ” Choose “Add New” and upload the theme file.
Activate the theme once uploaded. Customize it to fit your needs. Check your site’s appearance after changes. Ensure everything looks good. Regularly update themes for security. Keep exploring theme options. Each theme offers unique features. Enjoy your new design. It’s your site’s new look.
Make it appealing to visitors. Happy blogging!


