
Your online presence matters, and nothing makes your WordPress site feel more personal than adding a profile picture. But if you’ve ever wondered how to do this quickly and without hassle, you’re in the right place.
You’ll discover simple steps to upload and customize your profile picture in WordPress. By the end, you’ll have a more engaging and trustworthy site that connects with your visitors instantly. Ready to make your site truly yours? Let’s get started!

Credit: wpuserregistration.com
Choosing The Right Profile Picture
Choosing the right profile picture is important for your WordPress site. It shows who you are and builds trust with visitors. A clear and suitable image makes your site look professional and welcoming. It helps visitors connect with you or your brand at a glance.
Image Size And Format
Pick an image that fits well in the profile picture space. A common size is 200×200 pixels. Too small can look blurry. Too large can slow your site.
Use JPEG or PNG formats. JPEG works well for photos with many colors. PNG keeps sharp edges and transparent backgrounds. Avoid GIFs or BMPs for profile pictures.
Tips For A Professional Look
Choose a photo with good lighting. Natural light works best. Avoid dark or blurry images.
Wear simple, clean clothes. A plain background helps the face stand out. Smile or keep a neutral, friendly expression.
Crop the image so your face is centered. Avoid distractions in the background or too much empty space.
Adding A Profile Picture Via Gravatar
Adding a profile picture in WordPress is easy with Gravatar. Gravatar is a service that links your email to a profile image. This image appears automatically on WordPress sites and other platforms that support Gravatar.
This method saves time. You do not have to upload a picture every time you comment or write a post. Your profile picture stays consistent across websites.
Creating A Gravatar Account
Start by visiting the Gravatar website. Use the same email address you use for WordPress. Click on the sign-up button. Enter your email, create a password, and fill in your details.
Next, you will get a confirmation email. Open it and verify your account. After verification, log in to your Gravatar account. You can now upload your profile picture.
Linking Gravatar To WordPress
Your WordPress profile automatically connects to Gravatar using your email. Make sure your WordPress email matches your Gravatar email. Go to your WordPress dashboard and check your email in the profile settings.
Once the emails match, WordPress will show your Gravatar image as your profile picture. This works for posts, comments, and author bios. No need to upload pictures again.
Uploading Profile Picture From WordPress Dashboard
Uploading a profile picture from the WordPress dashboard is a simple process. It helps personalize your account and shows your identity on your site. This feature allows users to upload and display their image quickly.
Follow the steps below to upload your profile picture directly from the WordPress dashboard without extra plugins or tools.
Accessing Your User Profile
Log into your WordPress dashboard with your username and password.
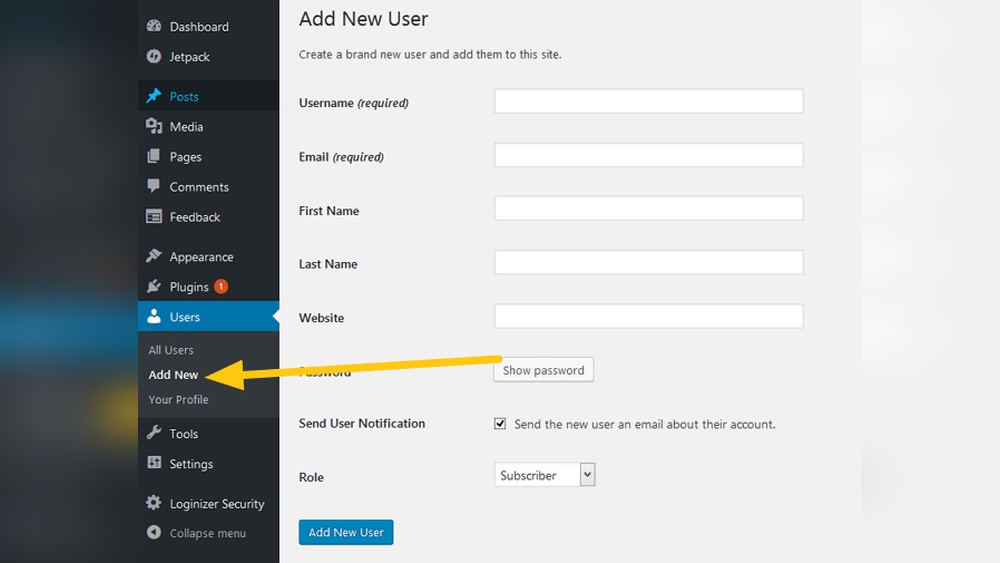
On the left menu, find and click on “Users.”
Select “Profile” or “Your Profile” from the submenu.
This page shows your personal details and settings for your account.
Uploading And Saving The Image
Scroll down to find the profile picture section. Some themes or plugins may add this option.
Click the “Upload” button to choose an image from your computer.
Select a clear, square photo for the best display.
After choosing, click “Save Profile” at the bottom of the page.
Your new profile picture will now appear on your user account and site comments.

Credit: profilegrid.co
Setting Profile Picture For Authors
Setting a profile picture for authors helps personalize your WordPress site. It builds trust and shows who is behind the content. Author images make posts more engaging and professional.
This section explains how to set profile pictures for authors easily. You will learn two main methods: using plugins and customizing author profiles.
Using Plugins For Author Images
Plugins offer a simple way to add author pictures. They work without coding knowledge. Popular plugins like “Simple Local Avatars” let authors upload pictures directly. After installation, go to the user profile page. Upload the desired image and save changes. The plugin will display the image next to the author’s name.
Plugins also support multiple authors. They keep pictures consistent across the site. This method saves time and avoids complex settings.
Customizing Author Profiles
WordPress allows profile customization without plugins. Authors can use Gravatar, a free service linked to their email. Upload a picture to Gravatar, and WordPress will show it automatically. This method requires the author to have a Gravatar account.
Customizing profiles can include adding biographies and social links. This improves author visibility and site credibility. It also helps readers connect with the writer.
Troubleshooting Common Issues
Adding a profile picture in WordPress is usually easy. Still, some issues can stop your picture from showing up or looking right. This section helps you fix common problems fast. Clear steps and simple tips make your profile picture work well on your site.
Profile Picture Not Showing
Check if your profile picture is uploaded correctly. Sometimes, WordPress caches old images. Clear your browser cache and refresh the page. Also, confirm that your theme supports profile pictures. Some themes need extra setup or plugins.
Look at your user settings in WordPress. Make sure the picture is linked to your profile email. Gravatar is the default system for profile pictures. If you do not have a Gravatar image, WordPress will not show one.
Image Quality Problems
Low-quality pictures look bad and unprofessional. Use clear, high-resolution images for your profile. WordPress resizes images, so start with a bigger file. JPEG or PNG formats work best for sharp images.
Avoid very small pictures. They become blurry when stretched. Crop your image to square shape before uploading. This helps keep your profile picture neat on all devices.
Best Practices For Profile Pictures
Choosing the right profile picture is important for your WordPress site. It shows who you are and builds trust with visitors. A good profile picture looks professional and clear. It helps your audience recognize you easily. Follow simple rules to make sure your picture fits well on your site.
Maintaining Consistency Across Platforms
Use the same profile picture on all your online accounts. This keeps your image strong and easy to identify. Visitors will connect your WordPress site with your social media profiles. Choose a photo that looks good in different sizes. A clear and simple picture works best on small screens. Consistency makes your brand look reliable and professional.
Updating Your Picture Regularly
Change your profile picture every few months. This keeps your site fresh and shows you are active. Use a recent photo that looks like you now. Avoid old pictures that can confuse your visitors. Updating your picture helps keep a good connection with your audience. It shows you care about your site and your image.

Credit: rankmath.com
Frequently Asked Questions
How Do I Add A Profile Picture In WordPress?
To add a profile picture, log in to your WordPress dashboard. Go to Users > Your Profile. Scroll to the Profile Picture section and upload your image. Save changes to update your profile picture instantly.
Can I Use Gravatar For WordPress Profile Pictures?
Yes, WordPress uses Gravatar by default. Create a Gravatar account with your email. Upload your profile picture there. It will automatically appear on your WordPress profile and comments.
What Image Size Is Best For WordPress Profile Pictures?
The ideal size for WordPress profile pictures is 250×250 pixels. This size ensures clear, sharp images without slowing your site. Larger images may be resized automatically but can affect load times.
How To Change My WordPress Profile Picture Later?
To change your profile picture, return to Users > Your Profile. Upload a new image in the Profile Picture section. Save changes to update your picture across your site immediately.
Conclusion
Adding a profile picture in WordPress helps personalize your site. It makes your page look professional and friendly. The steps are simple and quick to follow. You can update your picture anytime you want. A clear image helps visitors recognize you easily.
Keep your profile picture appropriate and relevant. This small change improves your website’s appeal. Try it today and see the difference yourself.


